-
IOT: Arduino weather station, using the Arduino MKR 1010
The new Arduino MKR 1010 was released this year and supports wireless connection. It is similar to the M0 Pro, in that it also uses a SAMD21 32bit processor. It is much smaller but has the same amount of I/O pins available as the M0 Pro.
I had to try it out!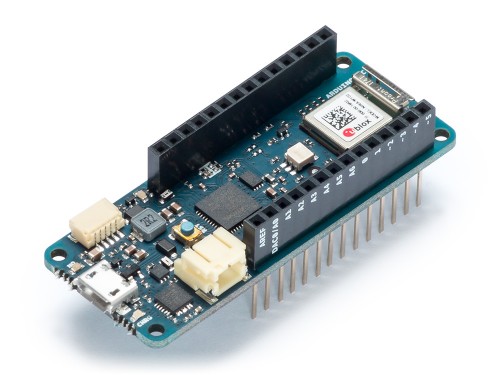
The previous setup was using an Ethernet shield that connected the controller by cable with the router.
I moved everything to an experimental board and switched out the Ethernet class and replaced it with the new Wifi class, along with a few other changes to get it working.
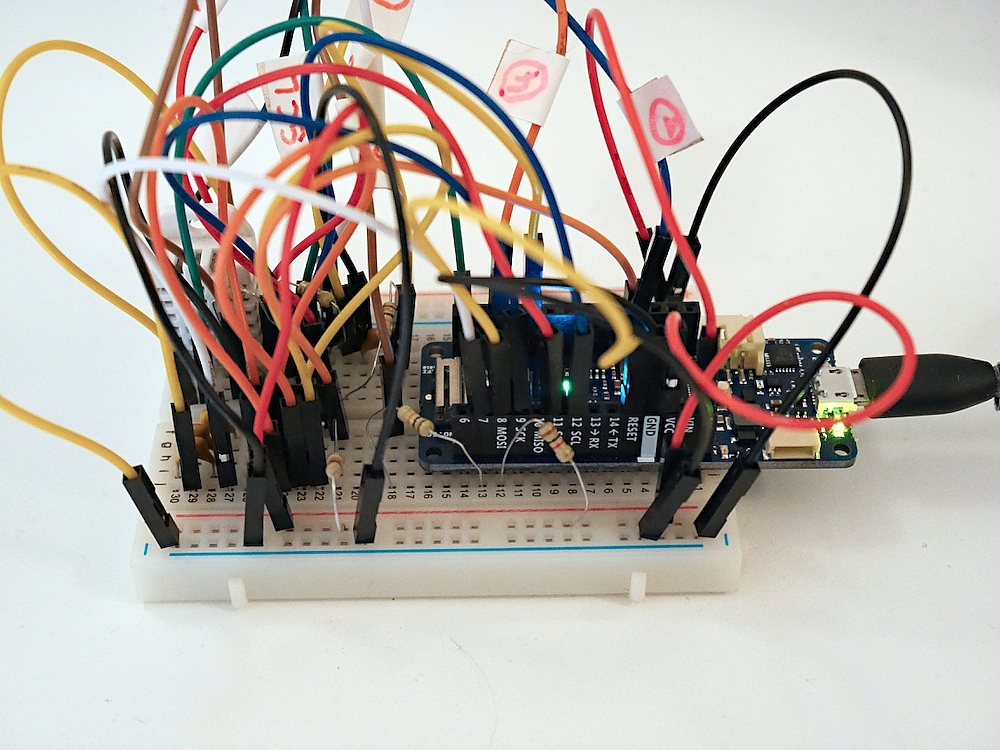
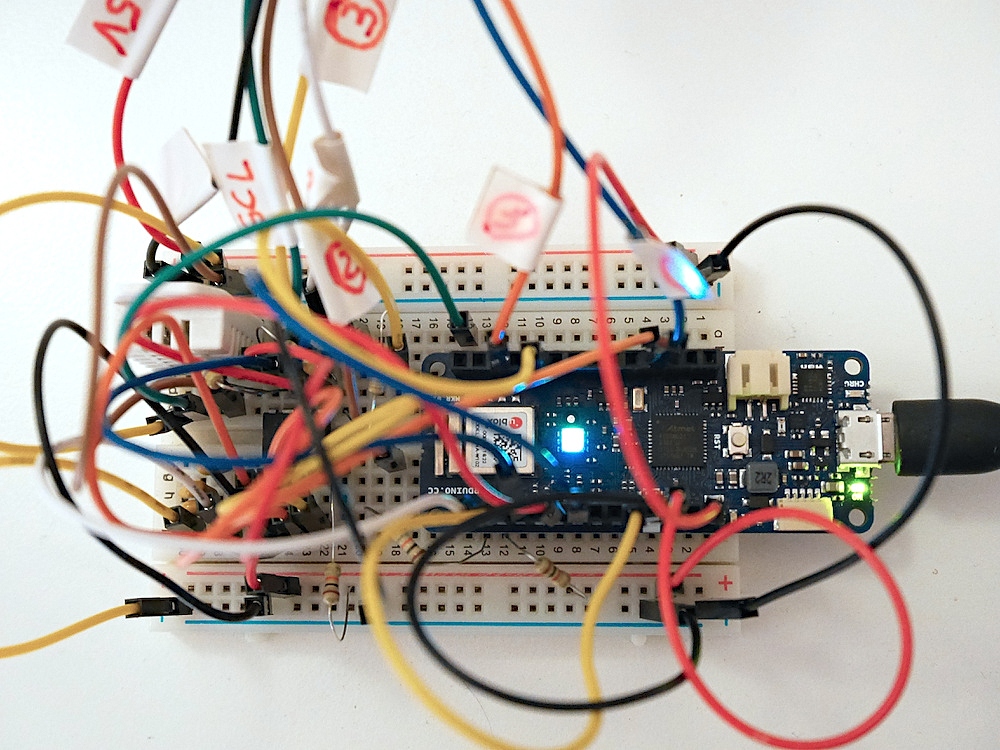
The bright spot in the middle of the board is actually a RGB LED of the wireless controller! I use each of the three colors to indicate HTTP requests, update of time and wind data and update of the air pressure, humidity and temperature.
Out of a brightness range from 1..255, 7 seems a good value to match the internal yellow LED.
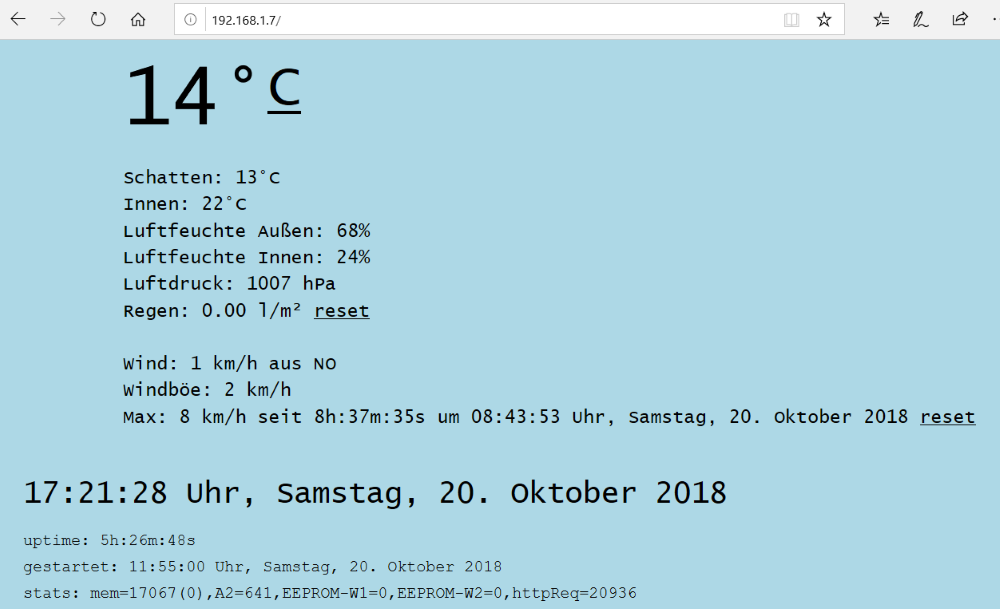
It is also possible to use a digitalWrite on the LED port to switch it on or off. This is the same as using analogWrite with 255. This is very bright.const int GREEN_LED = 25; const int RED_LED = 26; const int BLUE_LED = 27; const int LED_Brightness = 7; // Configure the LED port of the wireless controller. WiFiDrv::pinMode(GREEN_LED, OUTPUT); WiFiDrv::pinMode(RED_LED, OUTPUT); WiFiDrv::pinMode(BLUE_LED, OUTPUT); // Set the LED. WiFiDrv::analogWrite(GREEN_LED, bGreenLed ? LED_Brightness : 0);The webserver on the board provides a full HTML page and the weather data in a json format for the AJAX requests that gets updated every second.
The matching App is using the AJAX data for display
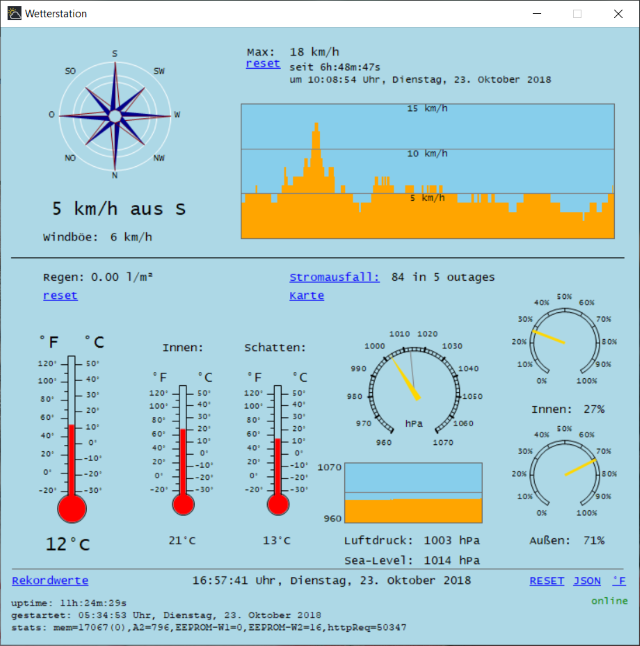
and also provides access to the weather data for wind, temperature and air pressure stored in the 32Kb chip.
-
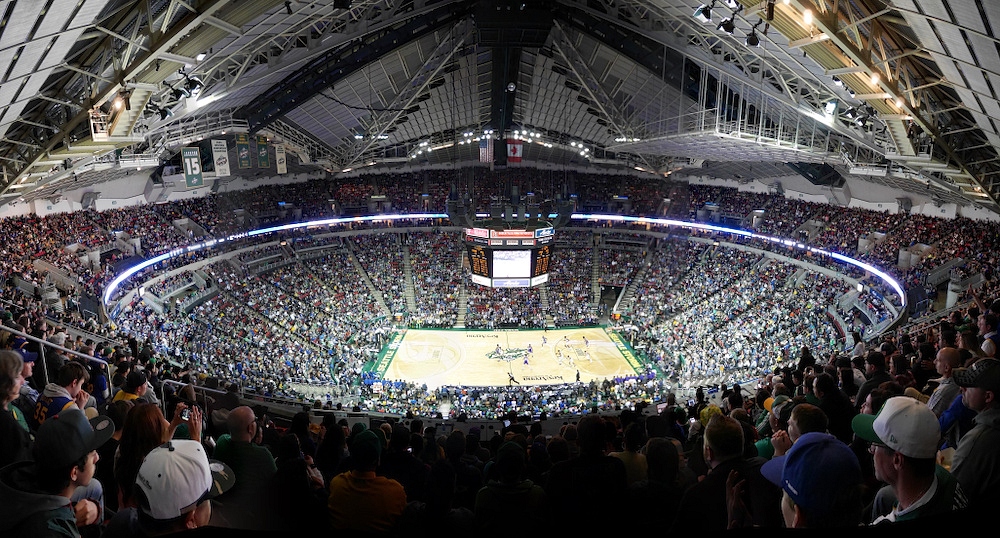
Golden State Warriors vs Sacramento Kings in the Seattle KeyArena
October 6th, the NBA is playing in the Seattle KeyArena. Golden State Warriors vs Sacramento Kings in an exciting pre season game!
Five 12mm shots were enough to capture the whole arena, before construction begins on the $700 million renovation.
One the way back, a view on the newly renovated Space Needle in the moon light. This was just one 12mm shot.

-
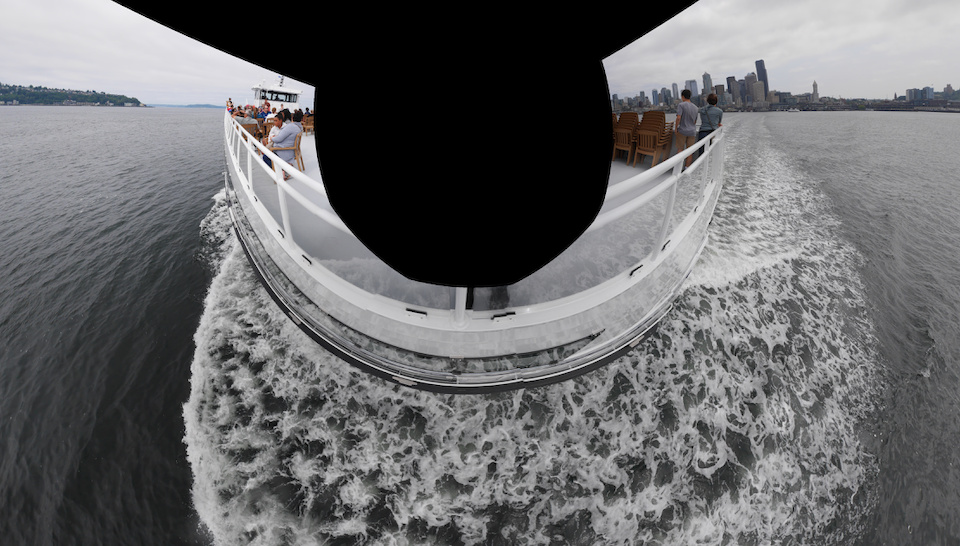
Stereographic projection
The 300° stereographic down projection is also known as the little planet projection. Usually it is used to transform a 360°×180° into those famous little planets, but in this example it is applied on a vertical 180° panorama with the last photo upside down:

Loaded into PTGui with the little planet transform:
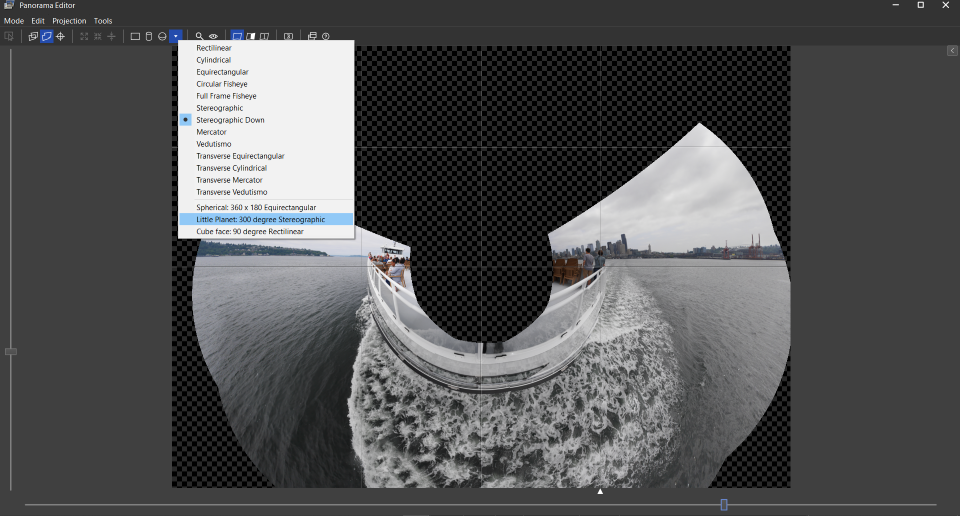
Gets you this amazing view:
See also Panotools projection, The Balcony Panorama, Panotools projections example and Use Case for Transverse Mercator Projection ✅.
-
Seattle panorama
Cityscape is constantly changing and over the weekend I took a snapshot of the Seattle water front.


-
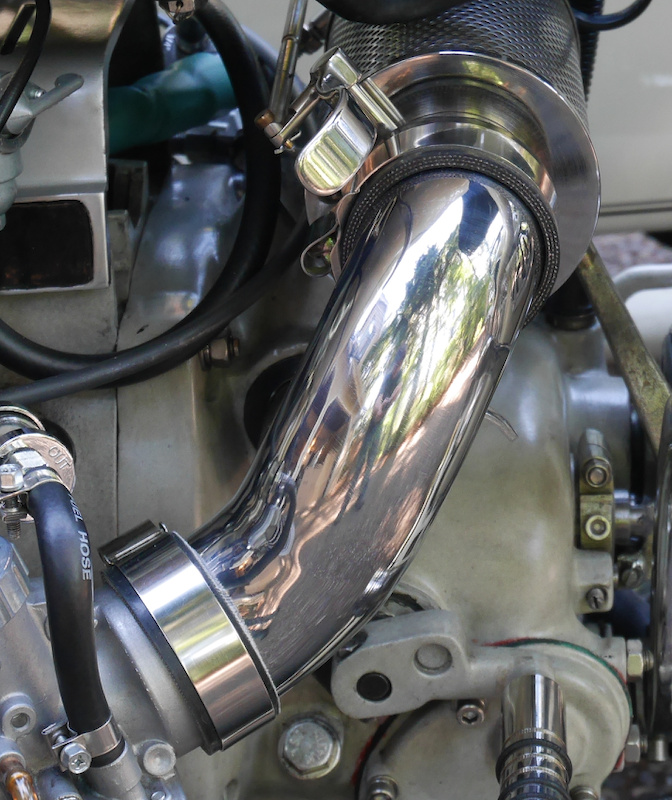
Custom Intake Pipe
With the custom air filter and new carbs, the standard intake pipes do not fit and the aluminum - rubber combination looked ugly.
Make one :)
Using a 90° and a 45° stainless steel elbow with 3mm thickness seemed to be a good start.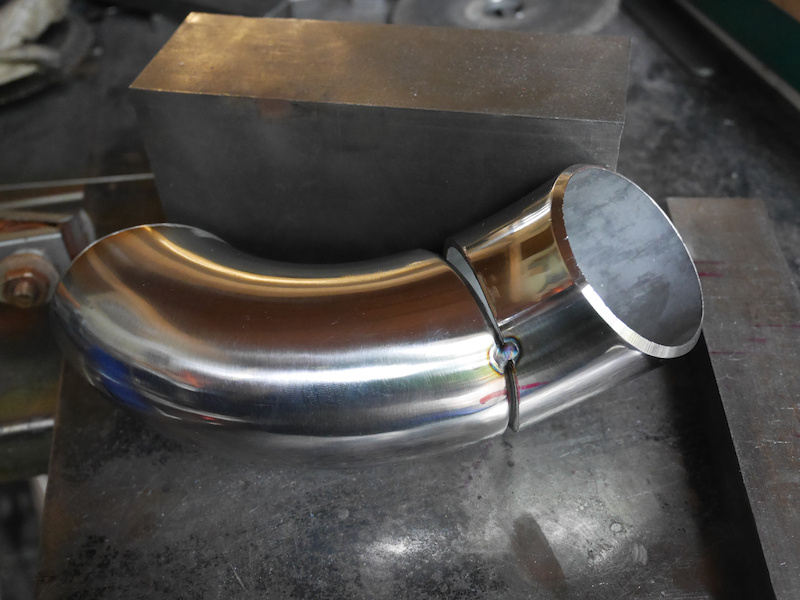
When back purging is not available, just use some sand instead.

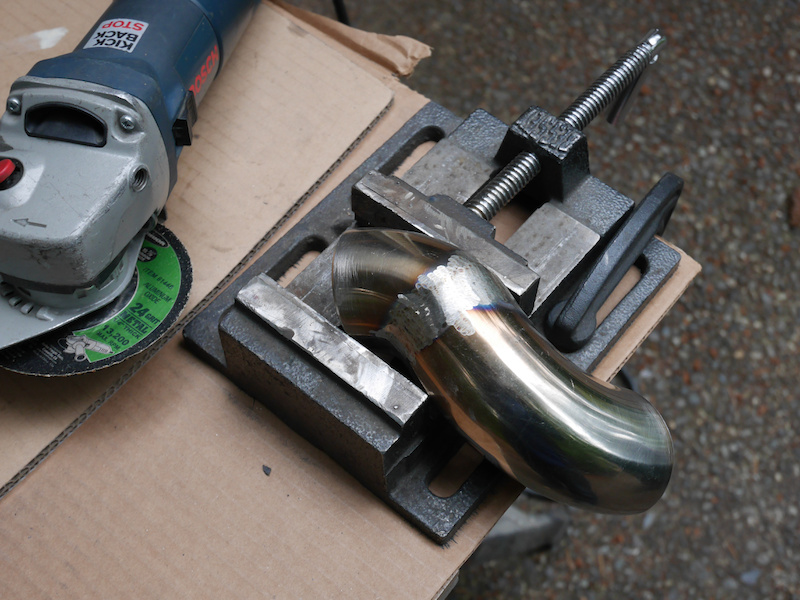
Grinding and Sanding
Polishing
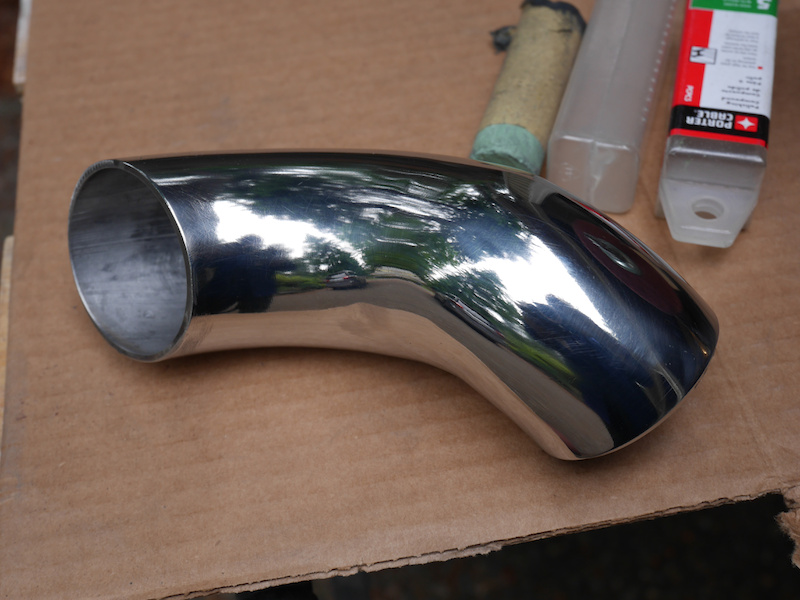
Done

Before:
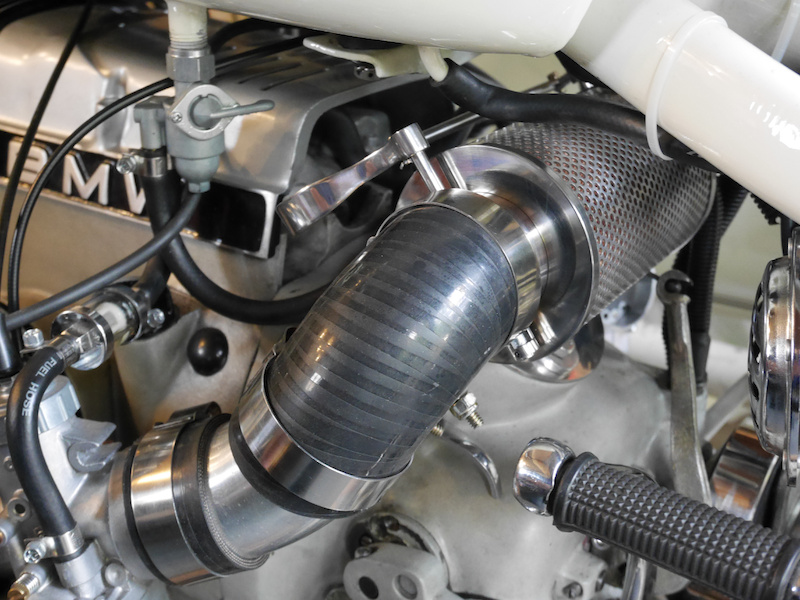
After: