-
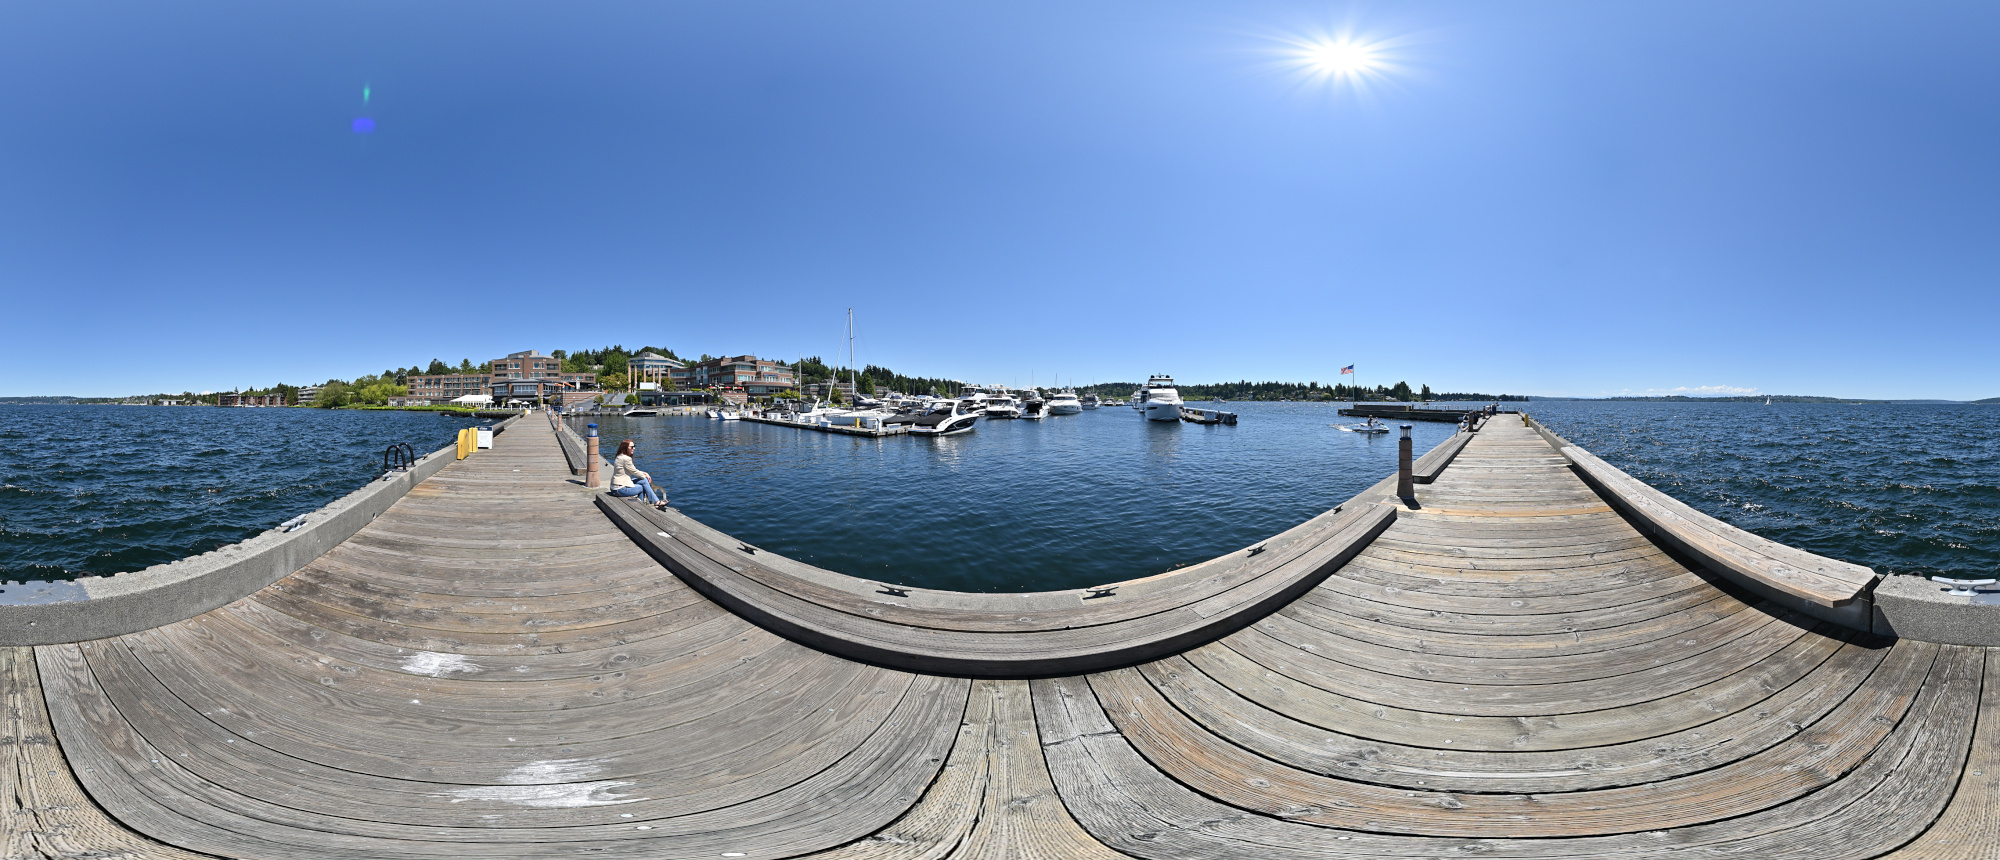
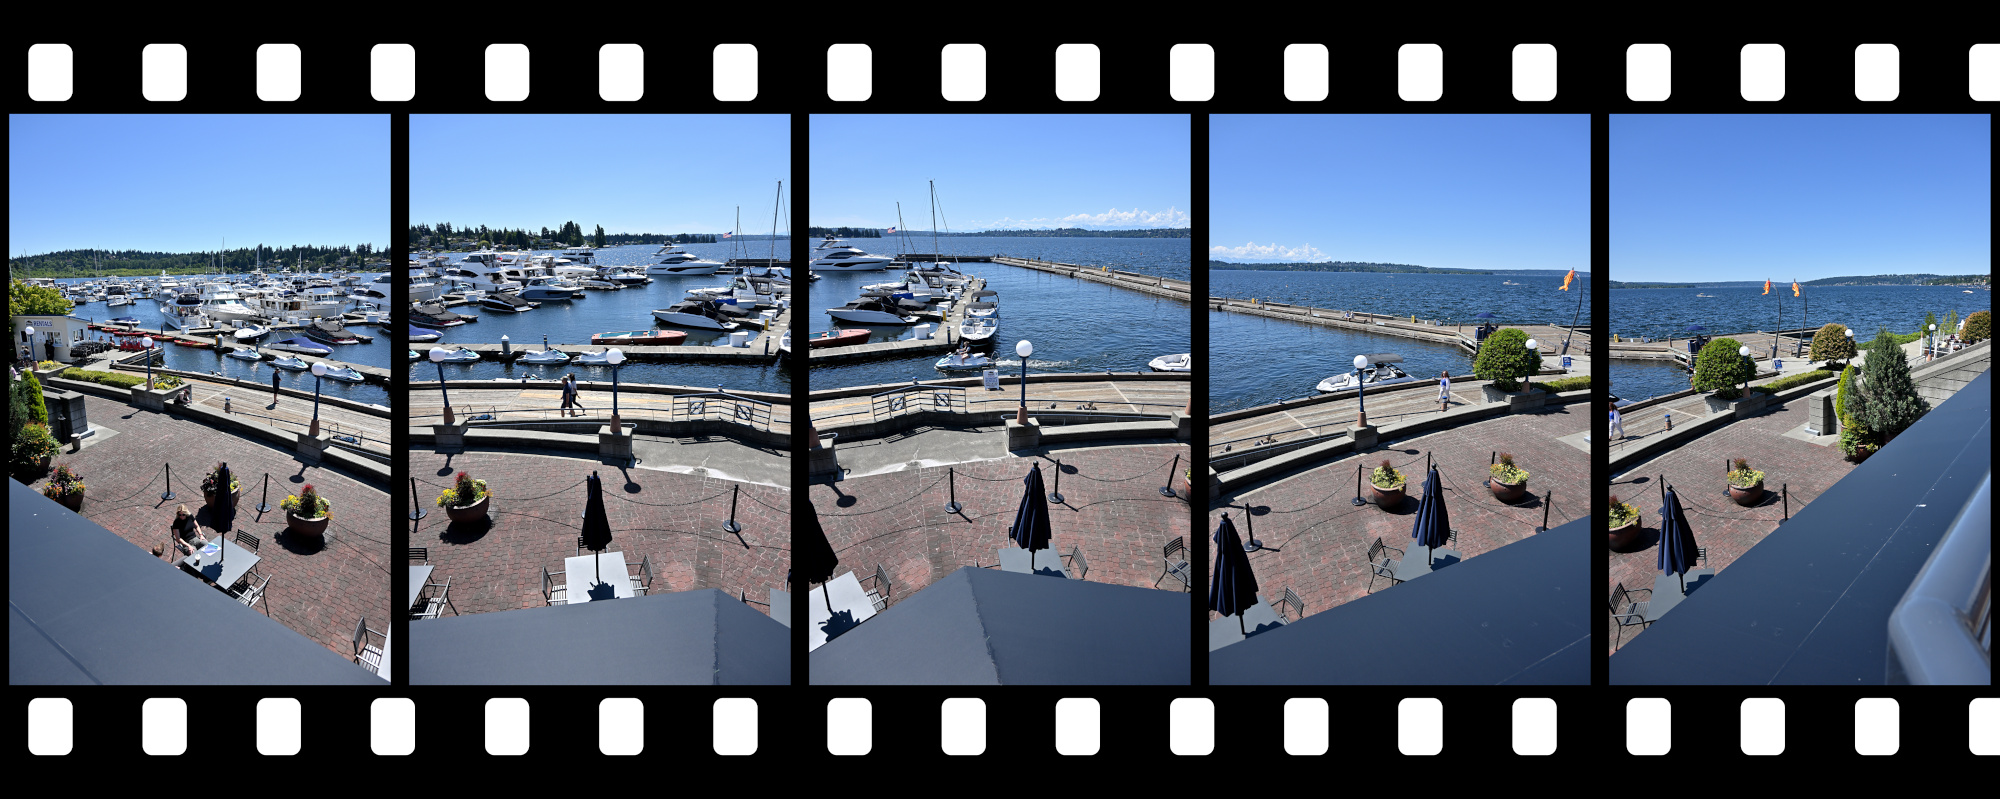
Carillon Point Dock, Kirkland
Taken at the 2024 Summer Solstice, the sun at its highest elevation over Lake Washington.
This panorama is the 2024 Summer Solstice contribution for the 'June Wrinkle' event of WorldWidePanorama.Interactive Panorama Carillon Point Dock 1
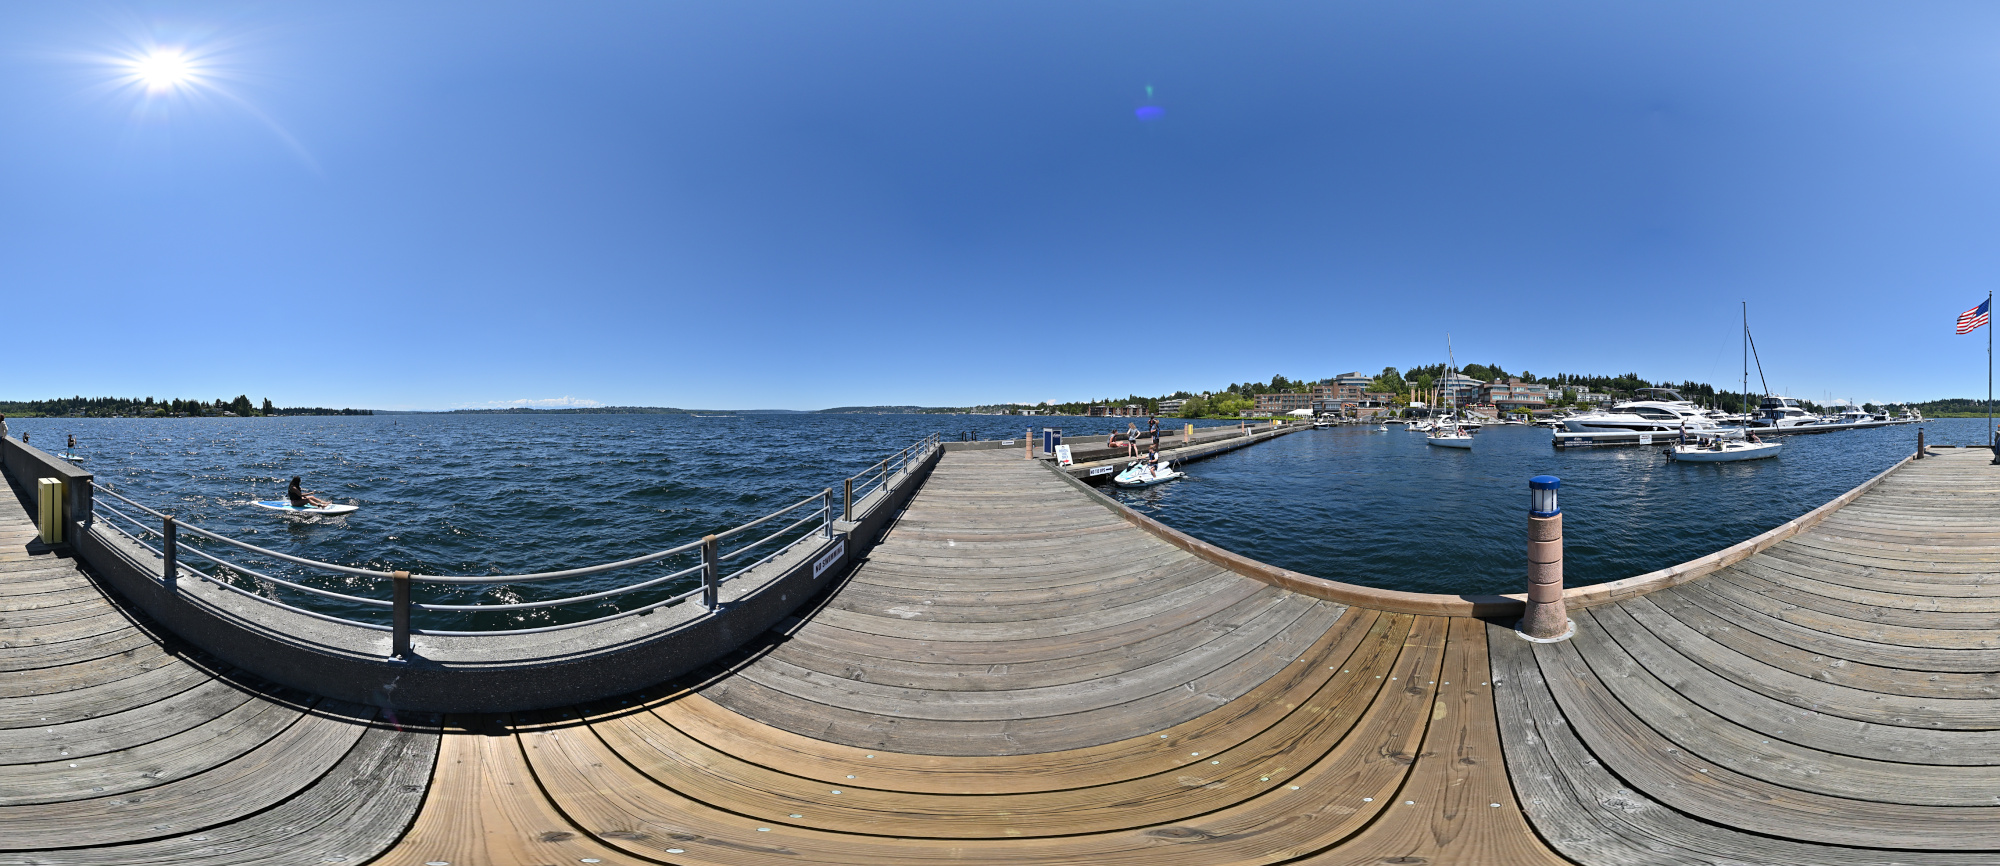
1/1000s f/5,6 ISO 100/21° 7,5mm
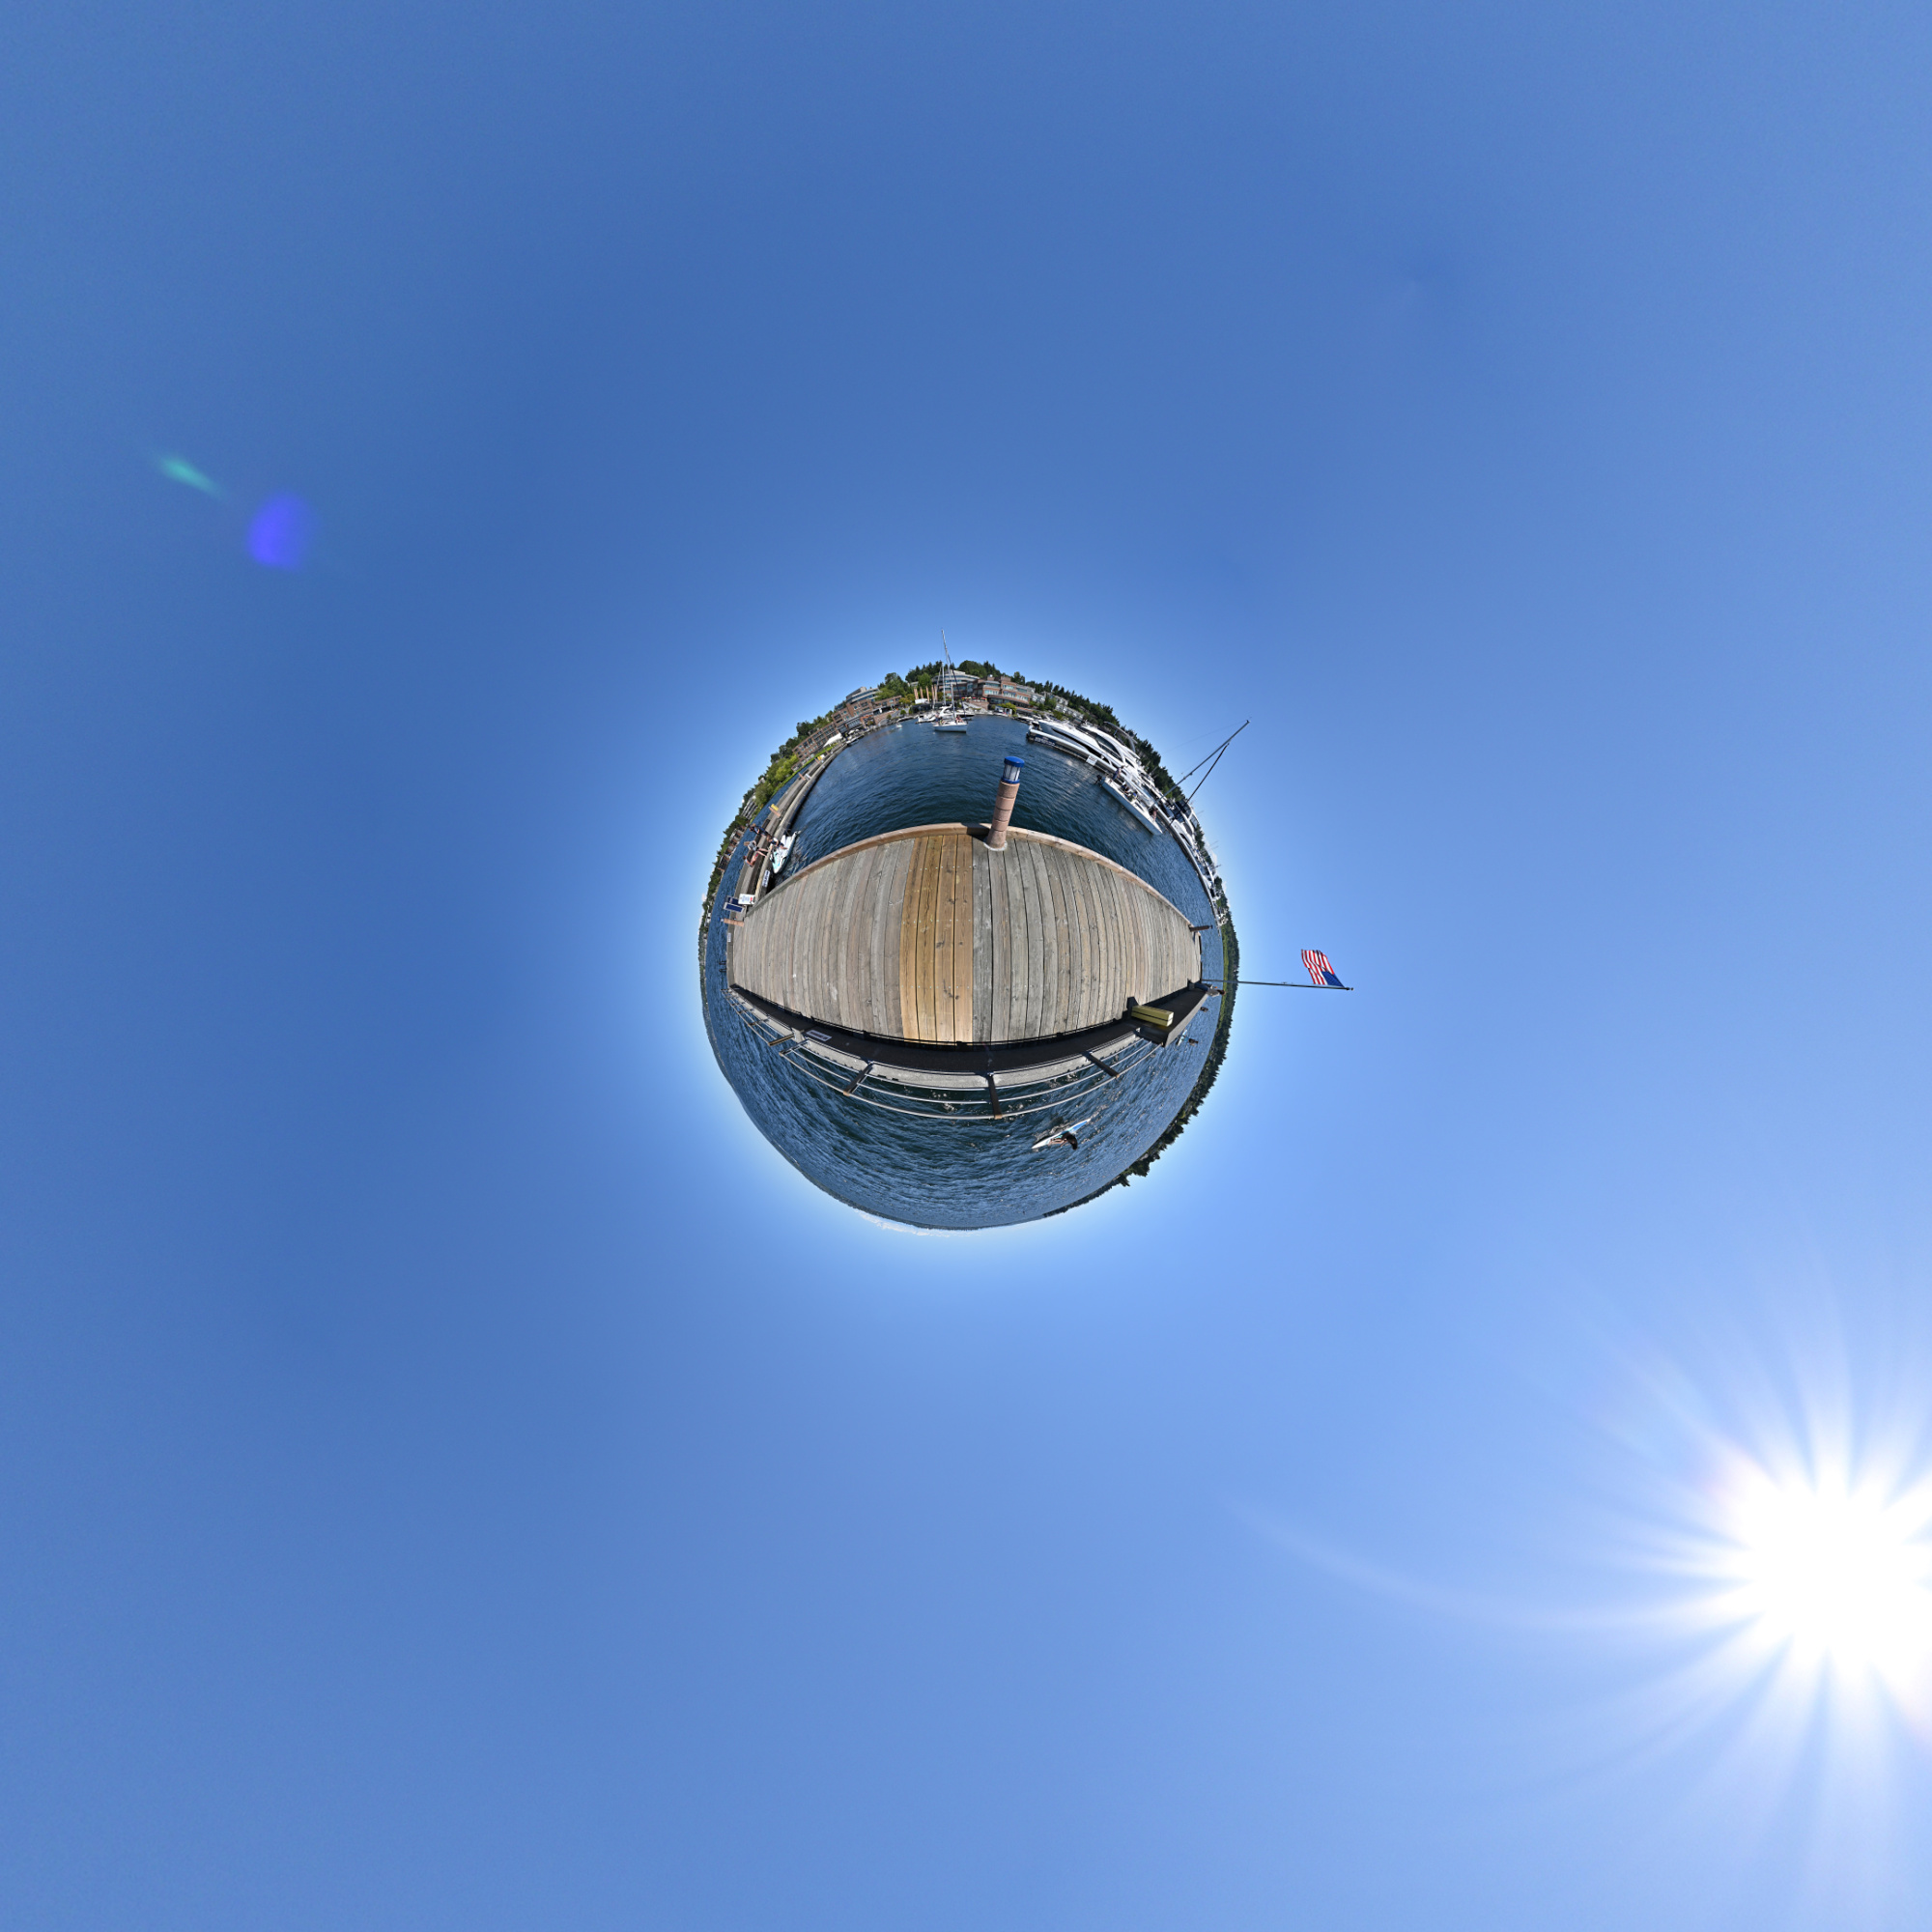
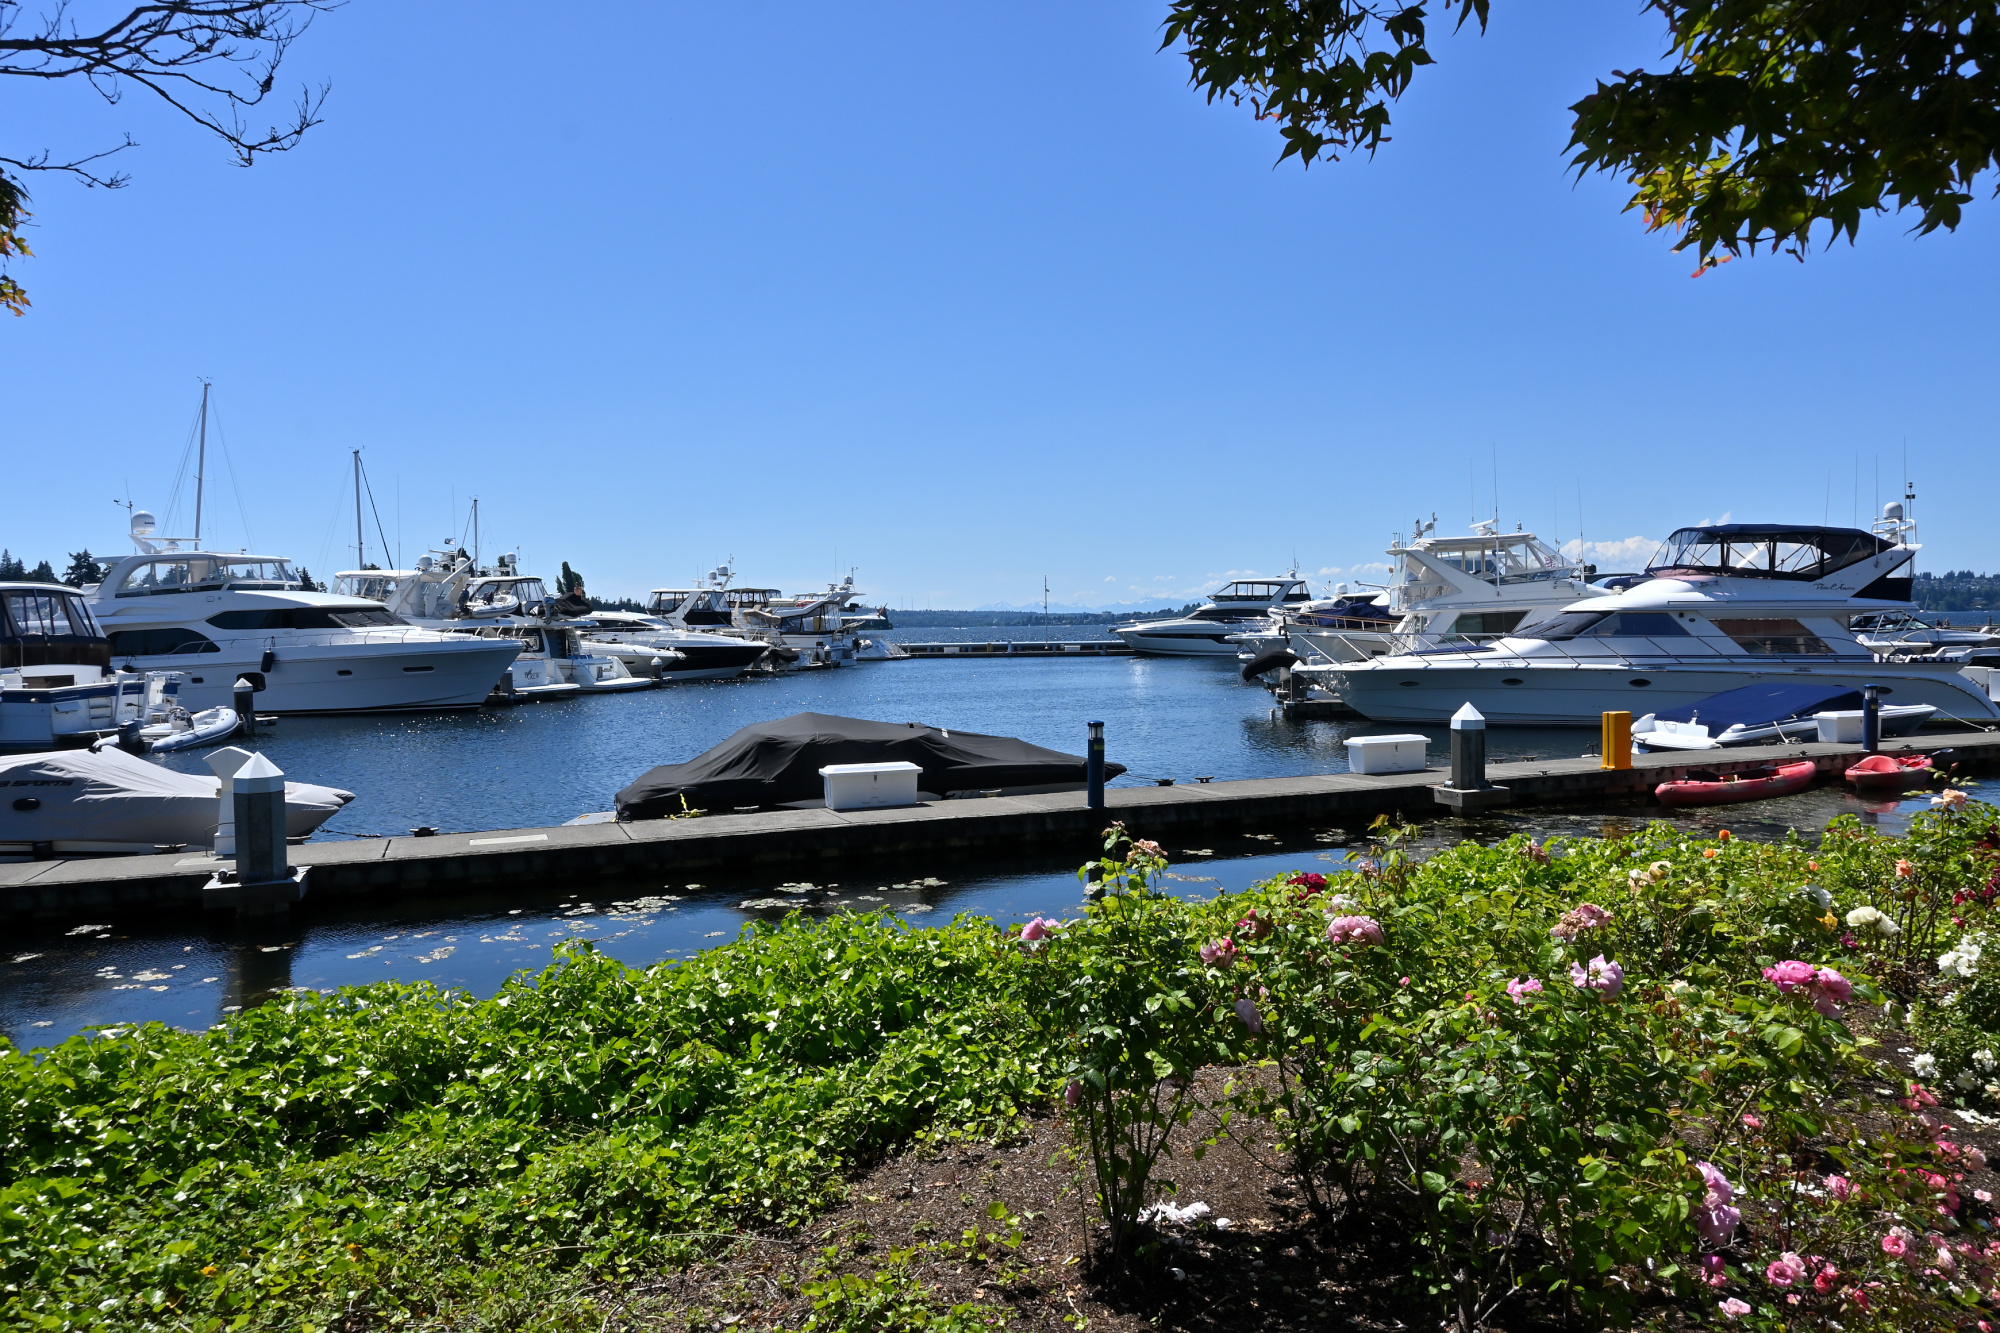
Interactive Panorama Carillon Point Dock 3
Have you found the duck?
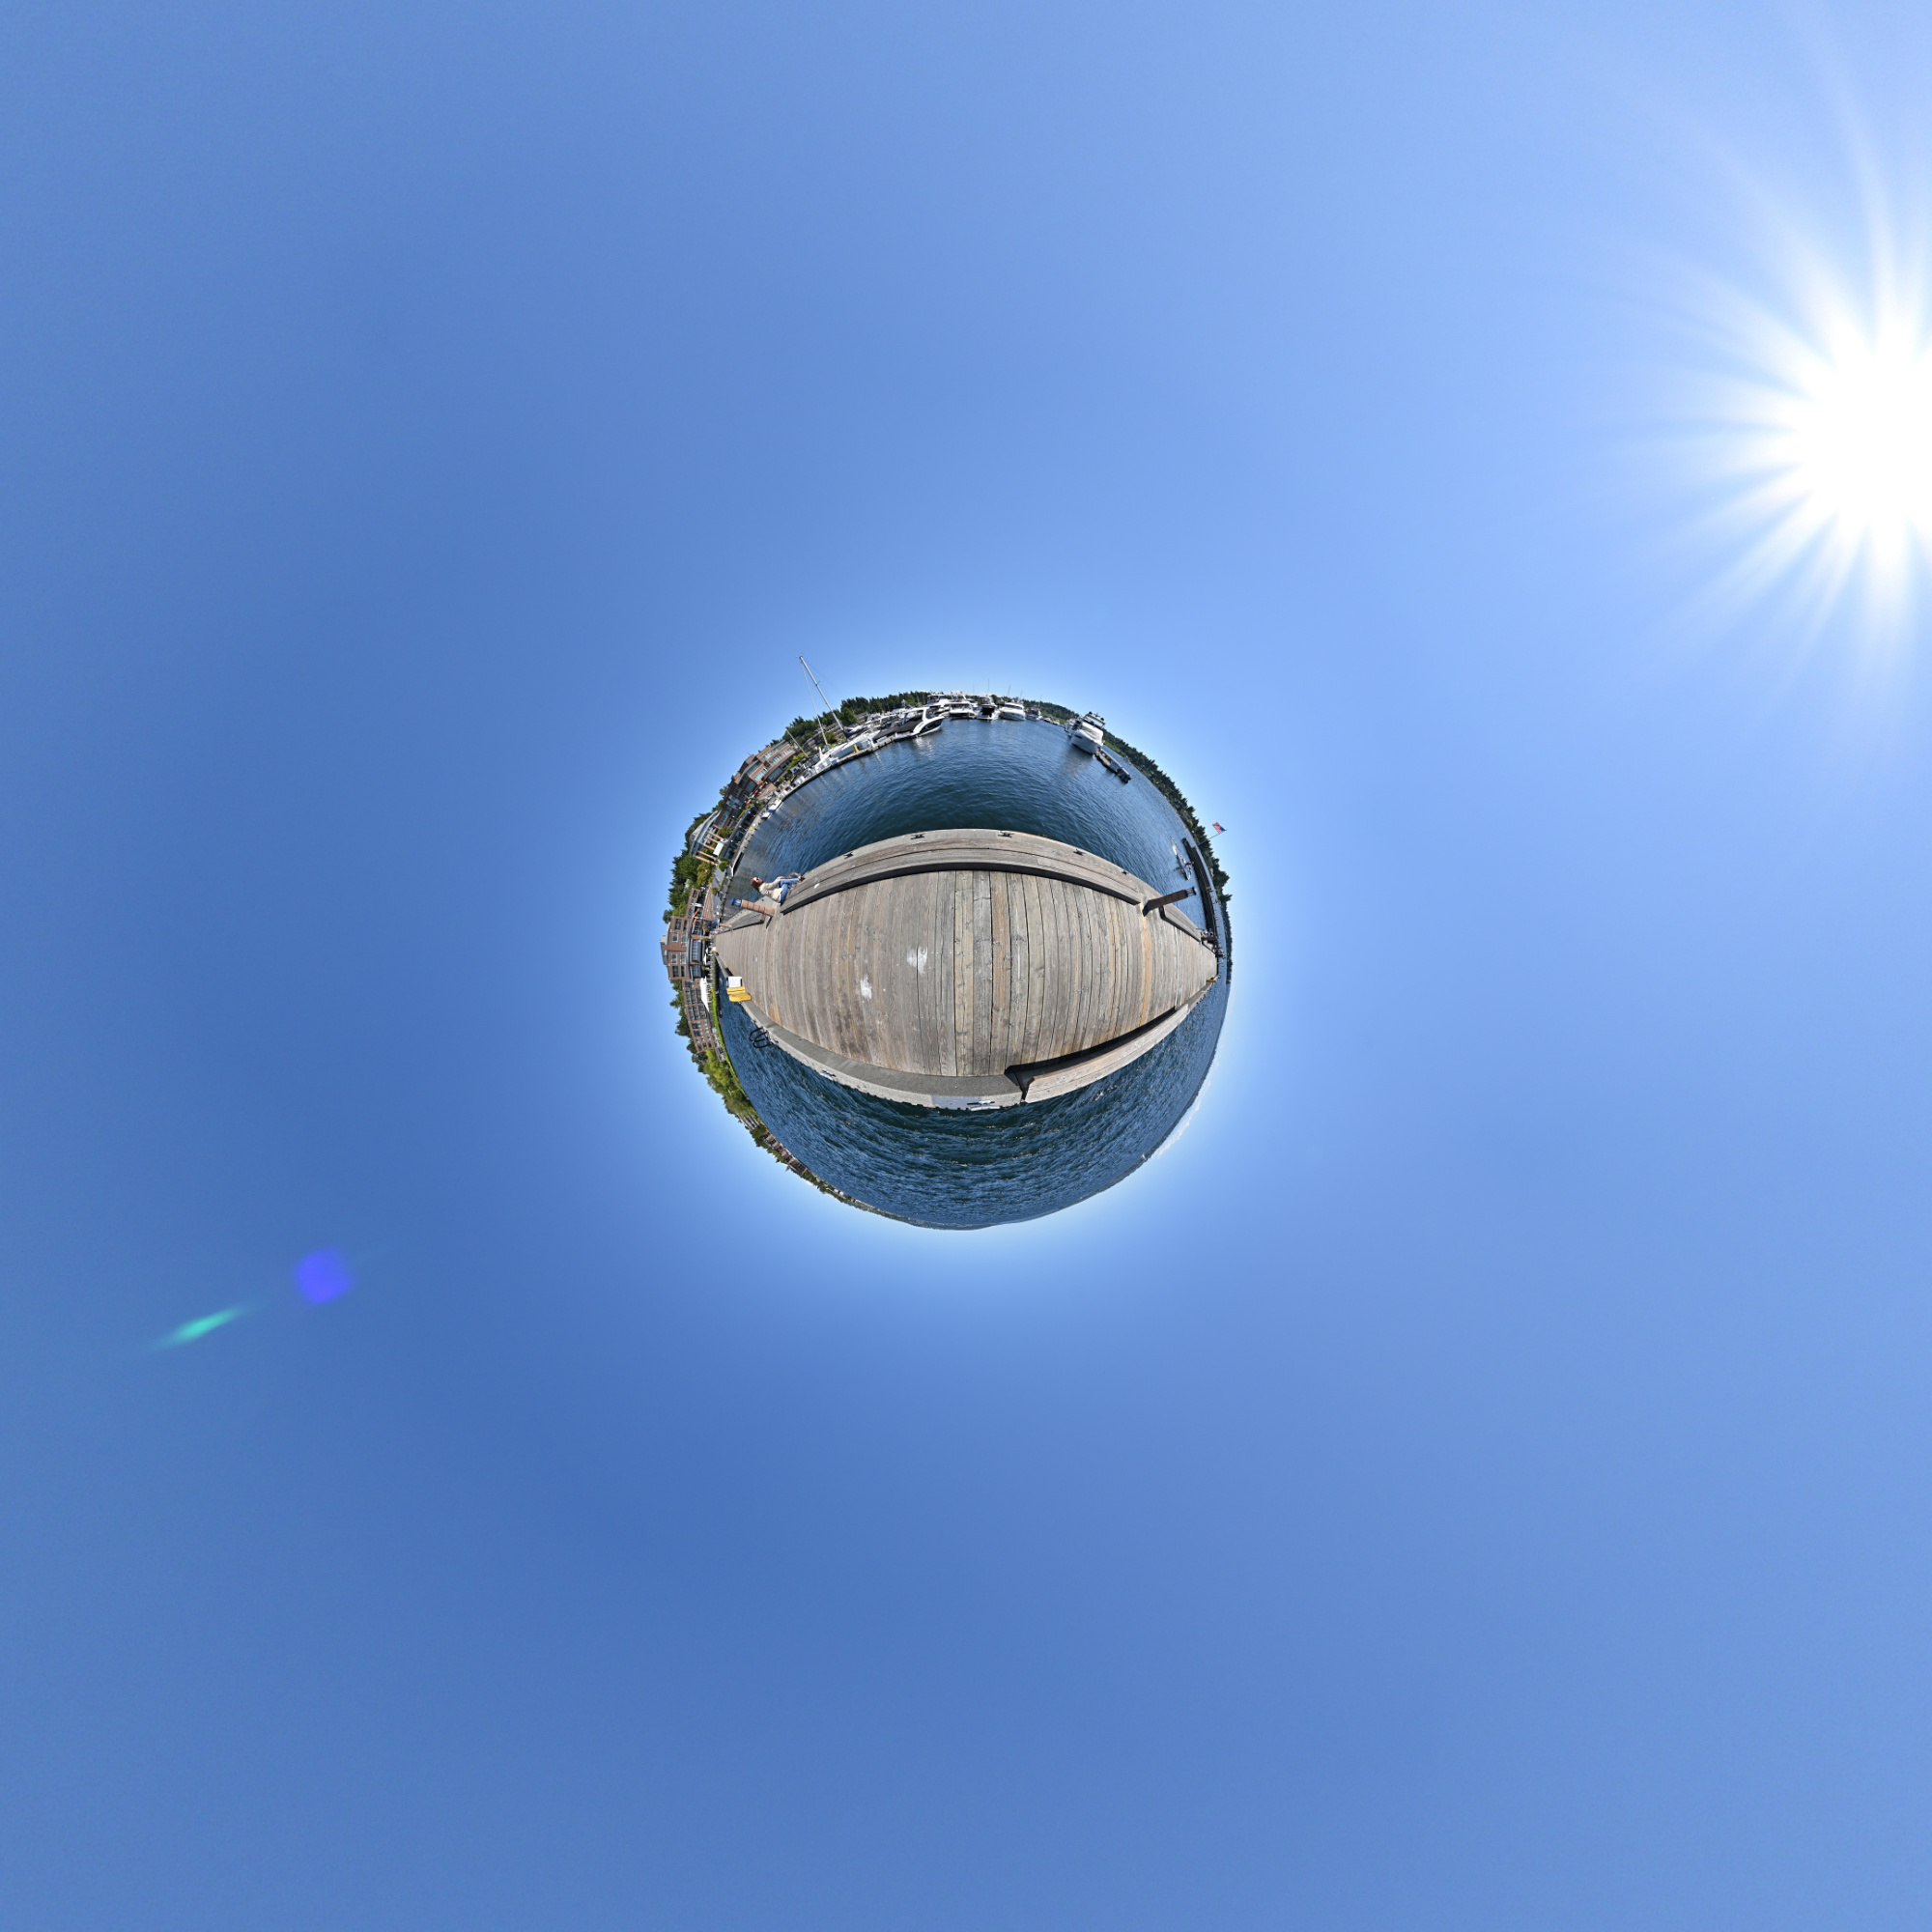
1/1000s f/5,6 ISO 100/21° 7,5mm
From Lakeview Drive
1/1000s f/4,5 ISO 100/21° 16-50mm f/3,5-6,3 VR f=16mm/24mm
1/400s f/10 ISO 125 16-50mm f/3,5-6,3 VR f=16mm/24mm
-
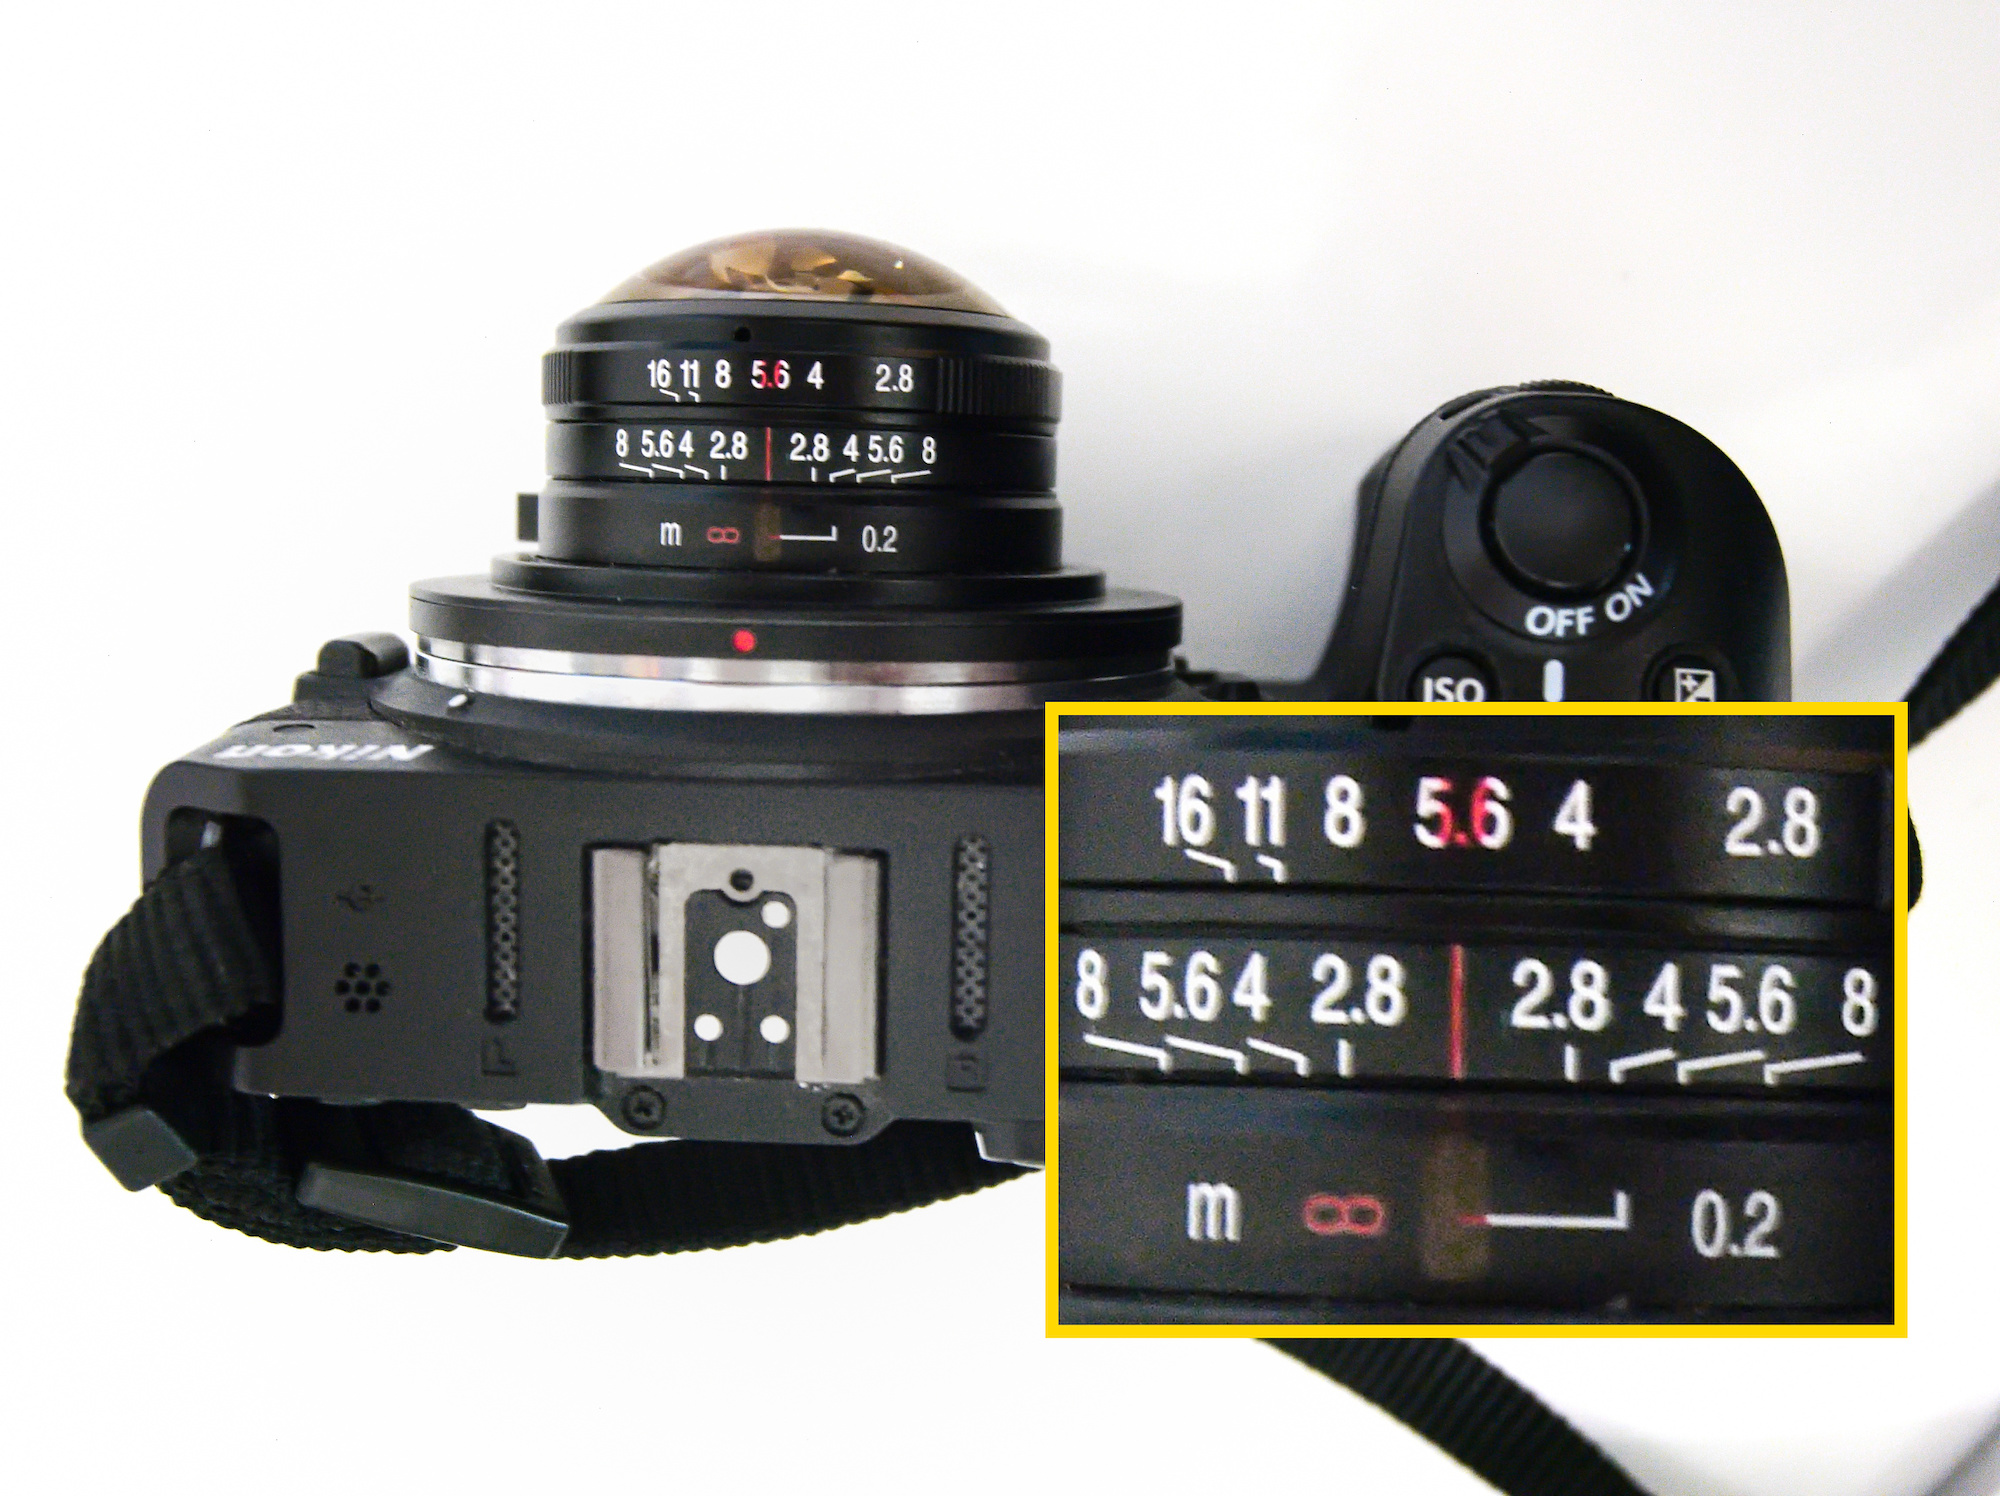
Laowa 4mm f/2.8 Fisheye Lens
The Laowa 4mm f/2.8 is a manual focus Circular Fisheye lens for APS-C cameras.

Best setting for 360°×180° Panoramas is at the beginning of the infinity mark and f/5.6. This puts everything from near to infinity in focus:
The 4mm Circular Fisheye lens allows you to capture stunning and unique shots:
And a 360°×180° panorama with just two pictures:
1/1000s f/5.6 ISO 100/21°
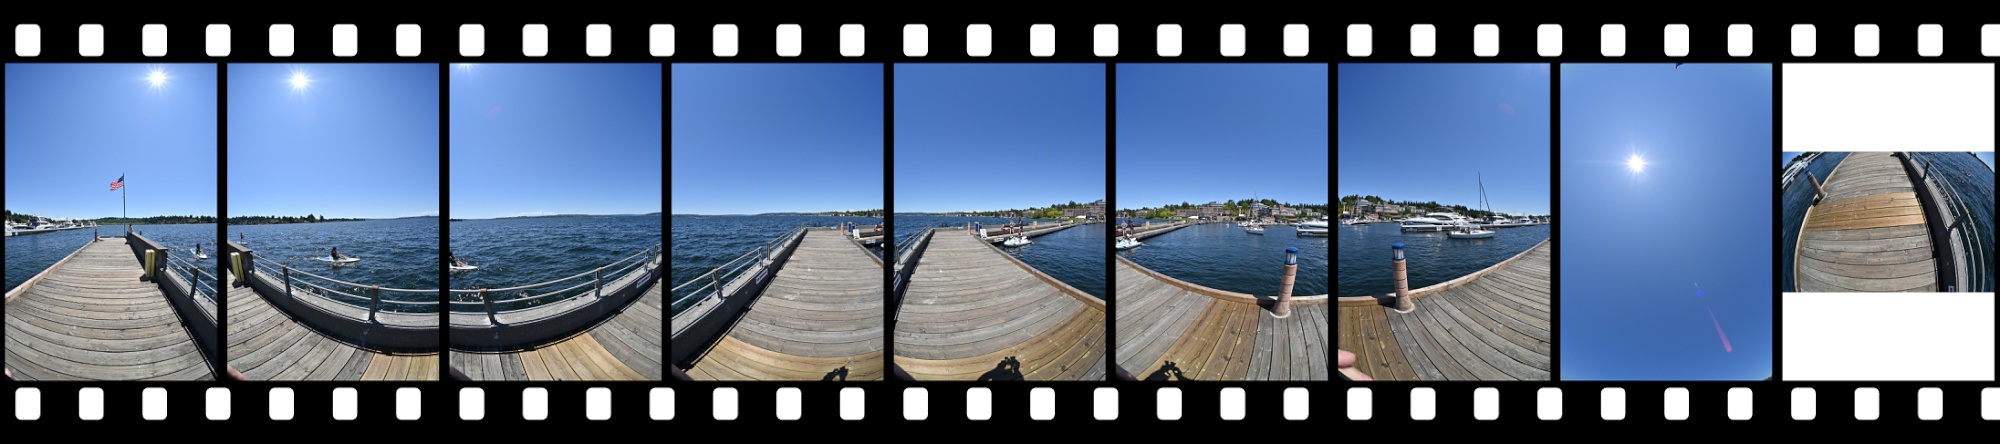
Original pictures used for this panorama: DSC_4706-4707.zip
Interactive Panorama Laowa 4mm
On a sunny day, position yourself so that your shadow falls within the area of overlap (your shadow is perpendicular to the direction you are looking):
The overlap with the lens's 210° field of view at the seam is large enough to cover the shadow. Even for a nodal point adapter with a small footprint.
This is not possible with a 180° Fisheye.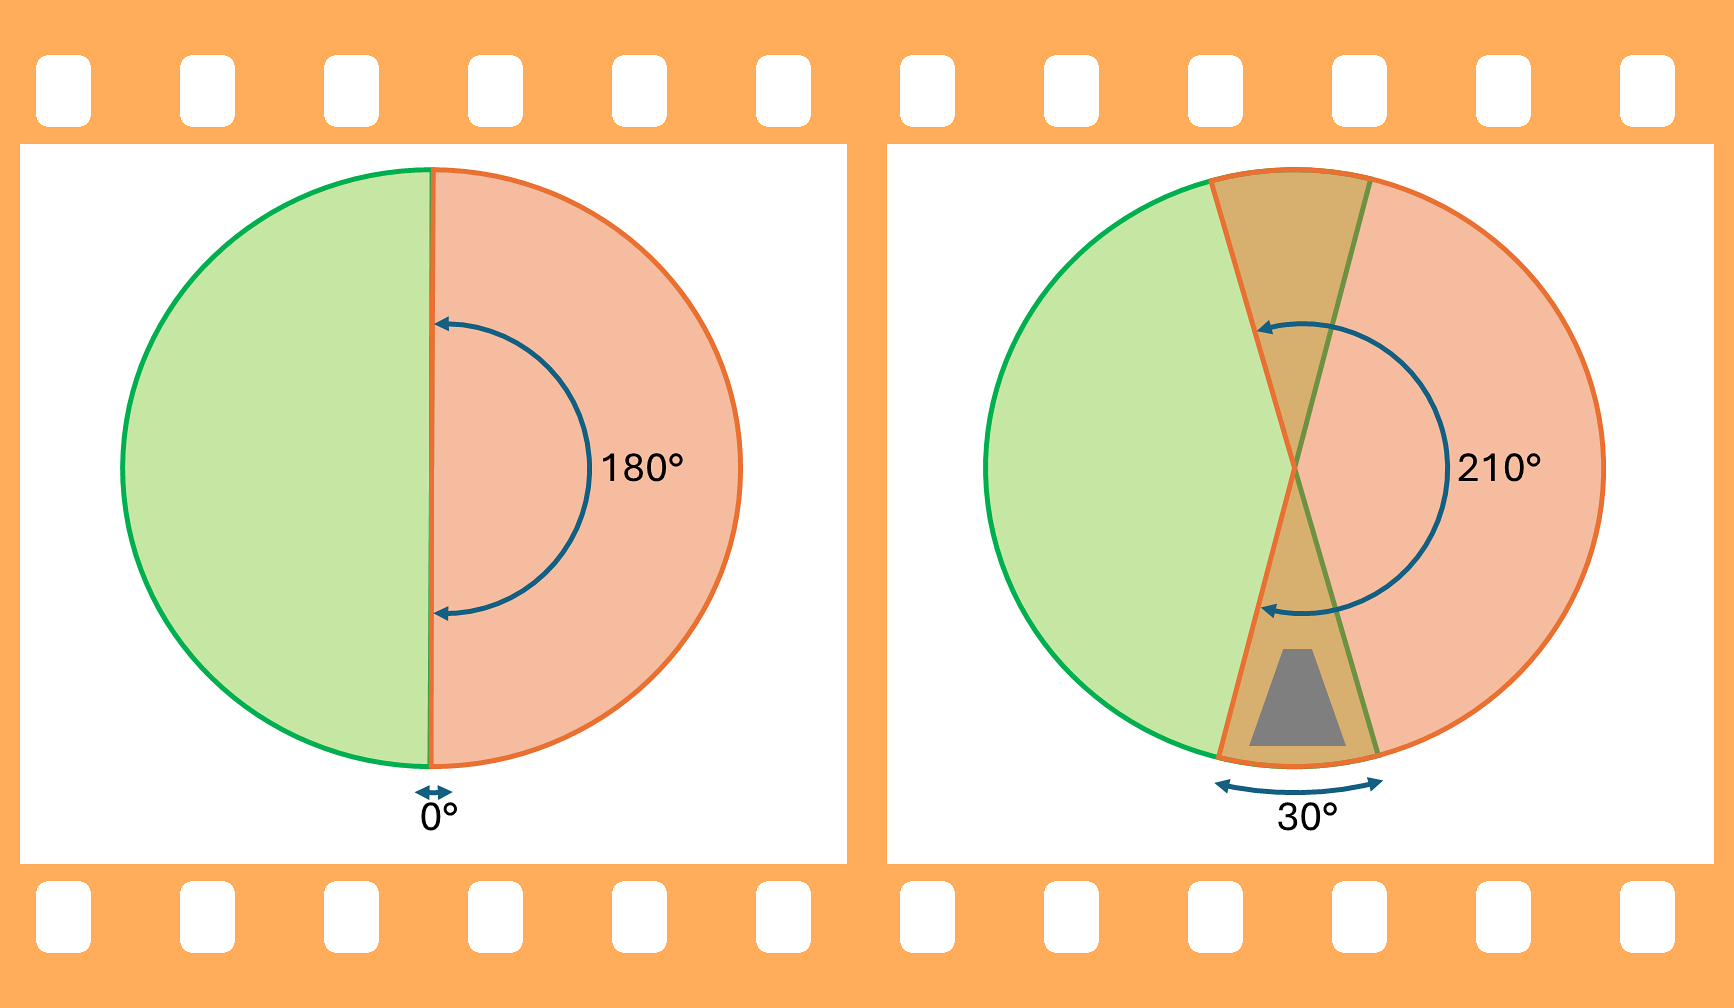
With the lens at a height of 1.6m, the 30° overlap is 1.6m*2*tan(15°)=0.85m (2ft 9").
Shadow covered:
It is common for fisheye lenses to have decreased image quality toward the edges, but not really an issue if it is only used for web/social media. The ordinary Tiktok brain does not recognize this deficiency anyway.
The two images were taken without a tripod, so the stitch does not result in everything perfectly vertical and also has some minor misalignments. And with only two images, there is not much to vary. A nodal point adapter is recommended.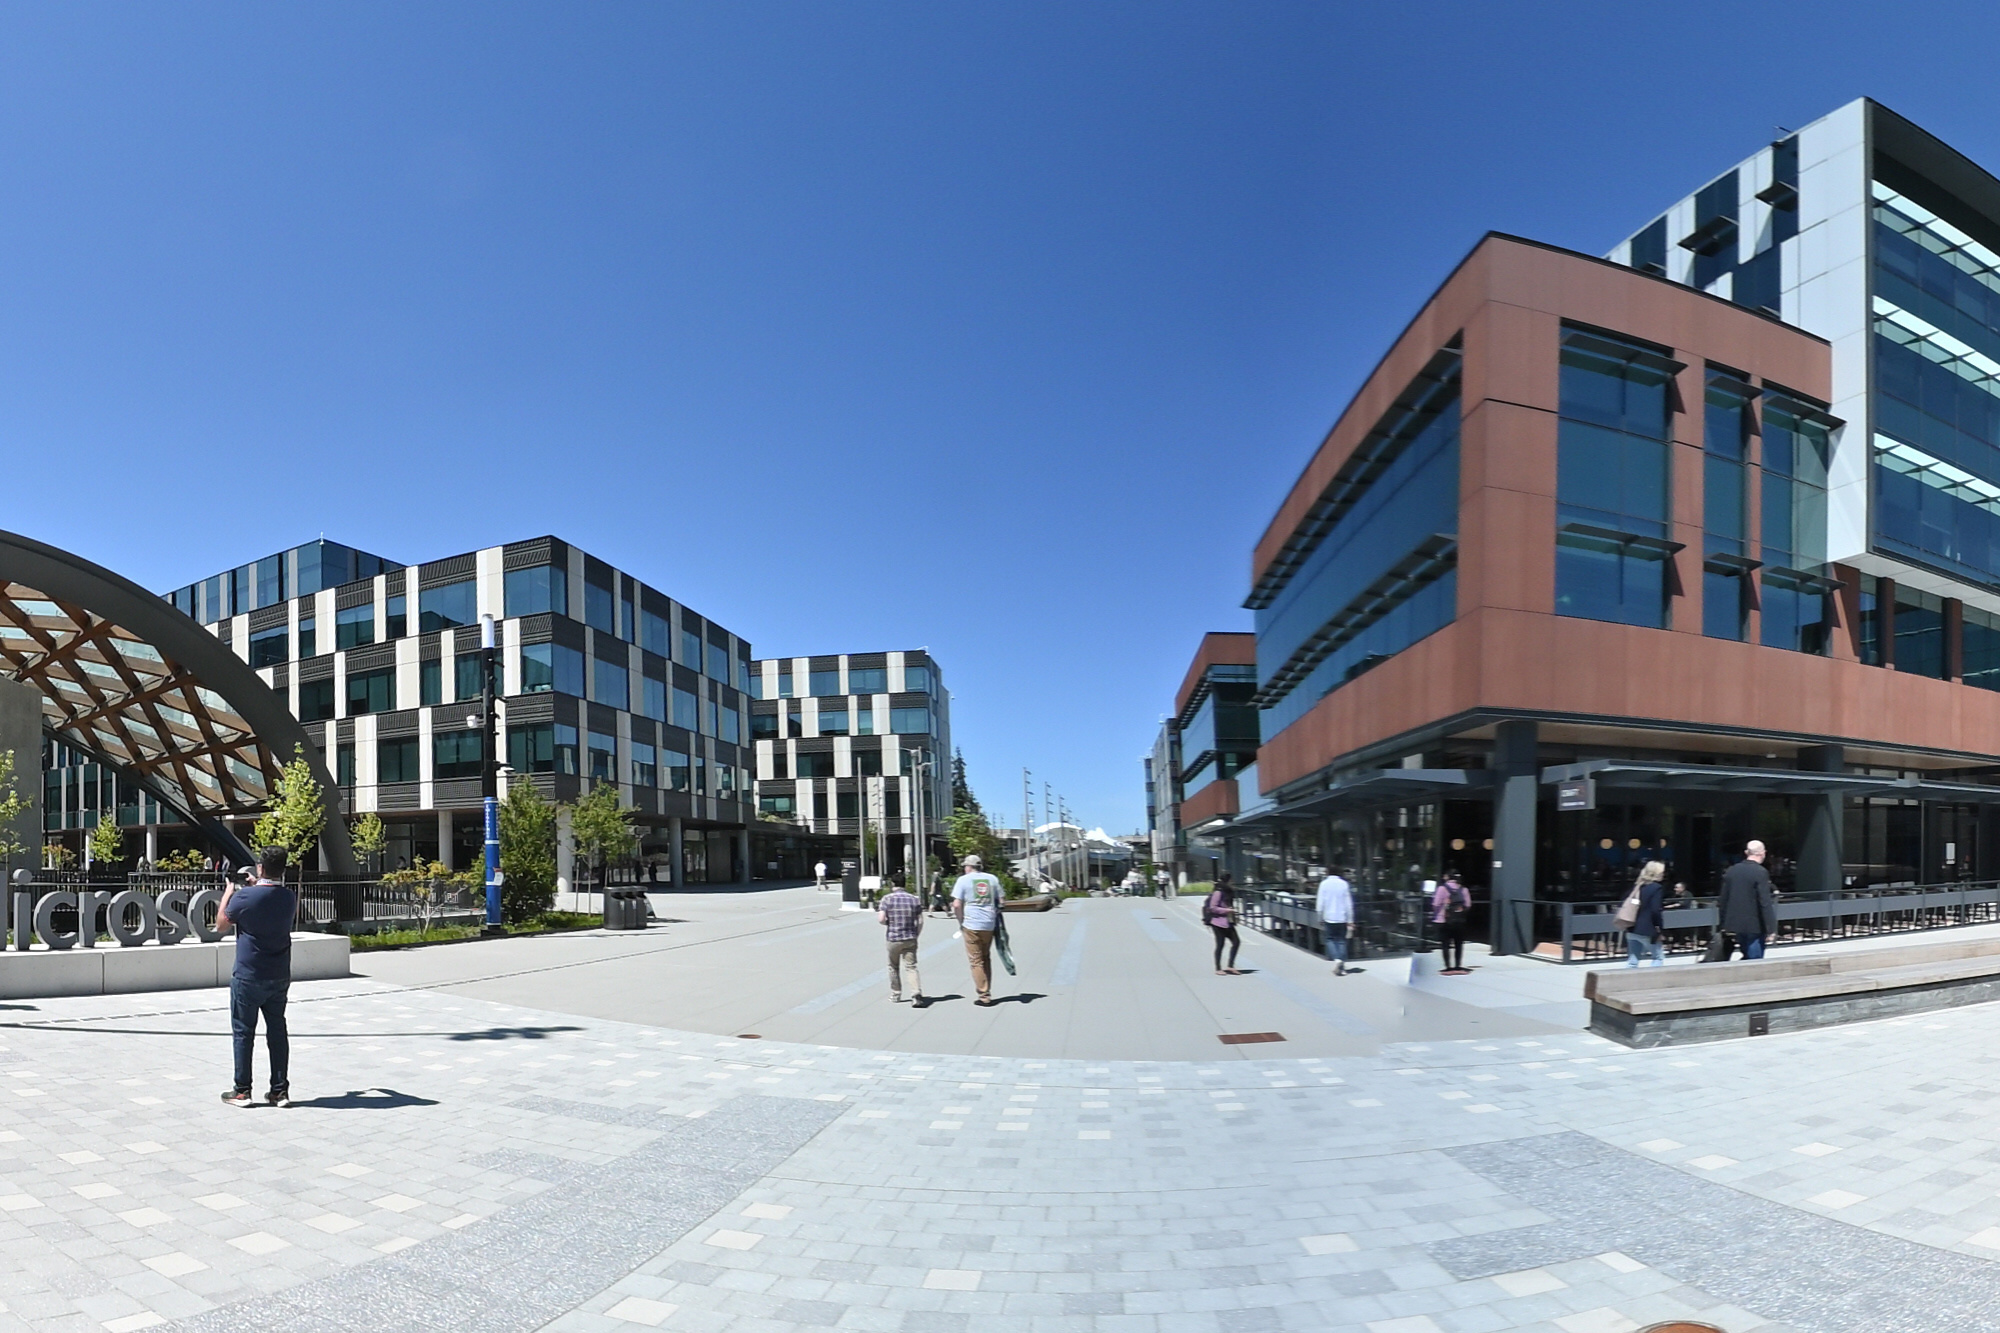
And there are internal reflections at the edges with bright sun light:
The crop of the center and the edge, both enlarged by 2 times:
See also
TTArtisan 7.5mm f/2.0 Fisheye Lens
AstrHori 6.5mm f/2.0 Fisheye Lens -
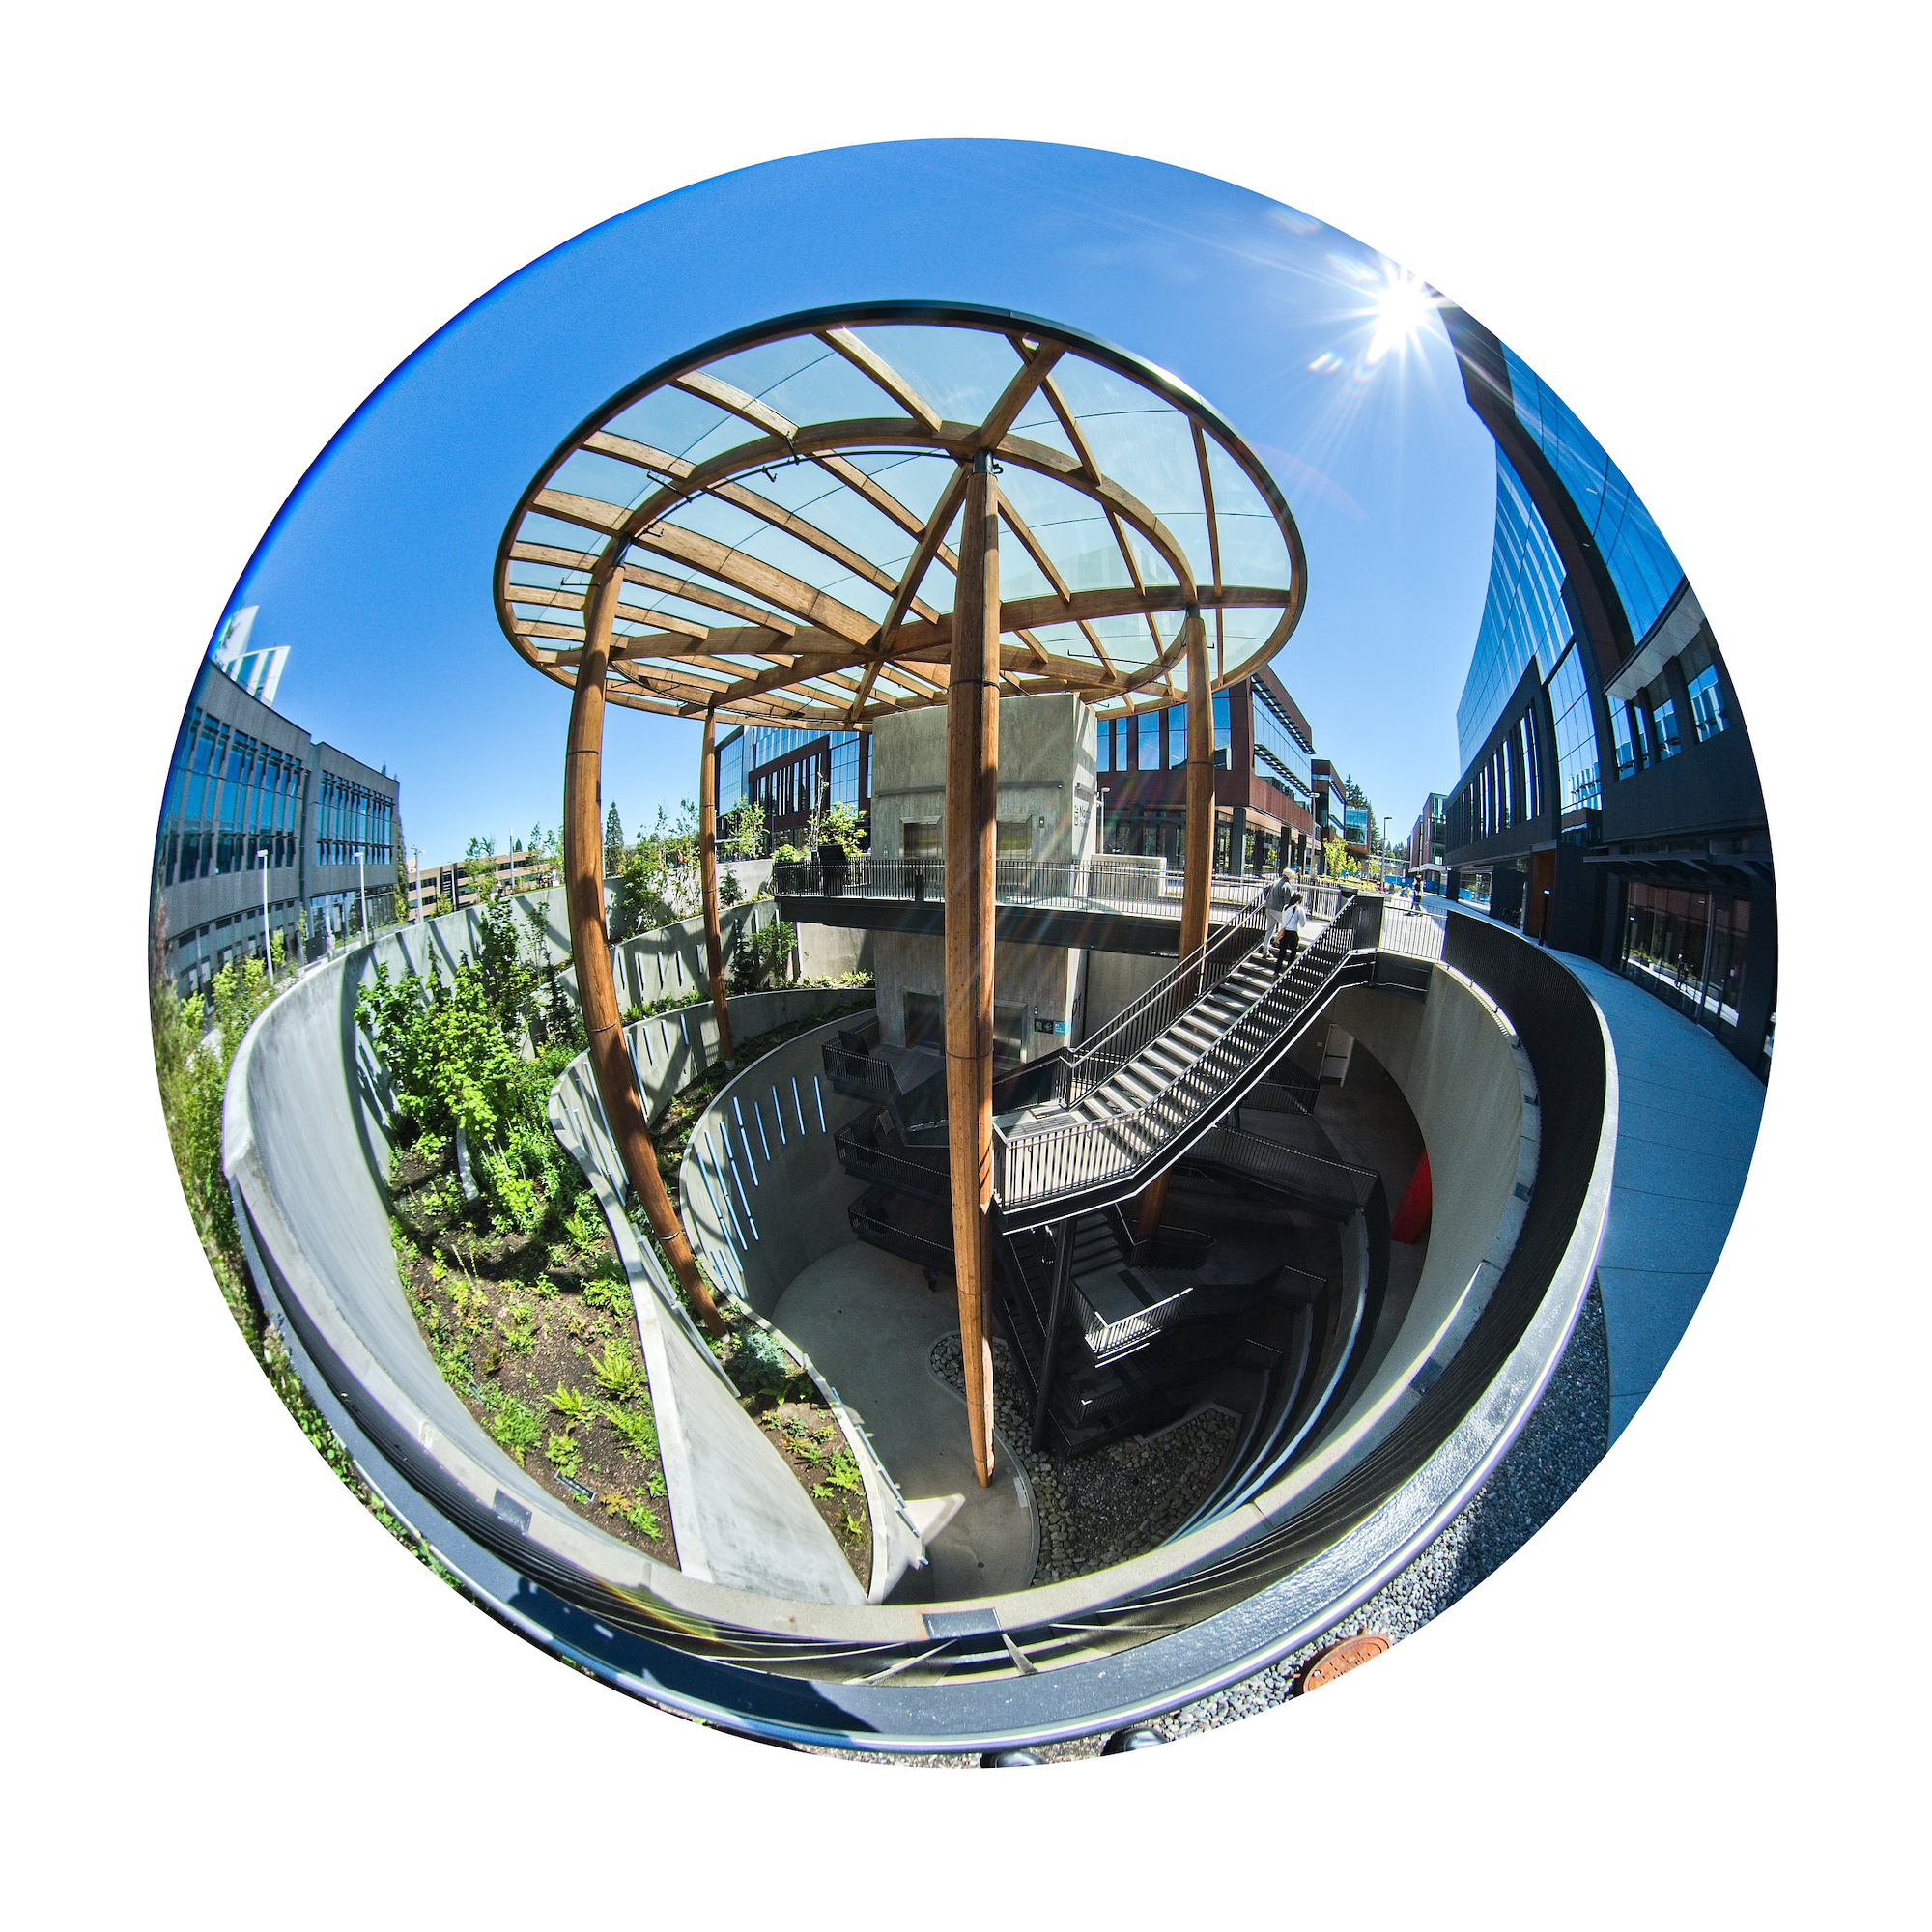
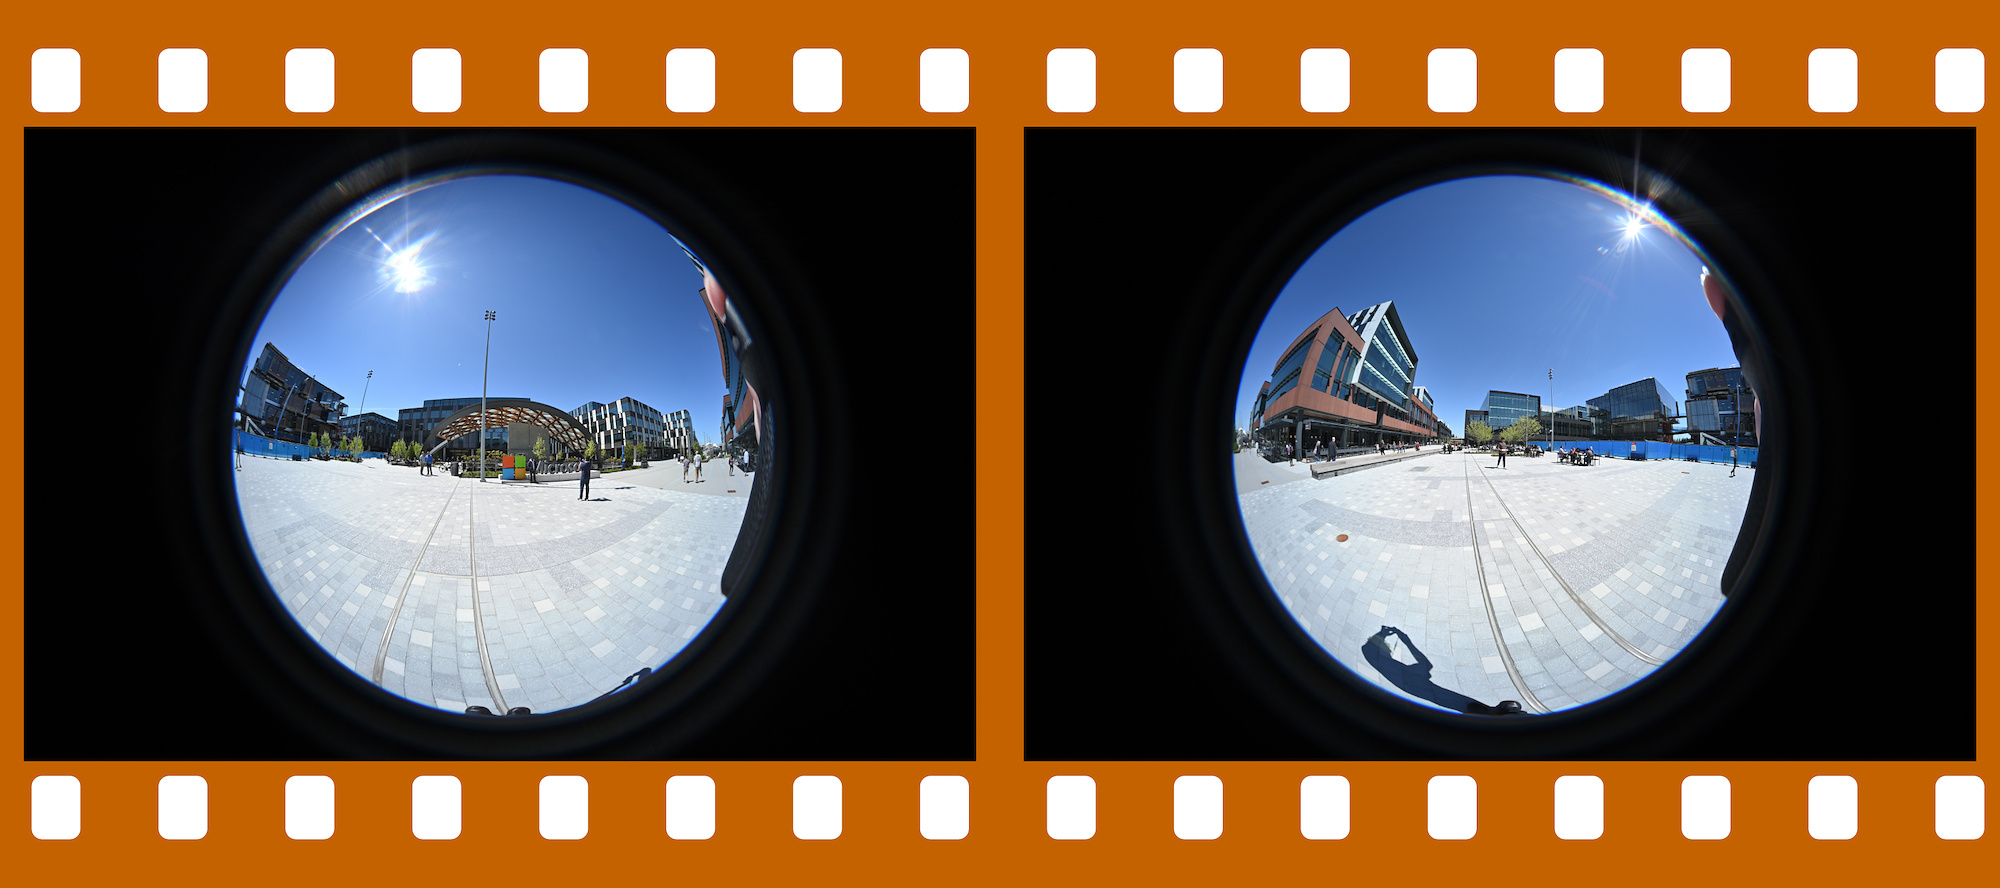
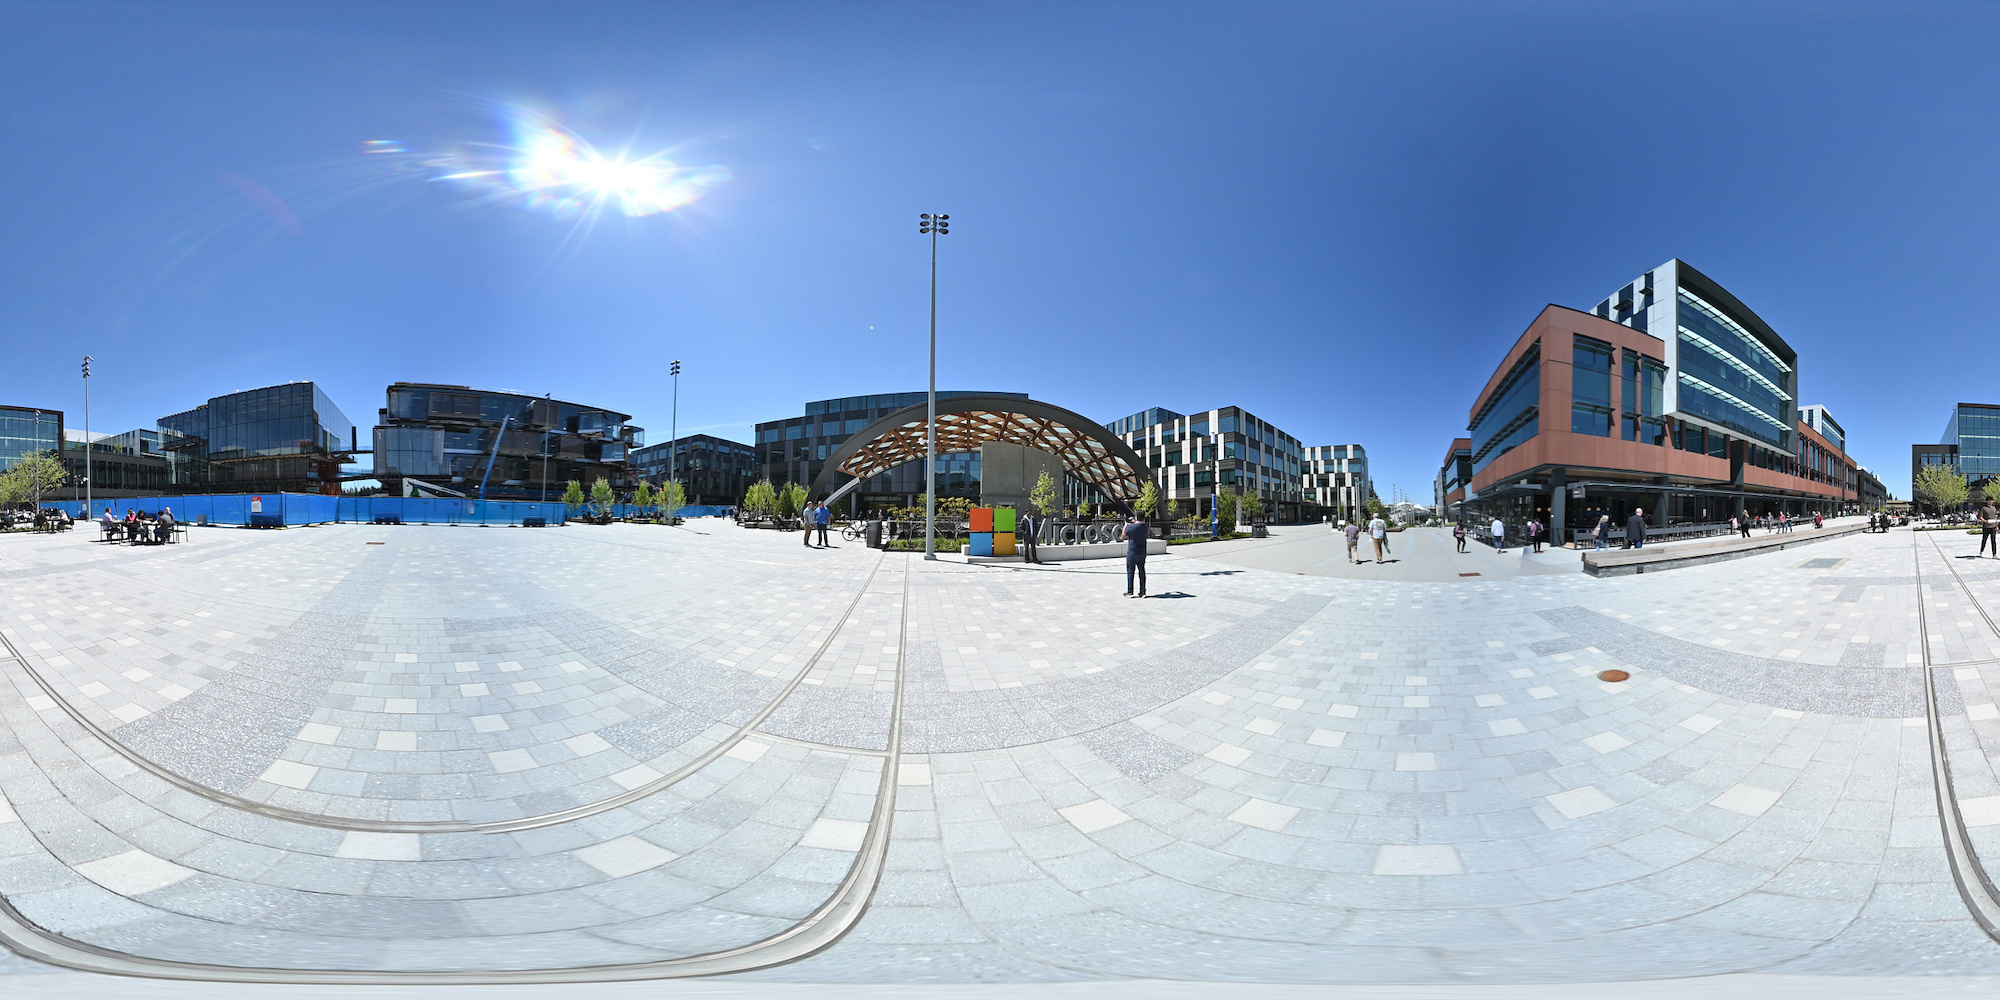
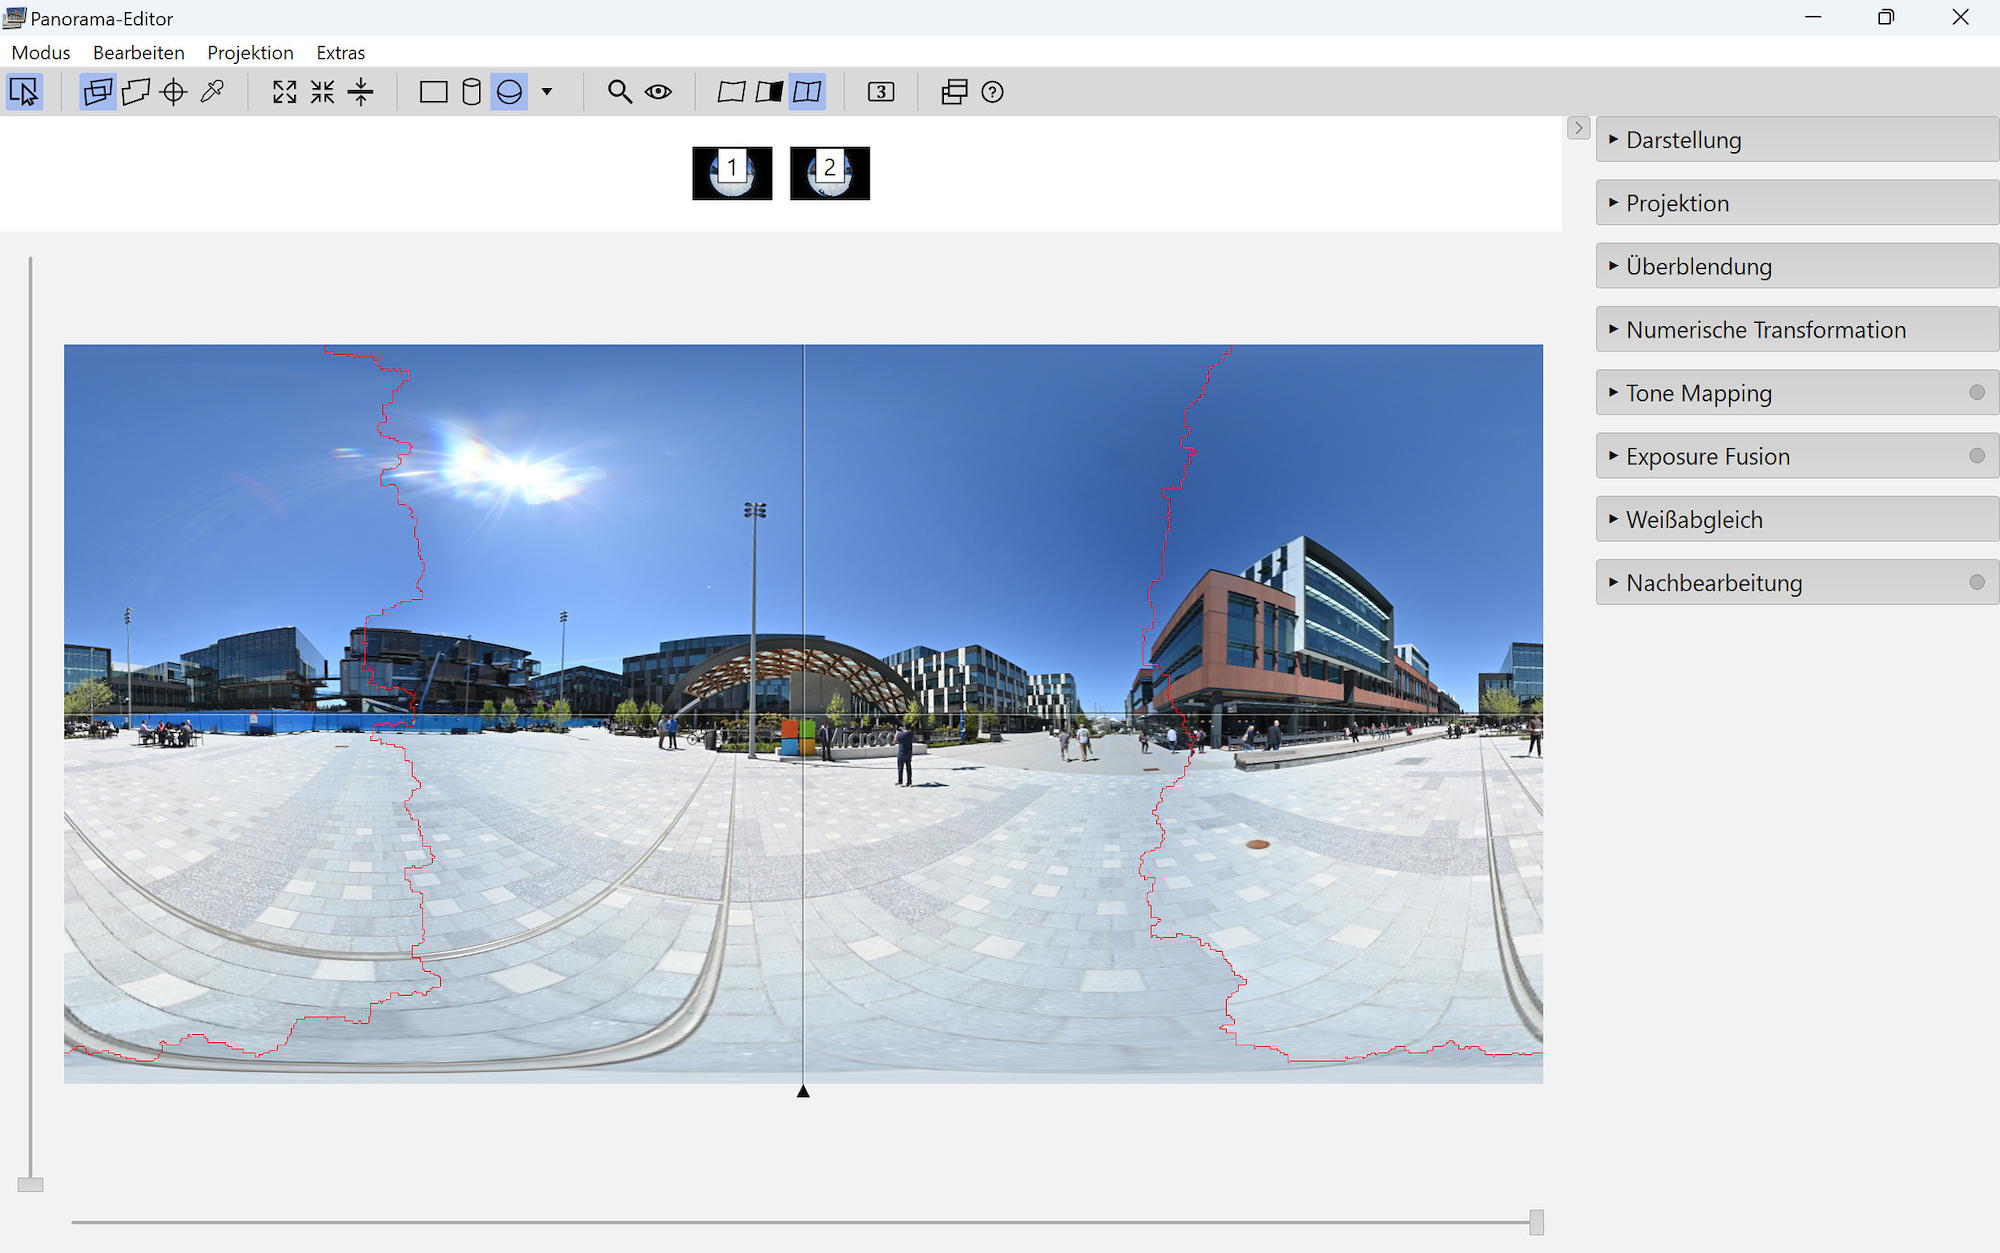
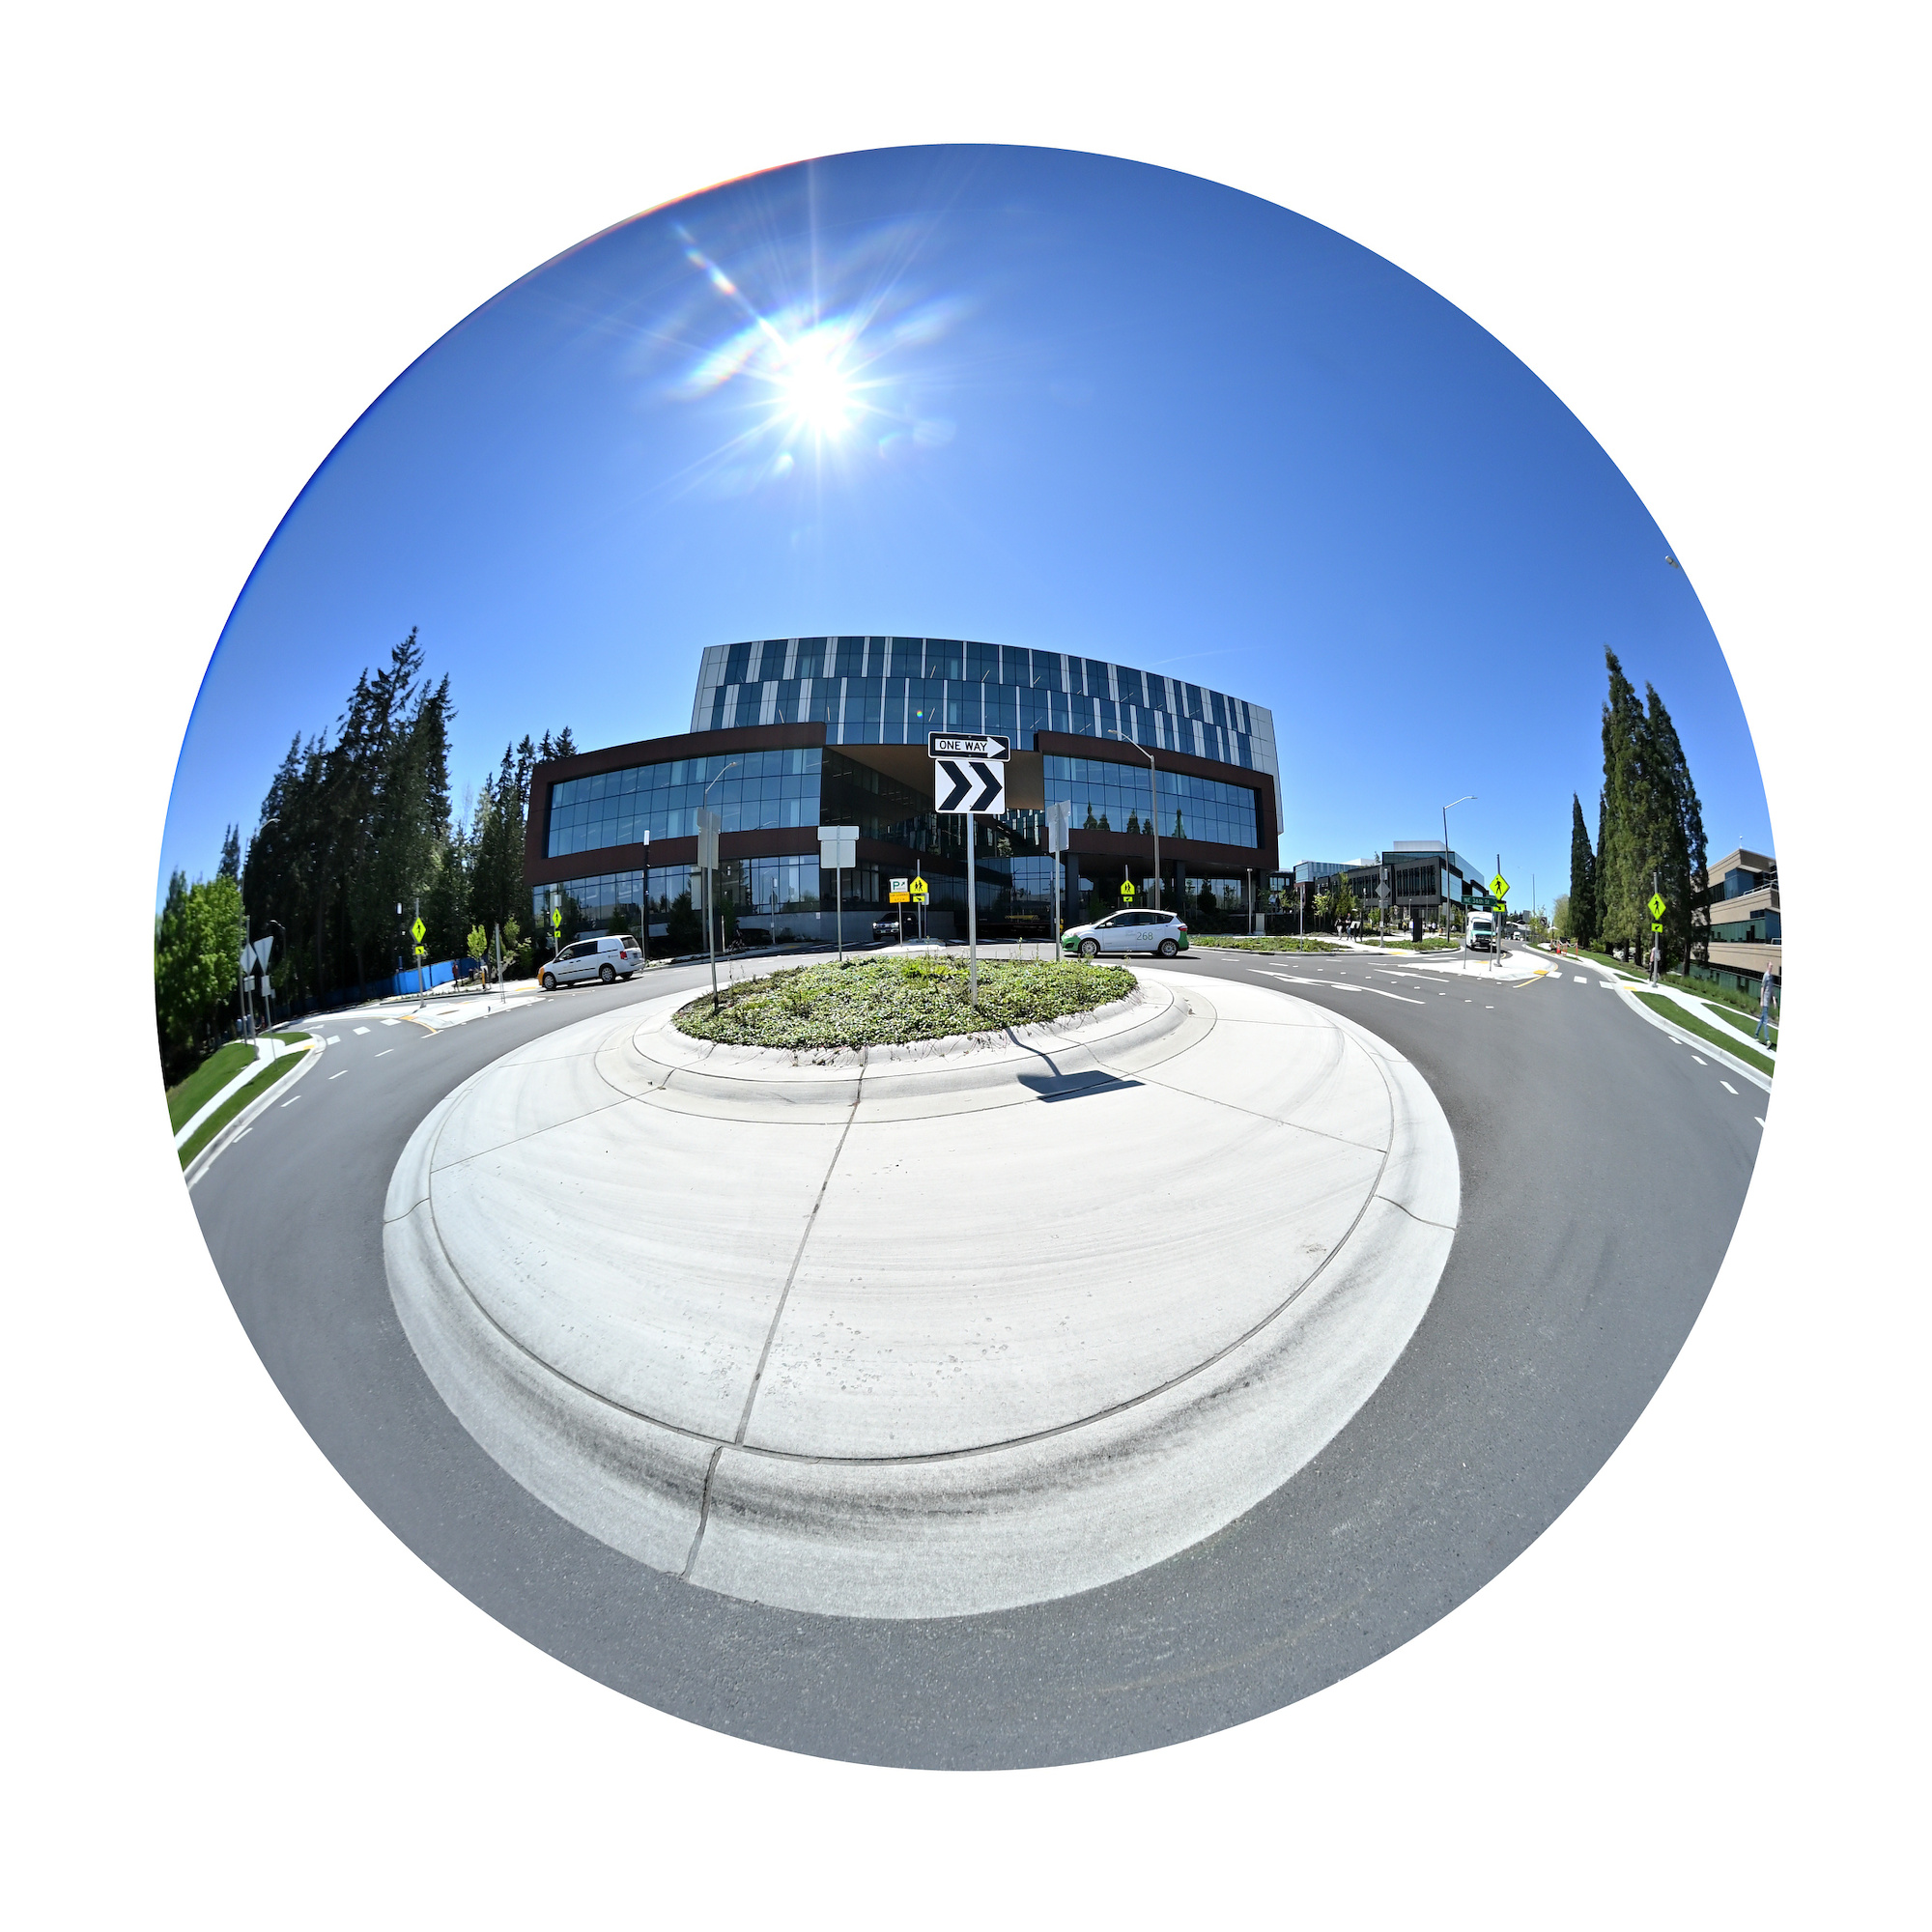
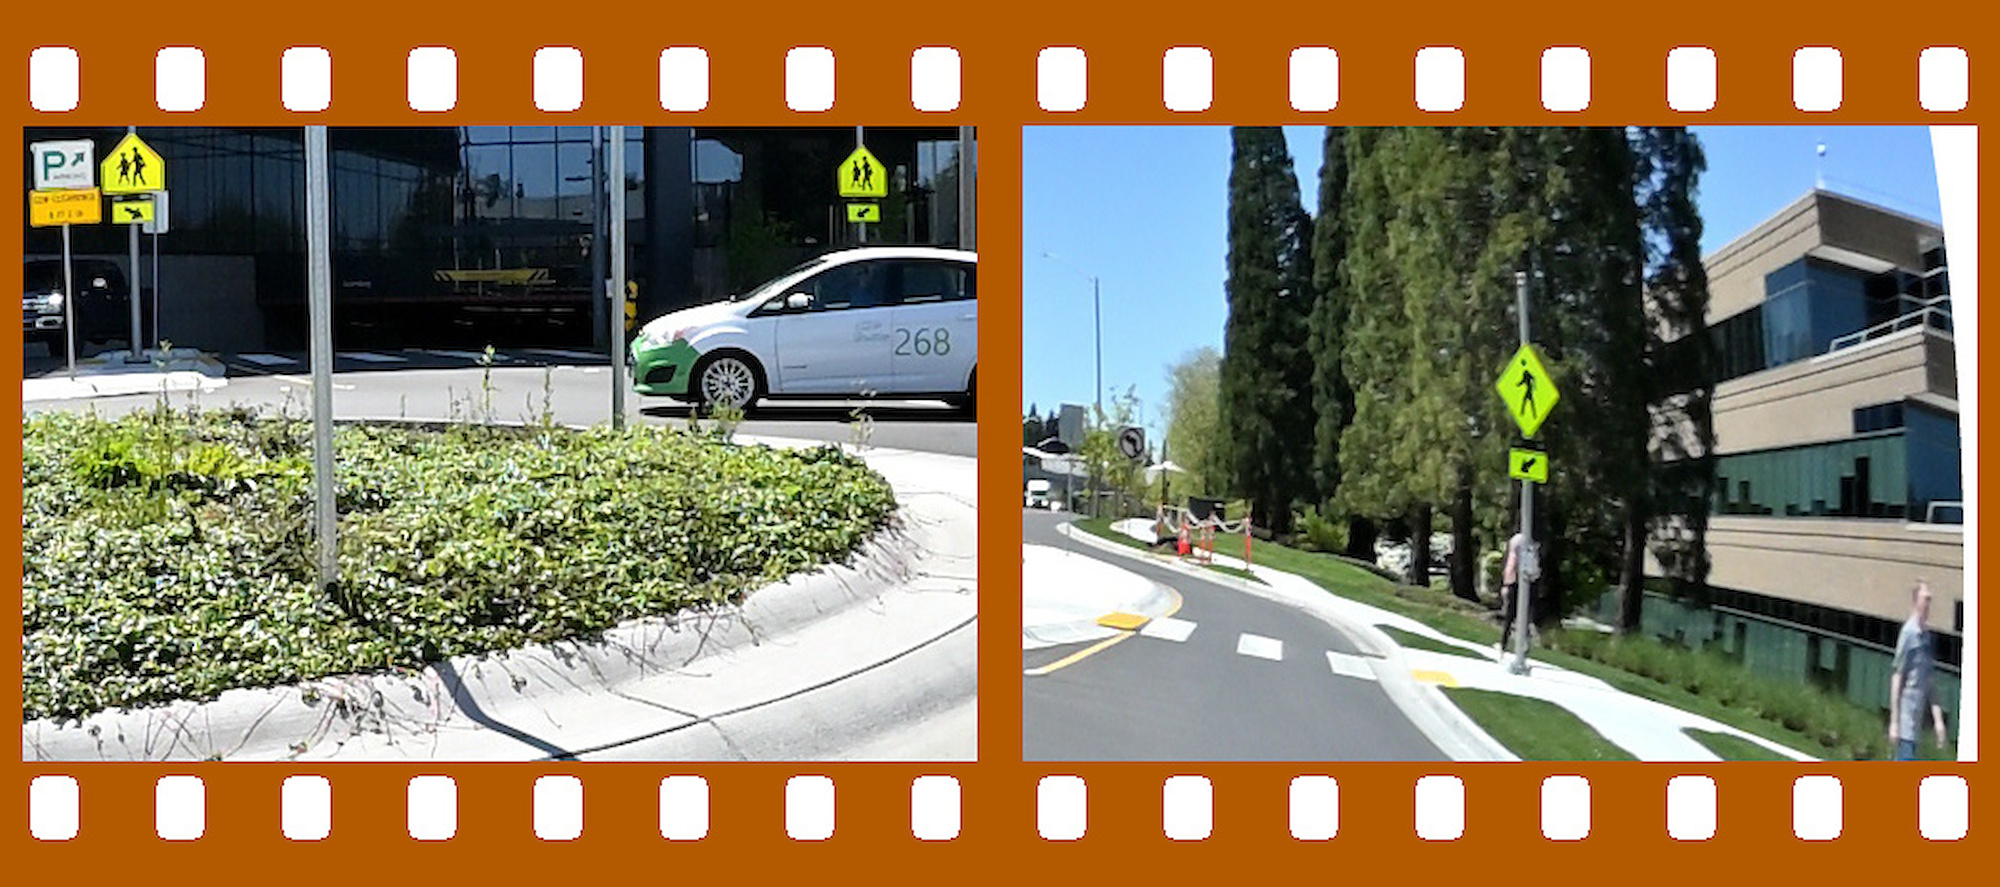
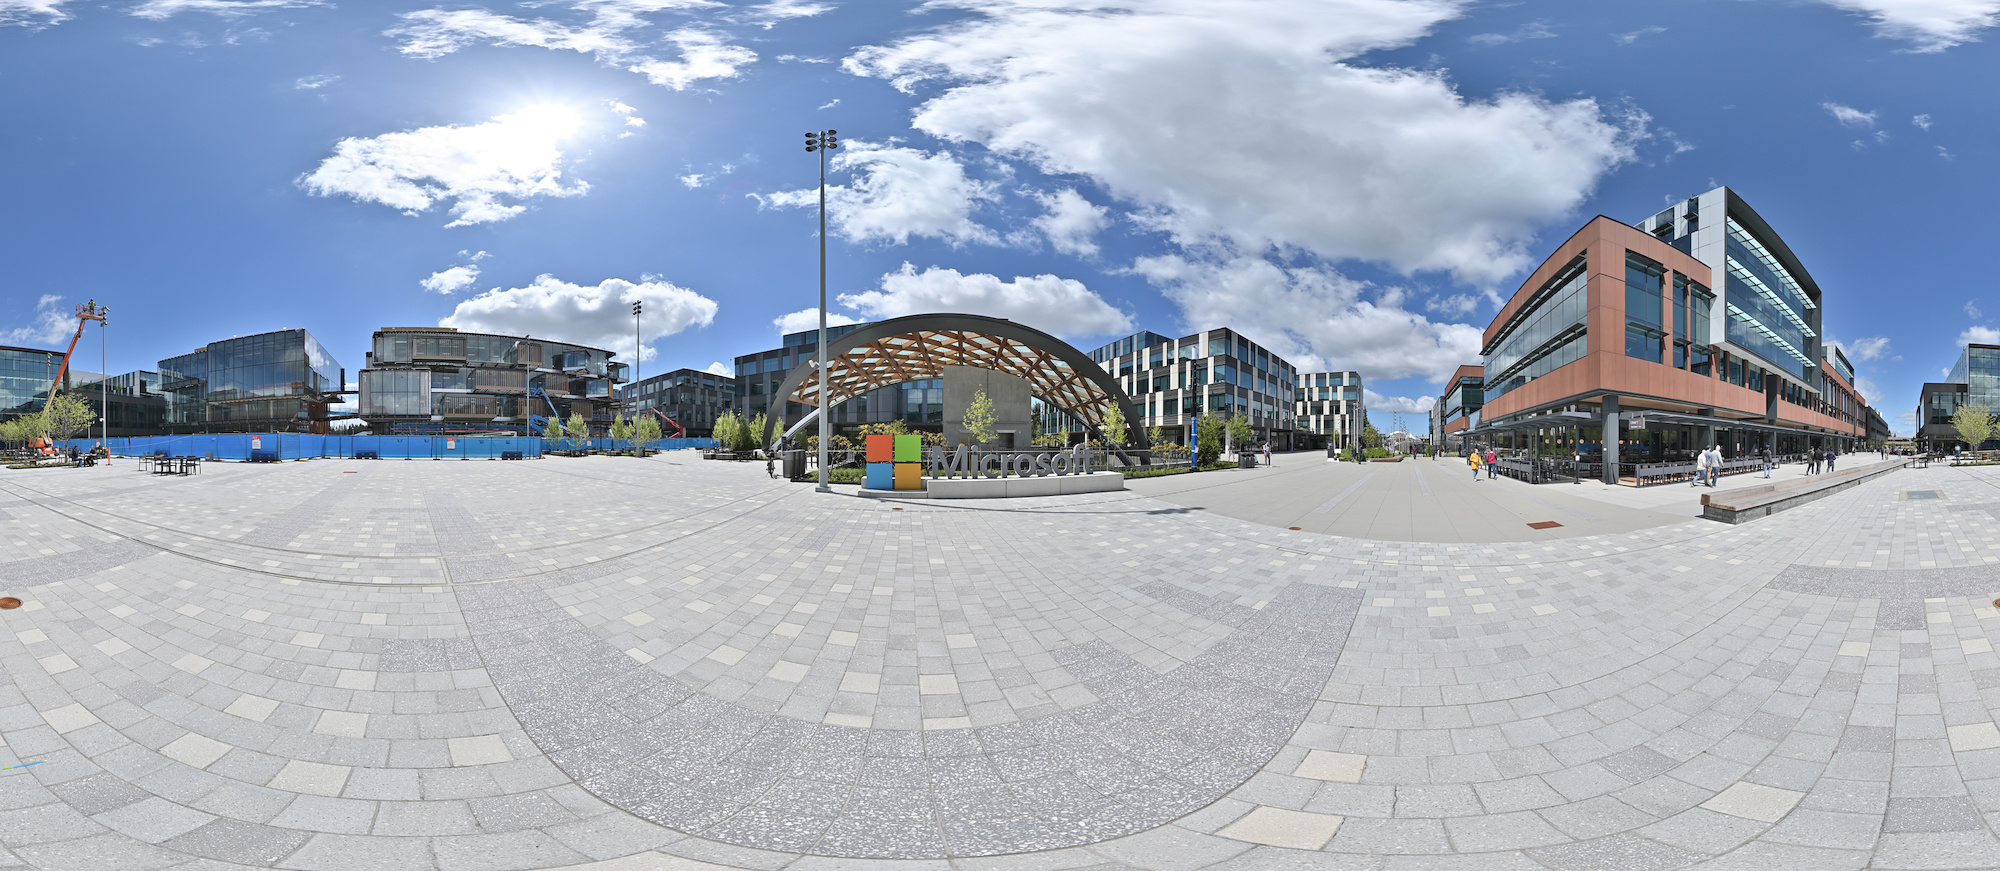
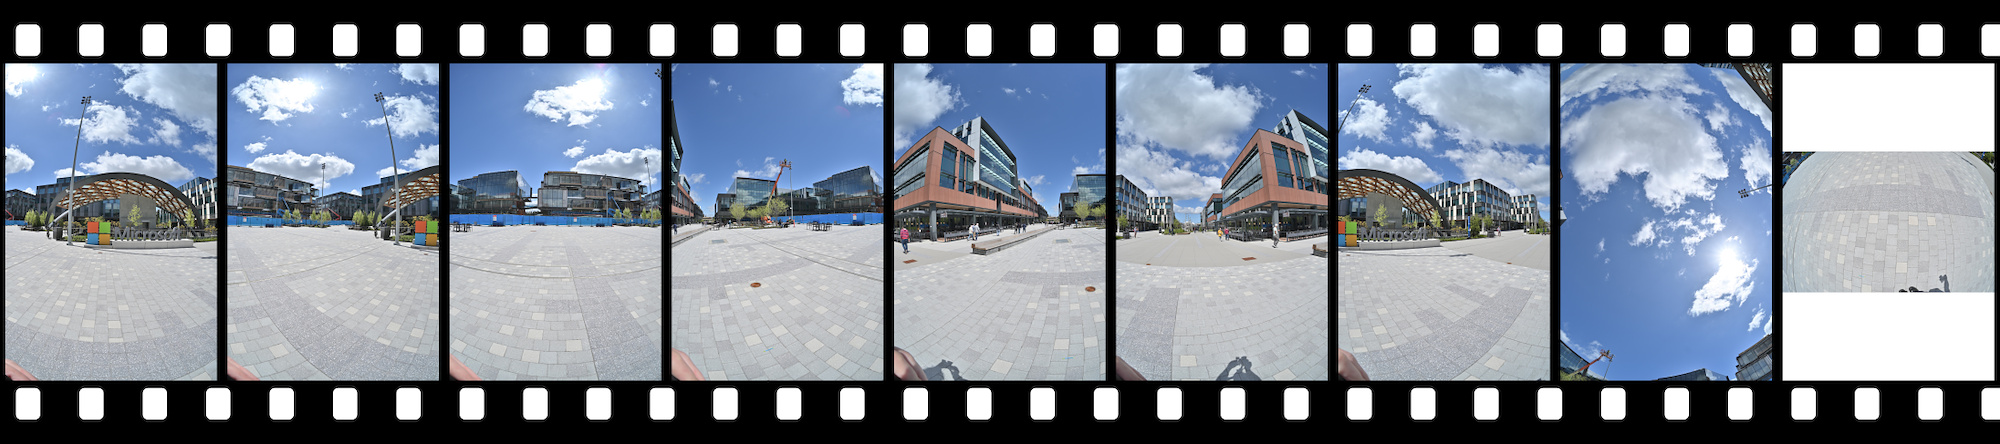
Microsoft East Campus, Redmond
This panorama is the 2024 contribution for the 'Evolution' event of WorldWidePanorama.
Interactive Panorama Microsoft East Campus Brücke

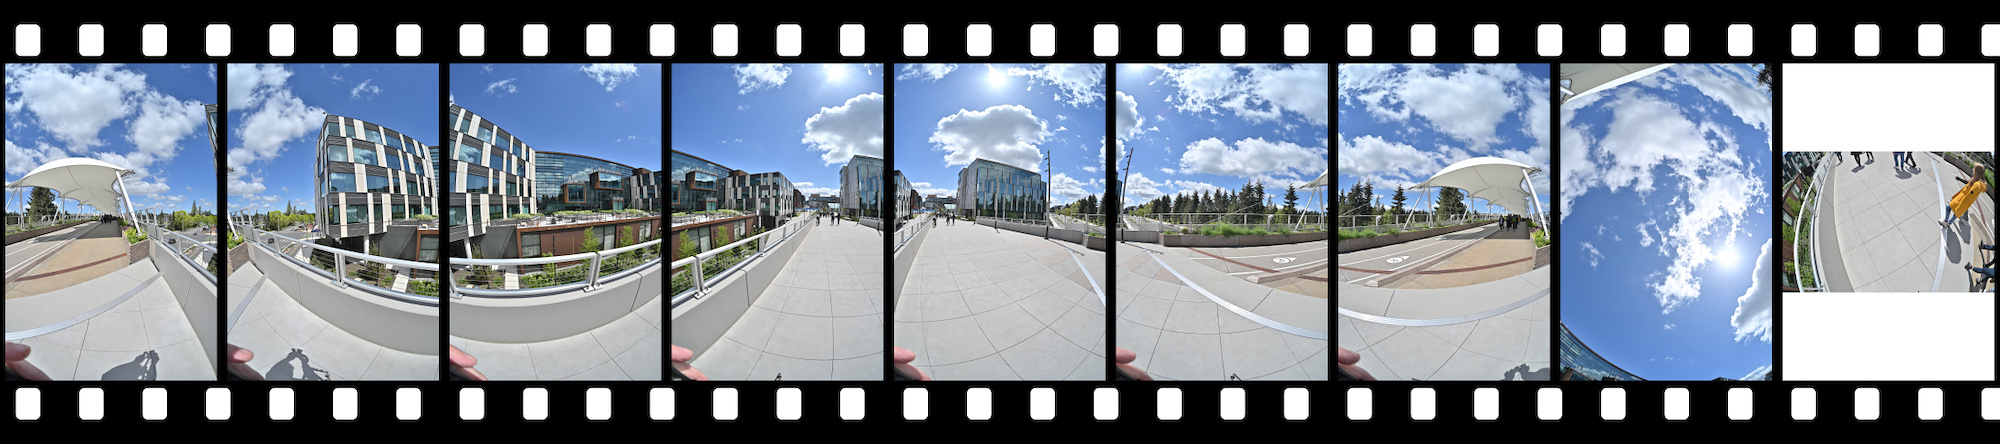

This panorama is the 2024 contribution for the '20 Years' event of WorldWidePanorama. This location was the main entrance of the old Campus.
Interactive Panorama Microsoft East Campus Bldg 9,10,11
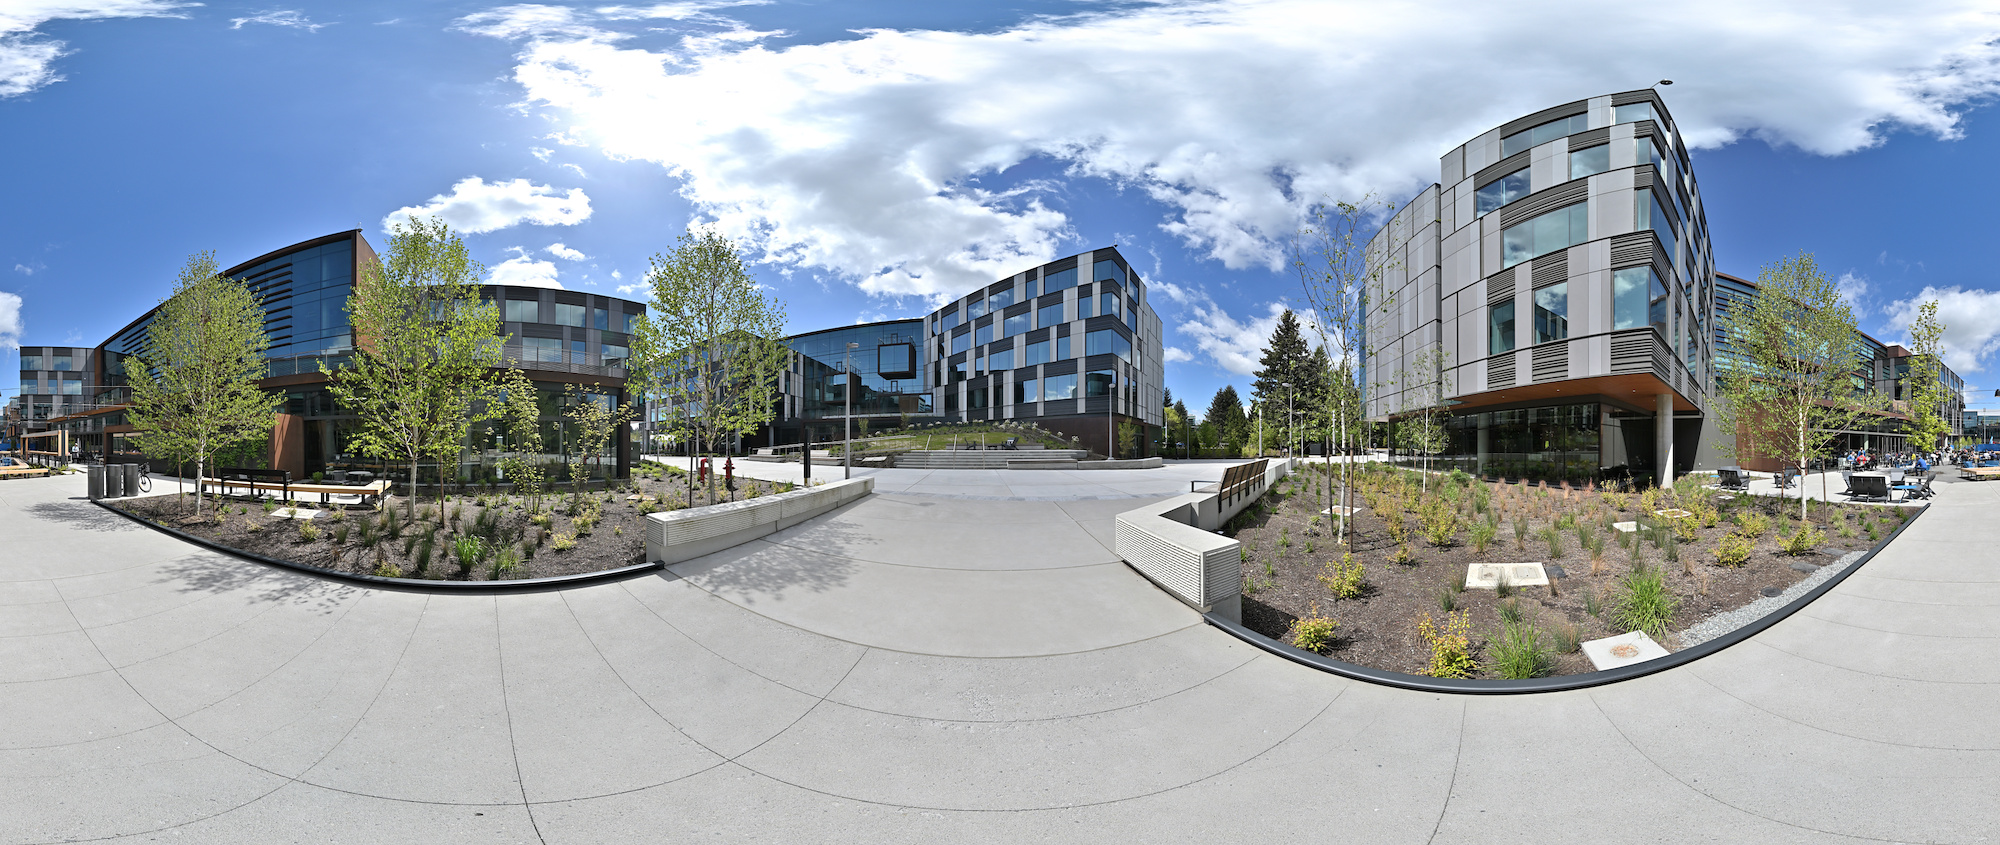
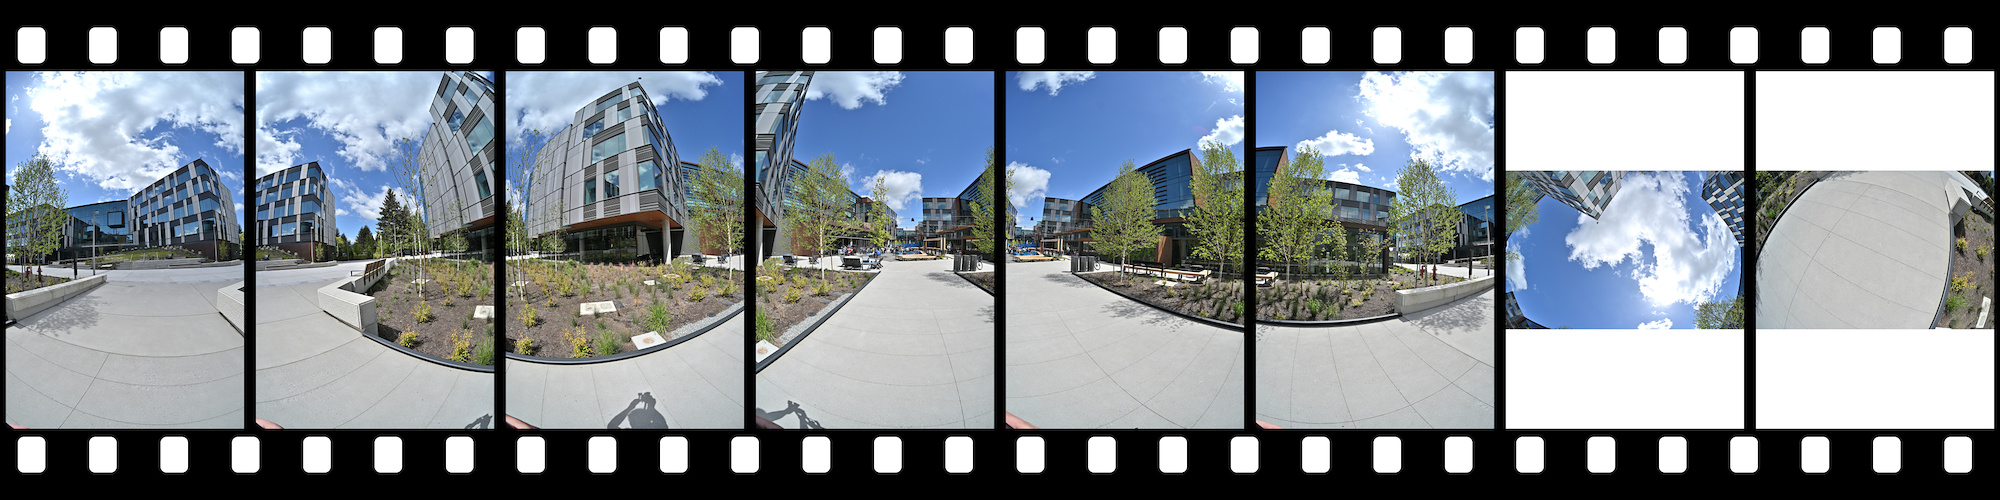
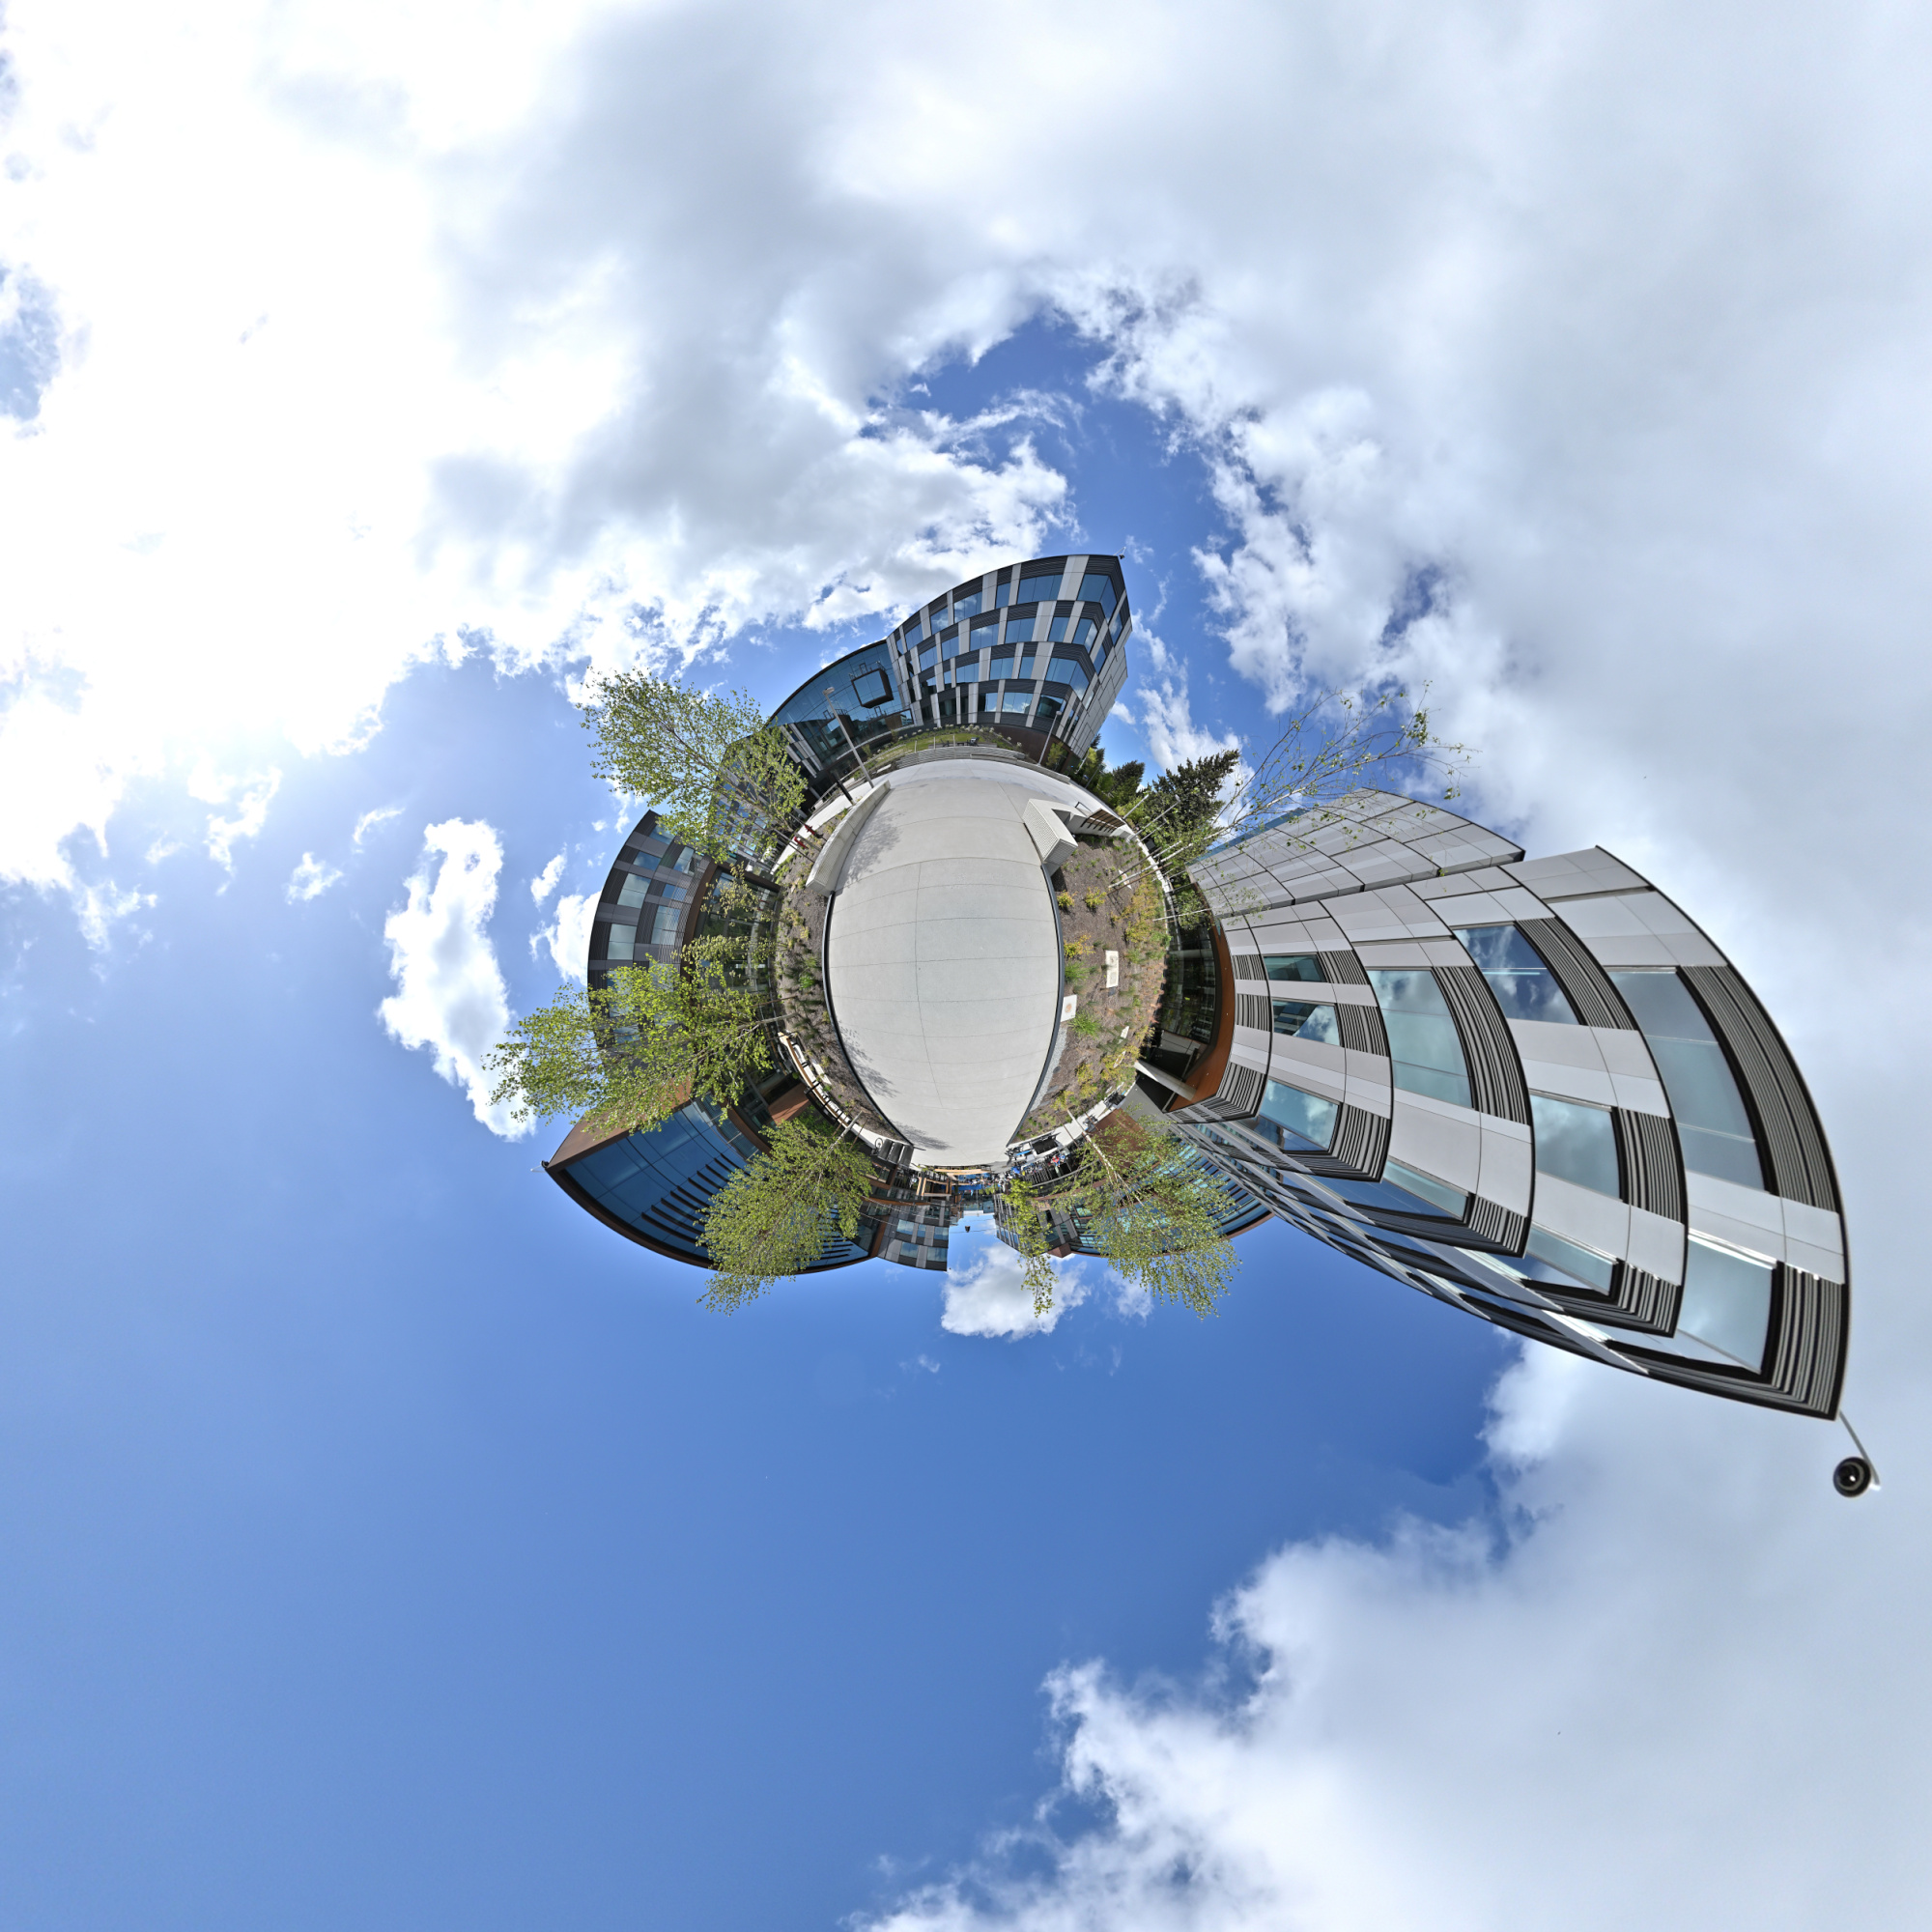
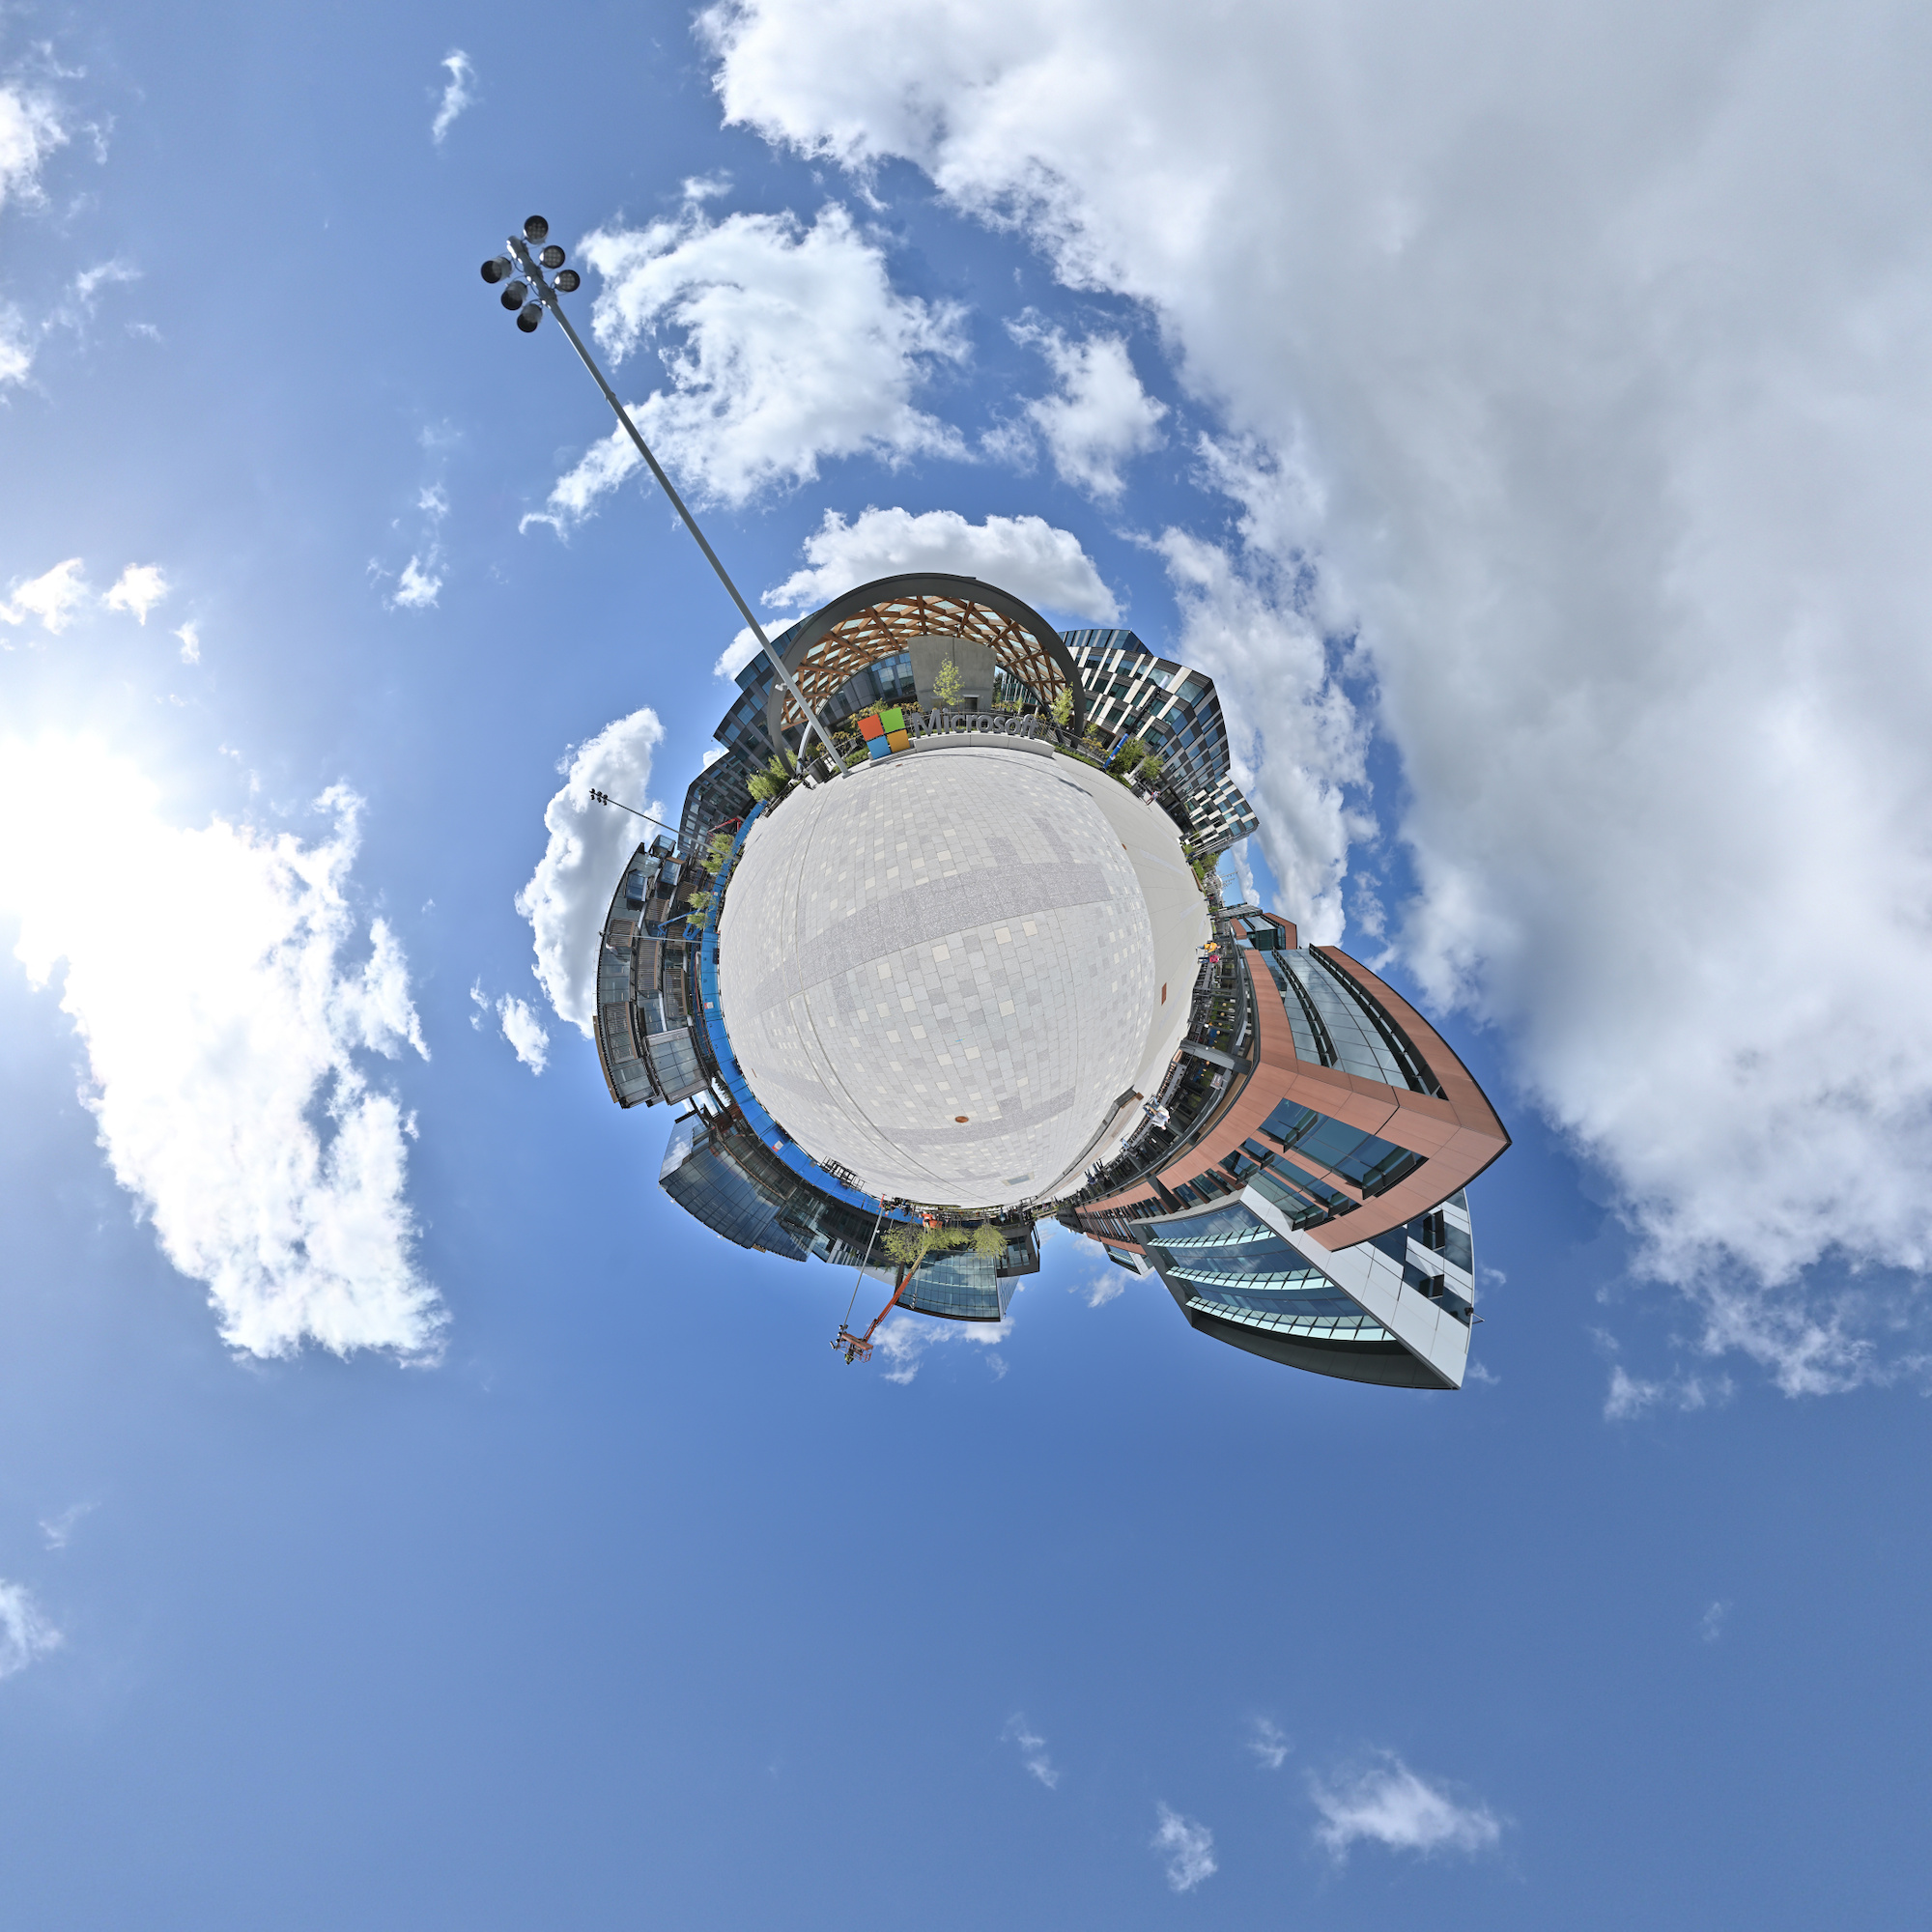
Interactive Panorama Microsoft East Campus Plaza
-
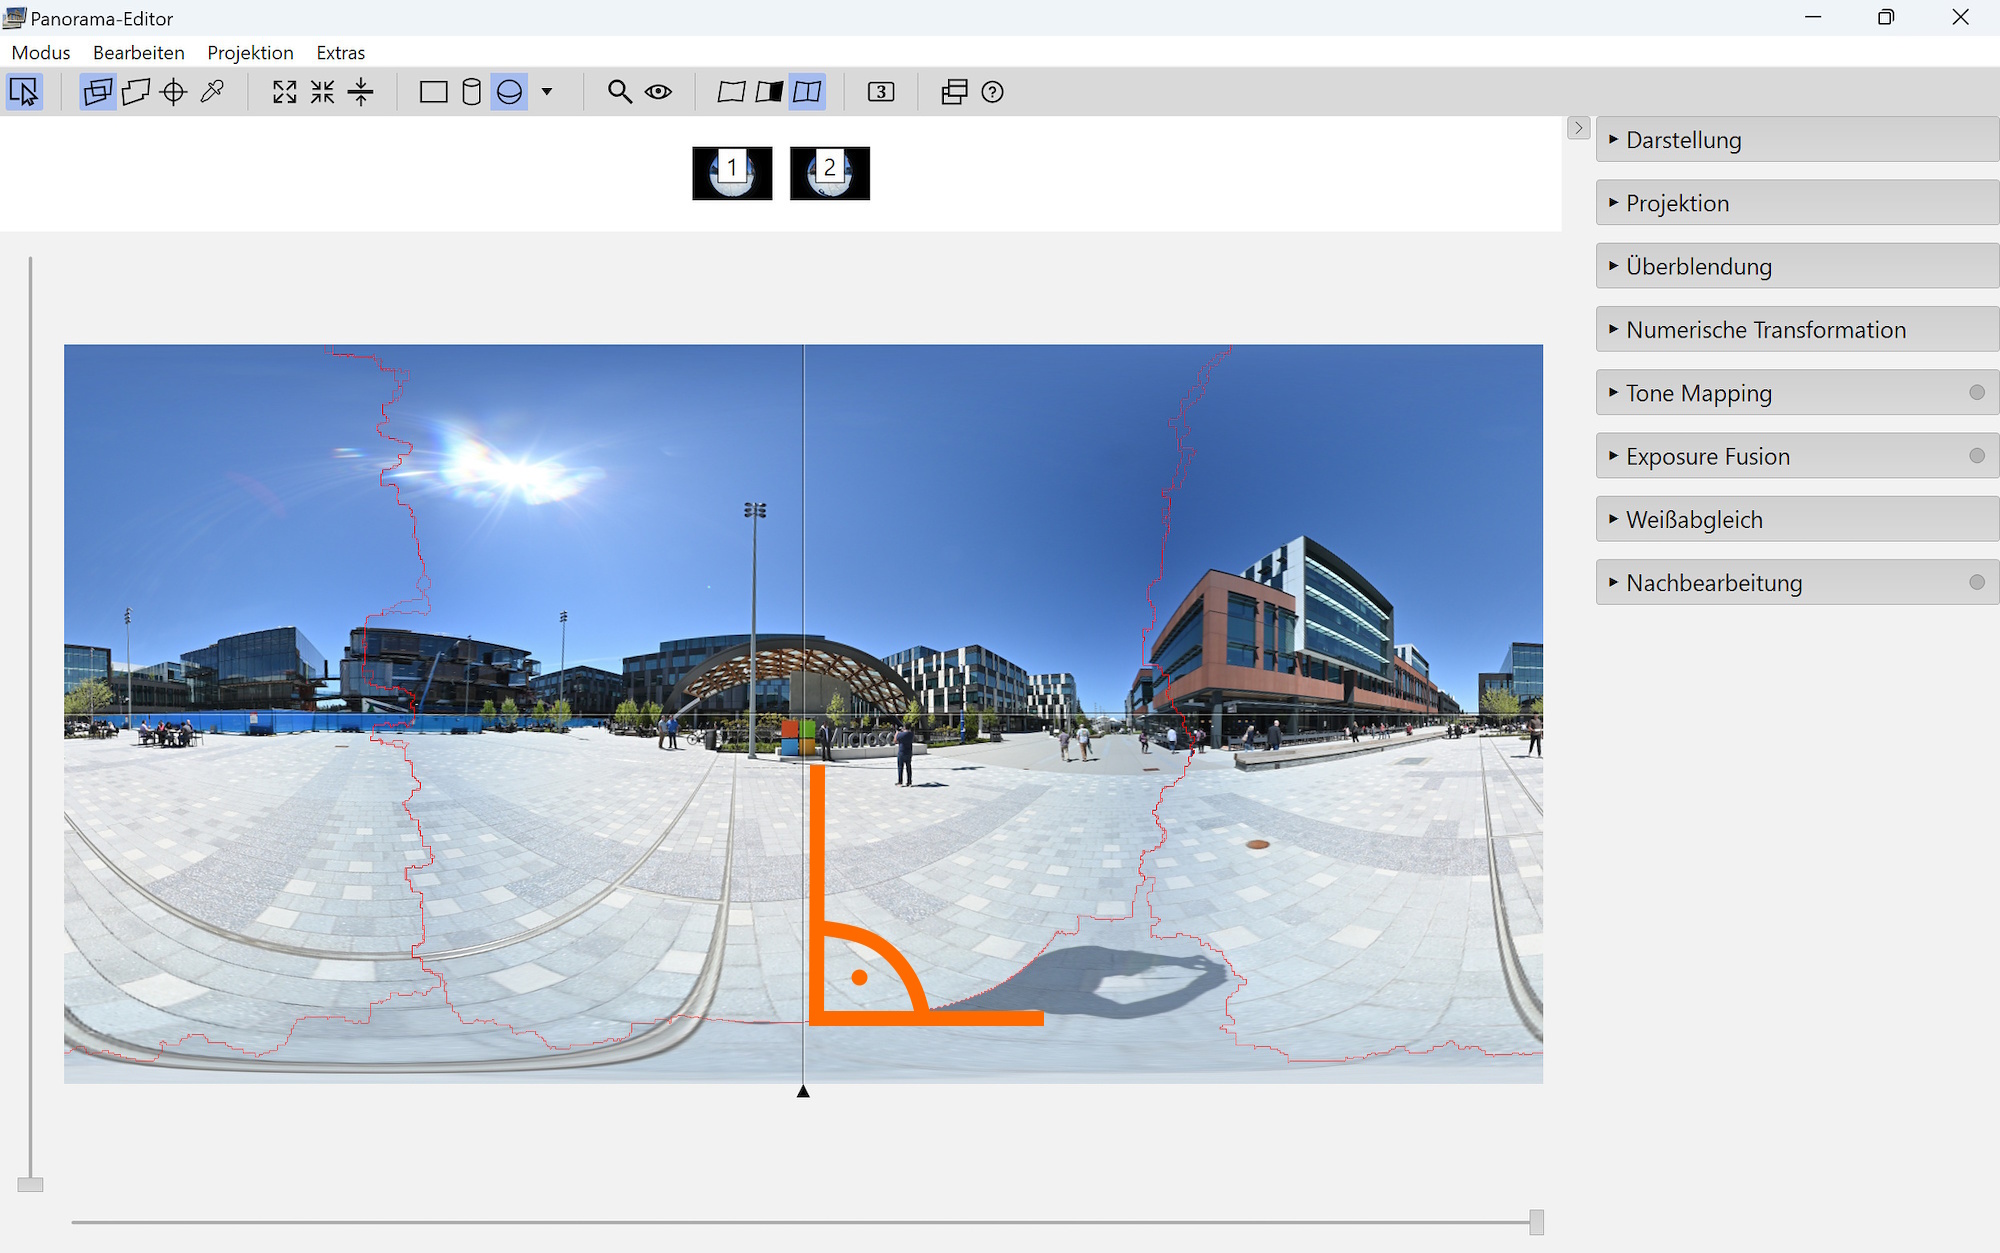
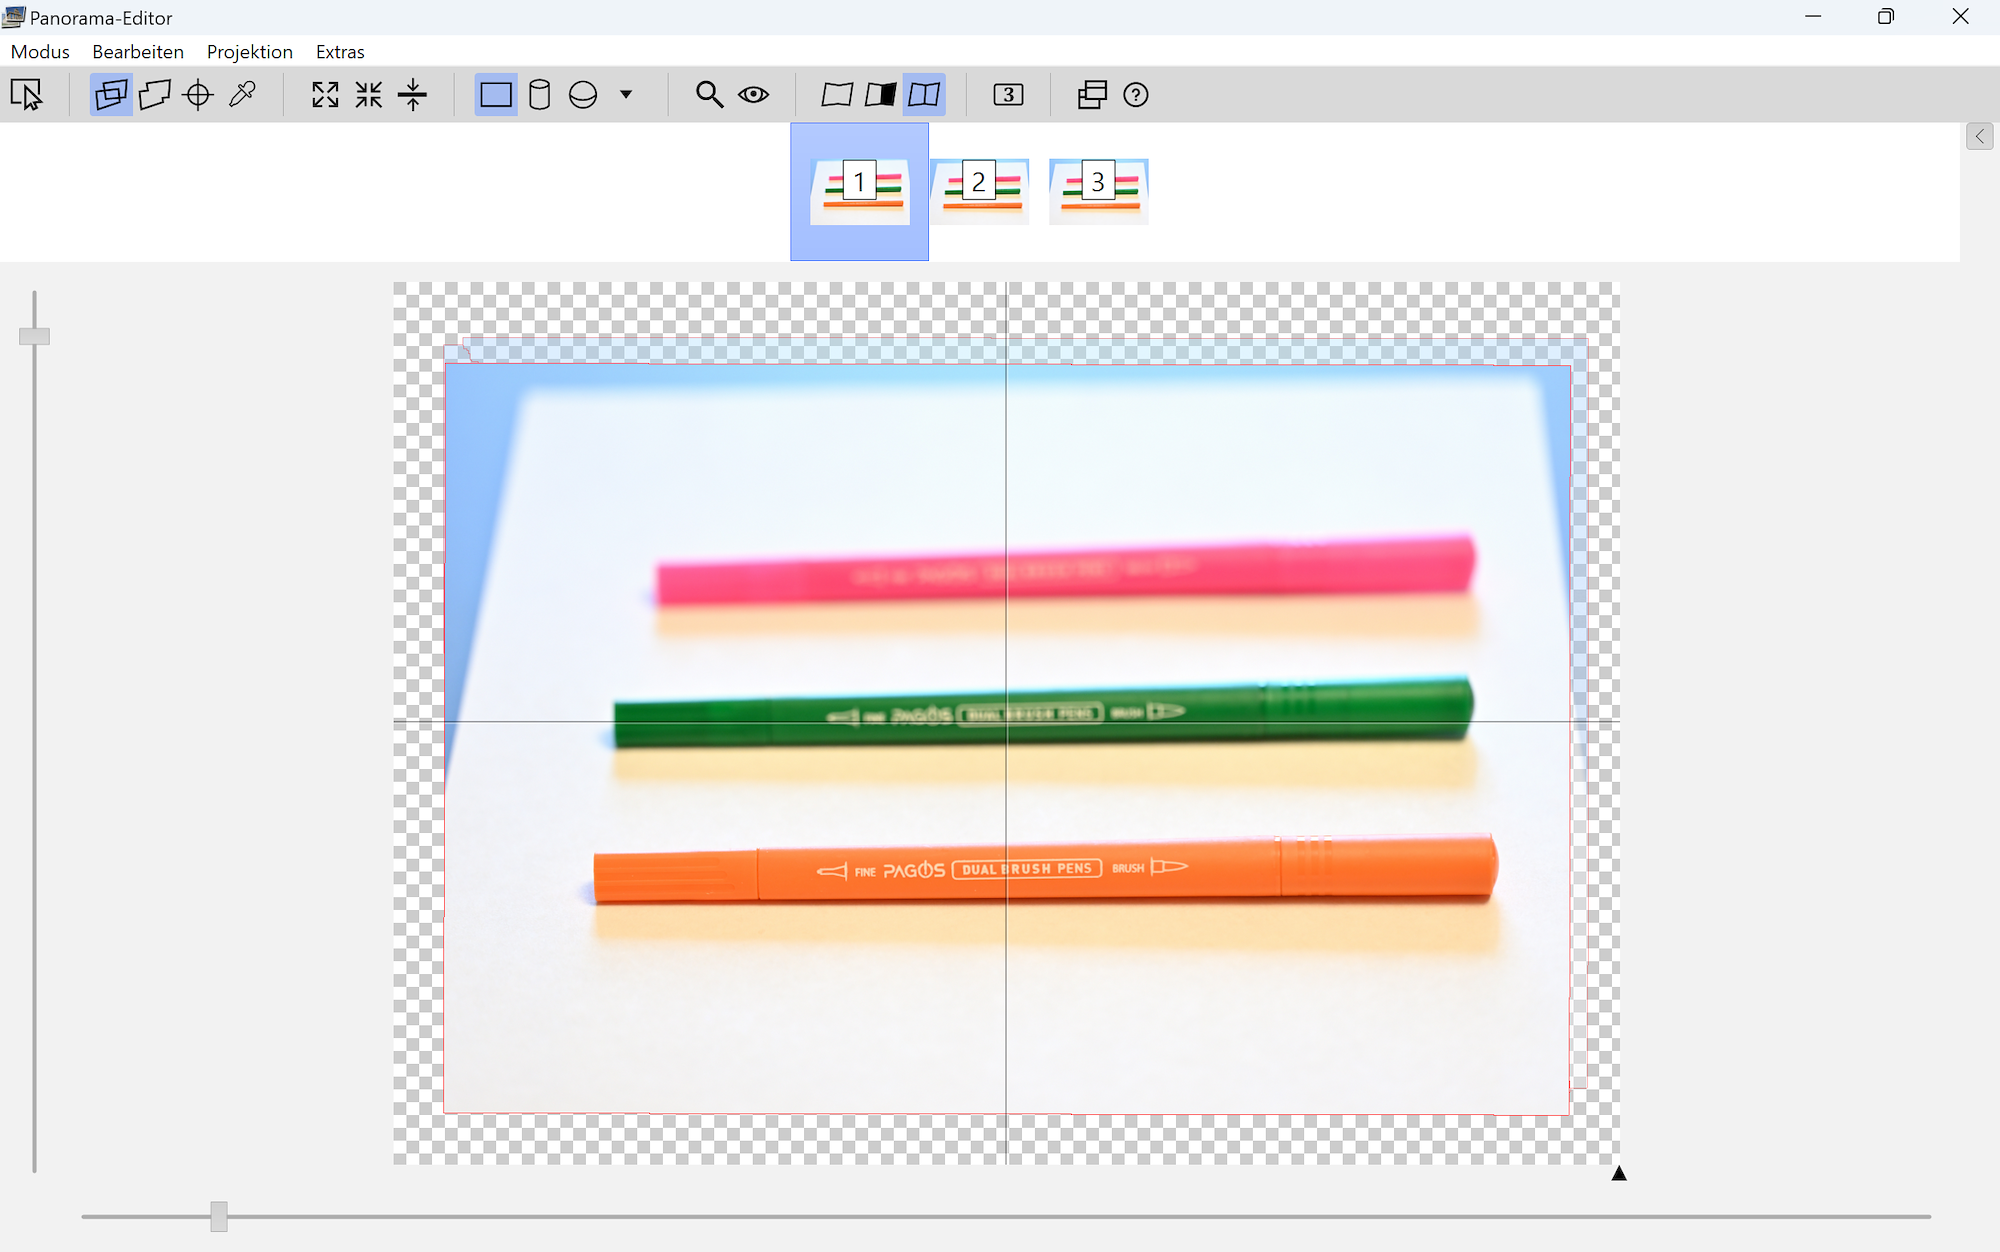
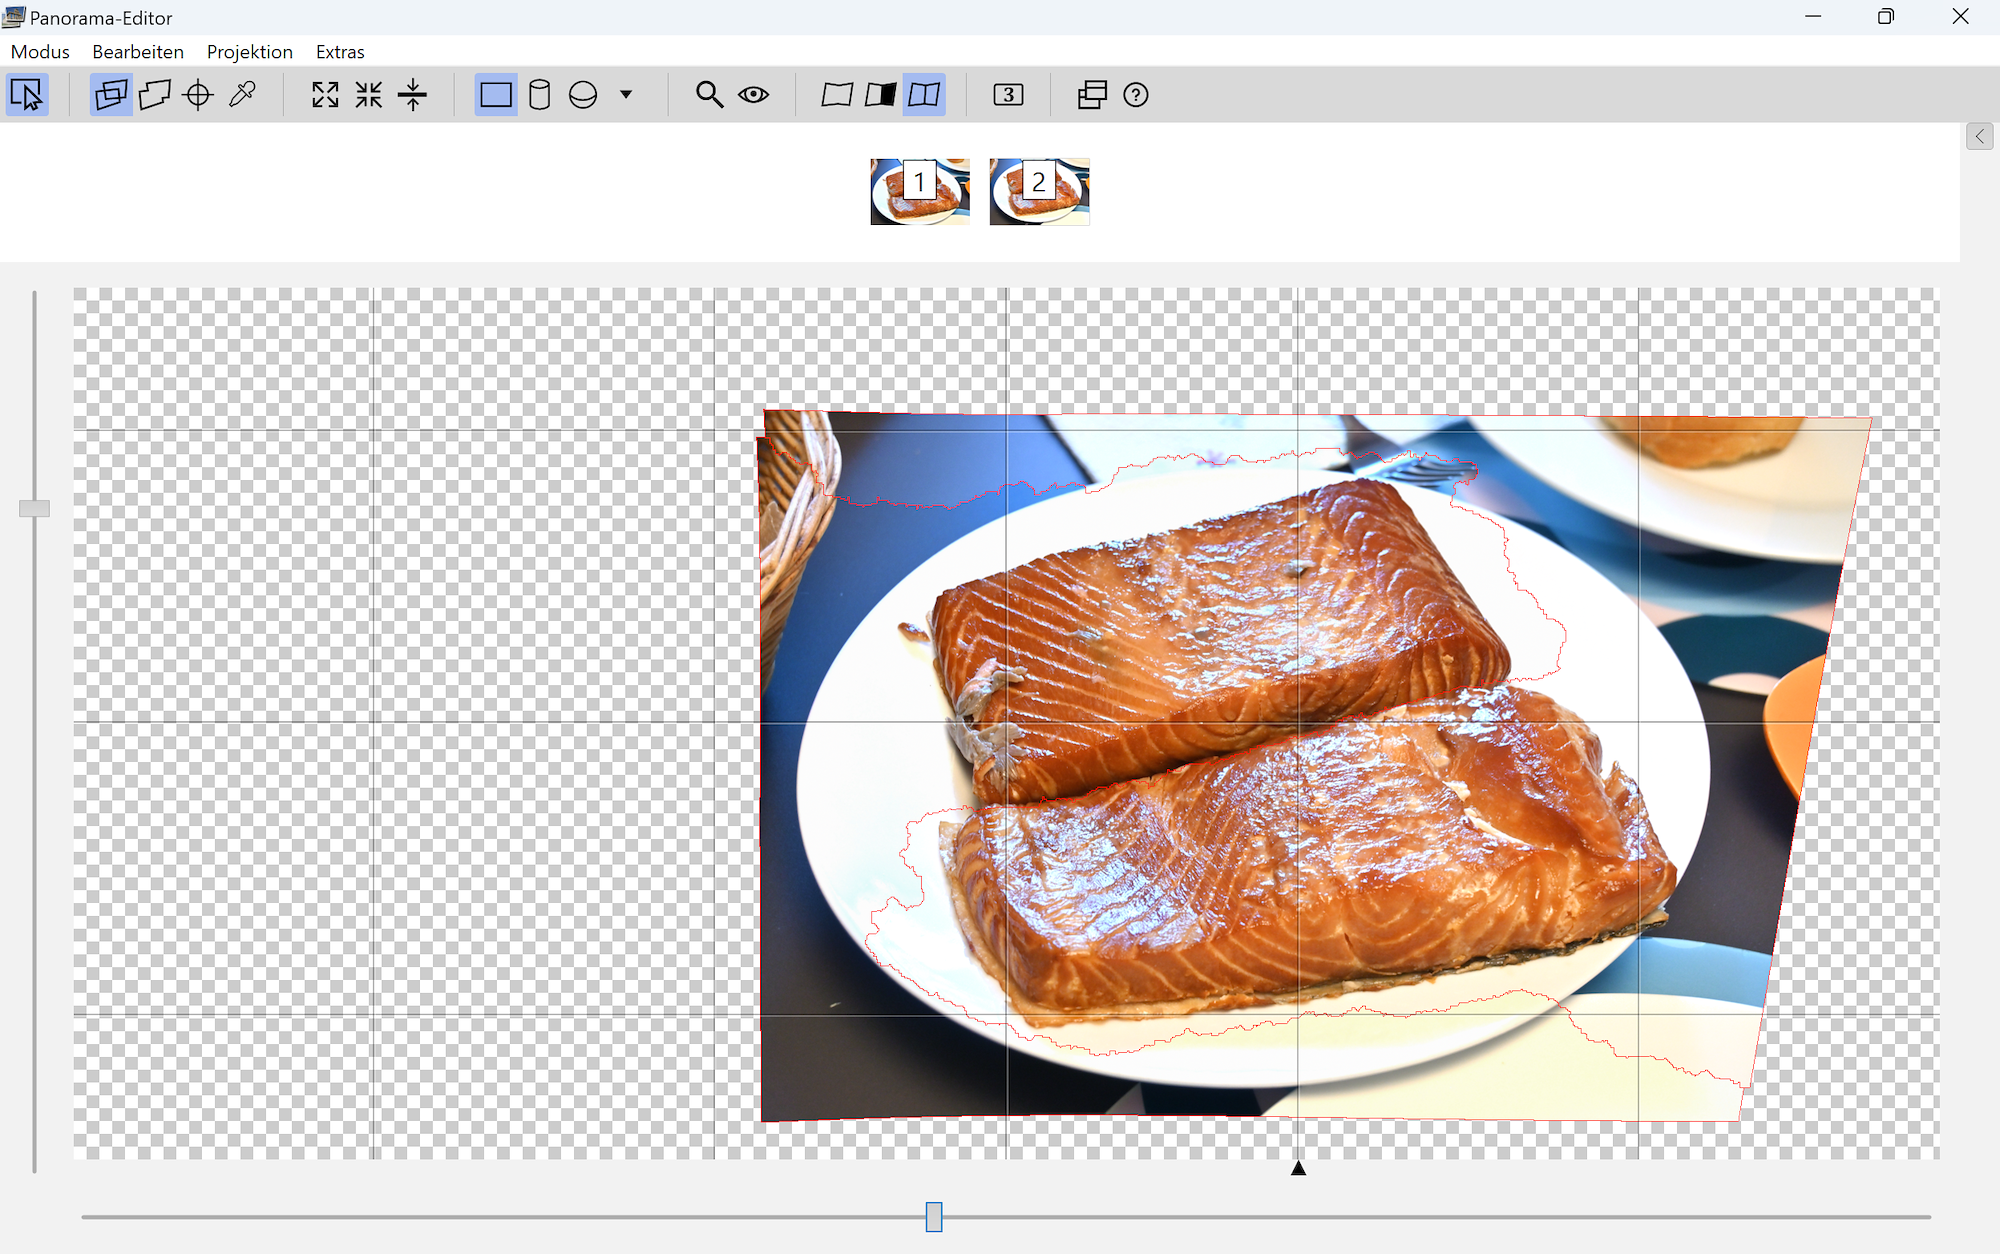
Combine pictures with PTGui, Focus stacking
The mask feature in PTGui simplifies the process of selecting areas from different images. This is not just for overlapping regions in panoramic photos, but it can also be applied to basic focus stacking.
Focus stacking involves taking multiple pictures with different focus areas.
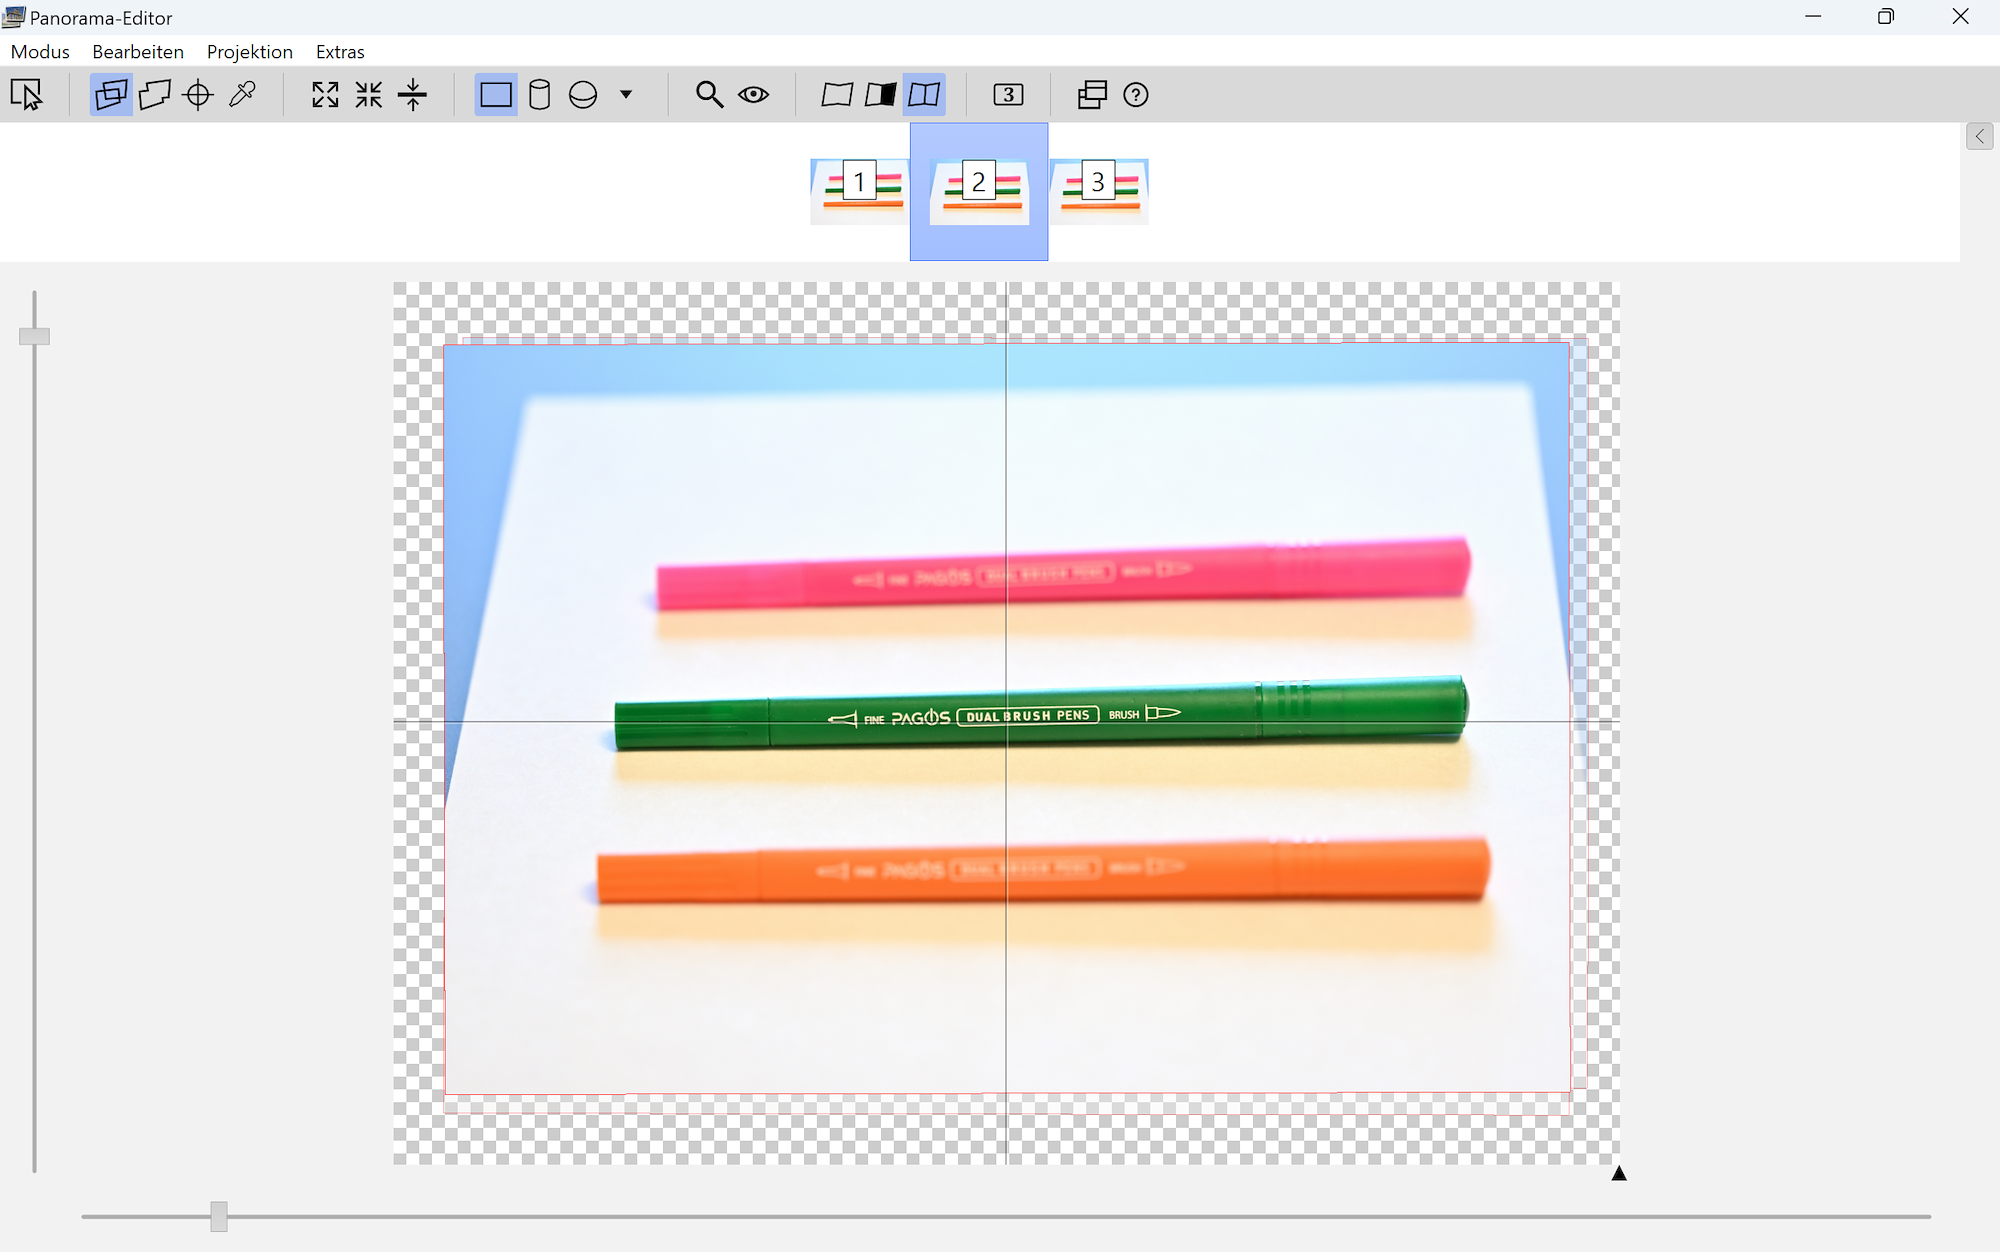
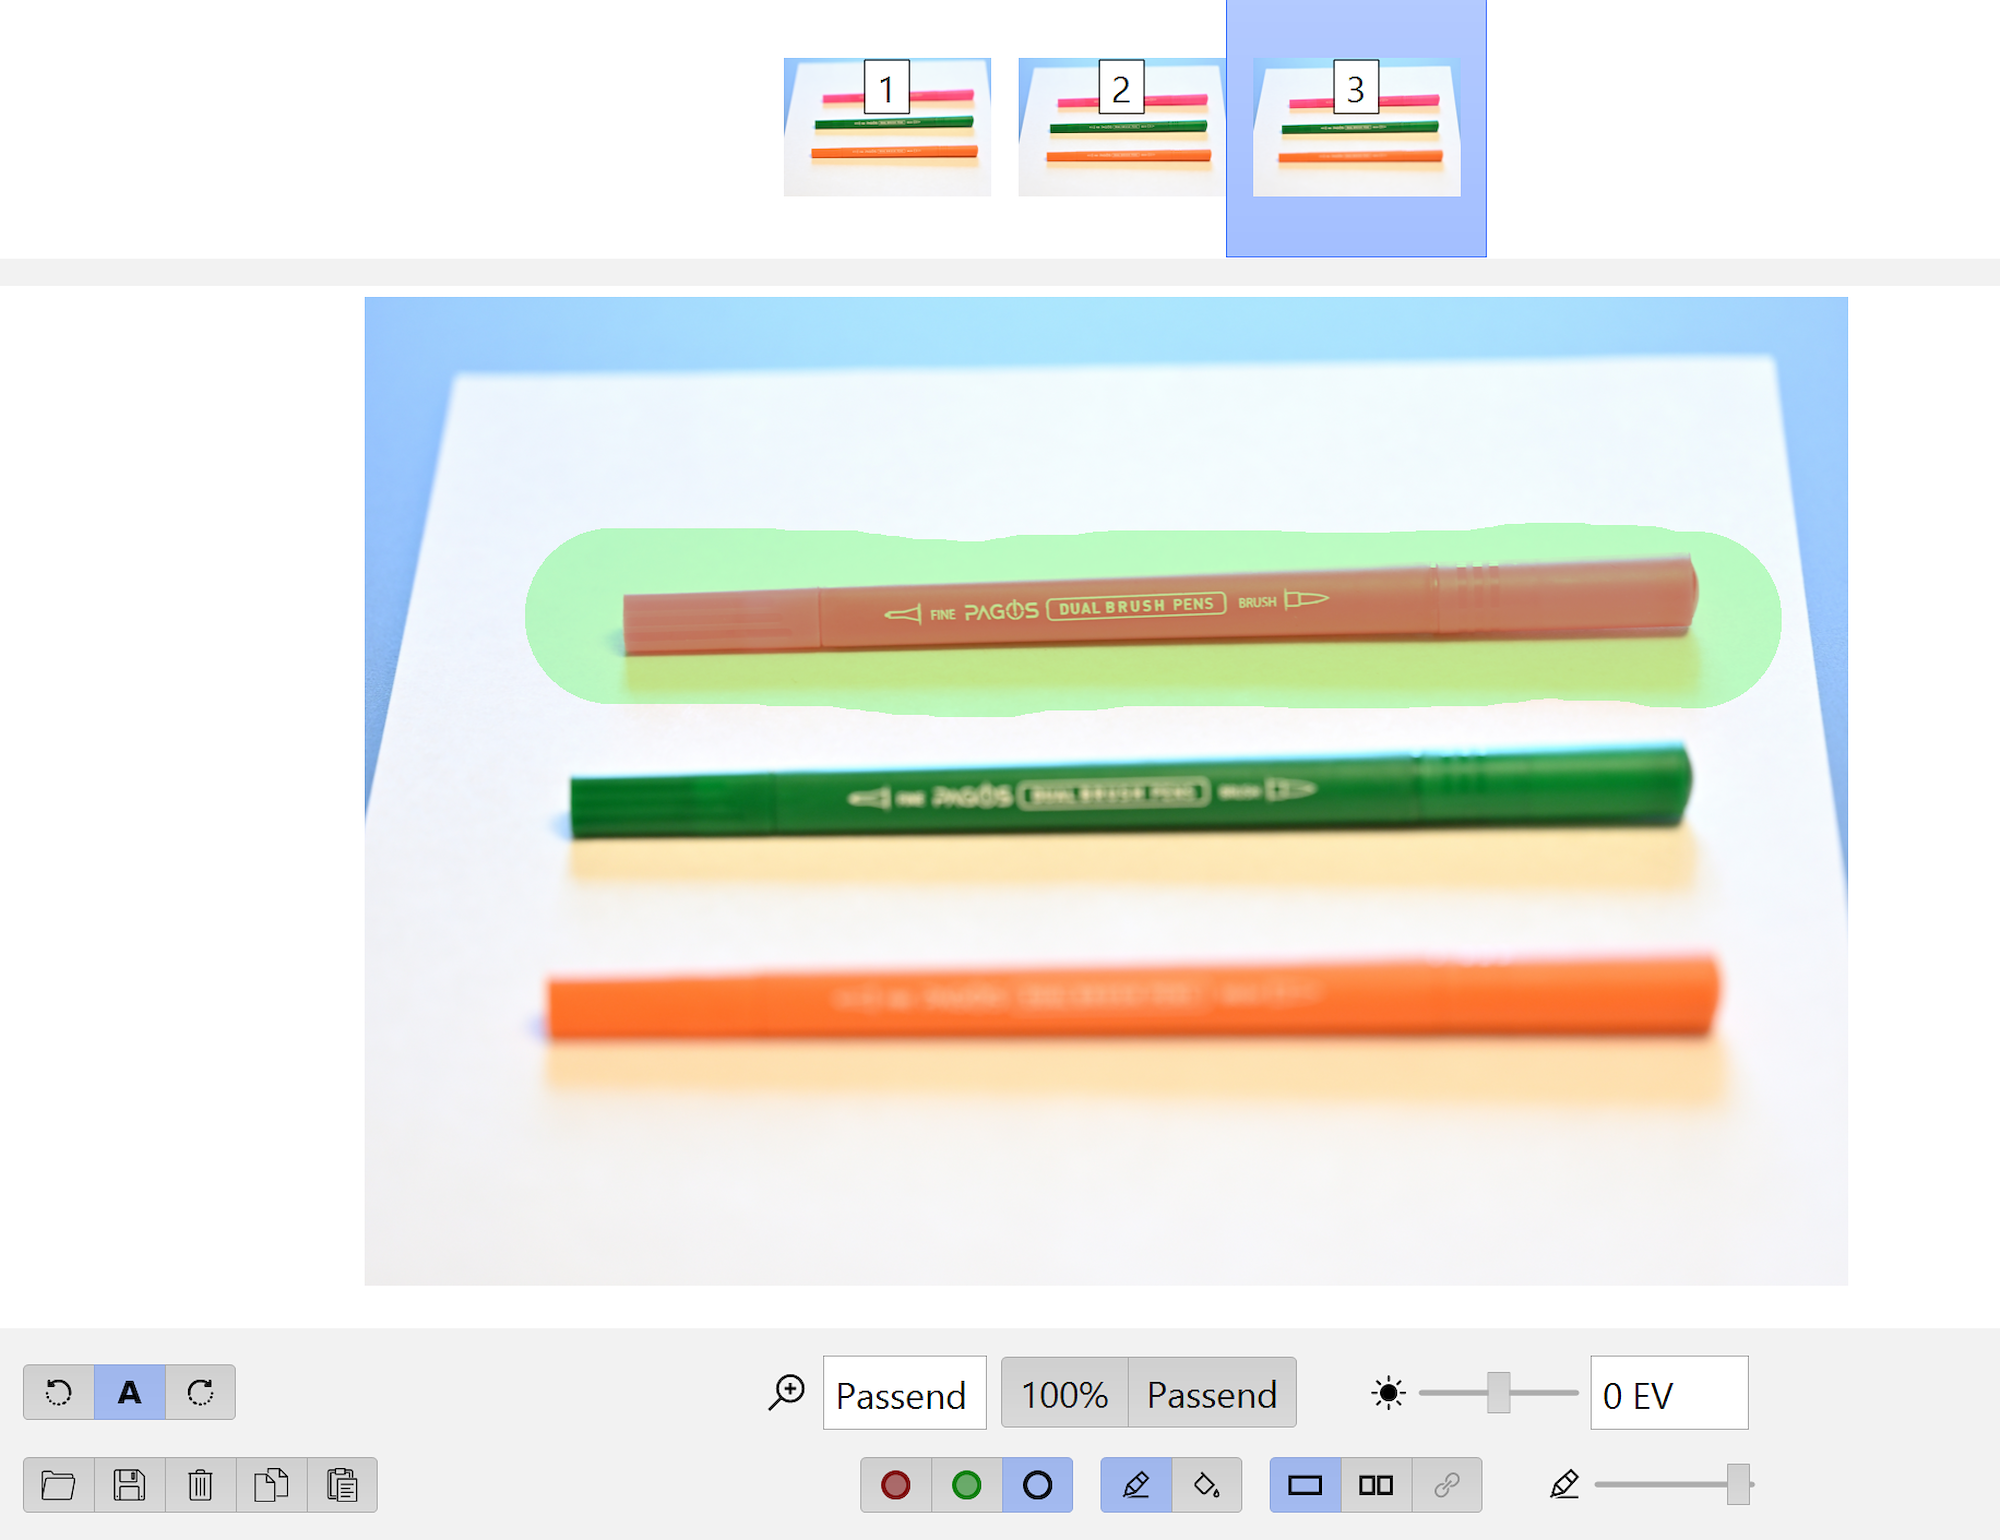
To achieve focus across all objects, a small aperture is needed, but this may not be ideal or sufficient under certain lighting conditions to achieve the required depth of field. Thus, when not all objects are in focus, focus stacking becomes a practical solution.For instance, consider these pictures each with a different focus point:
Orange in focus:
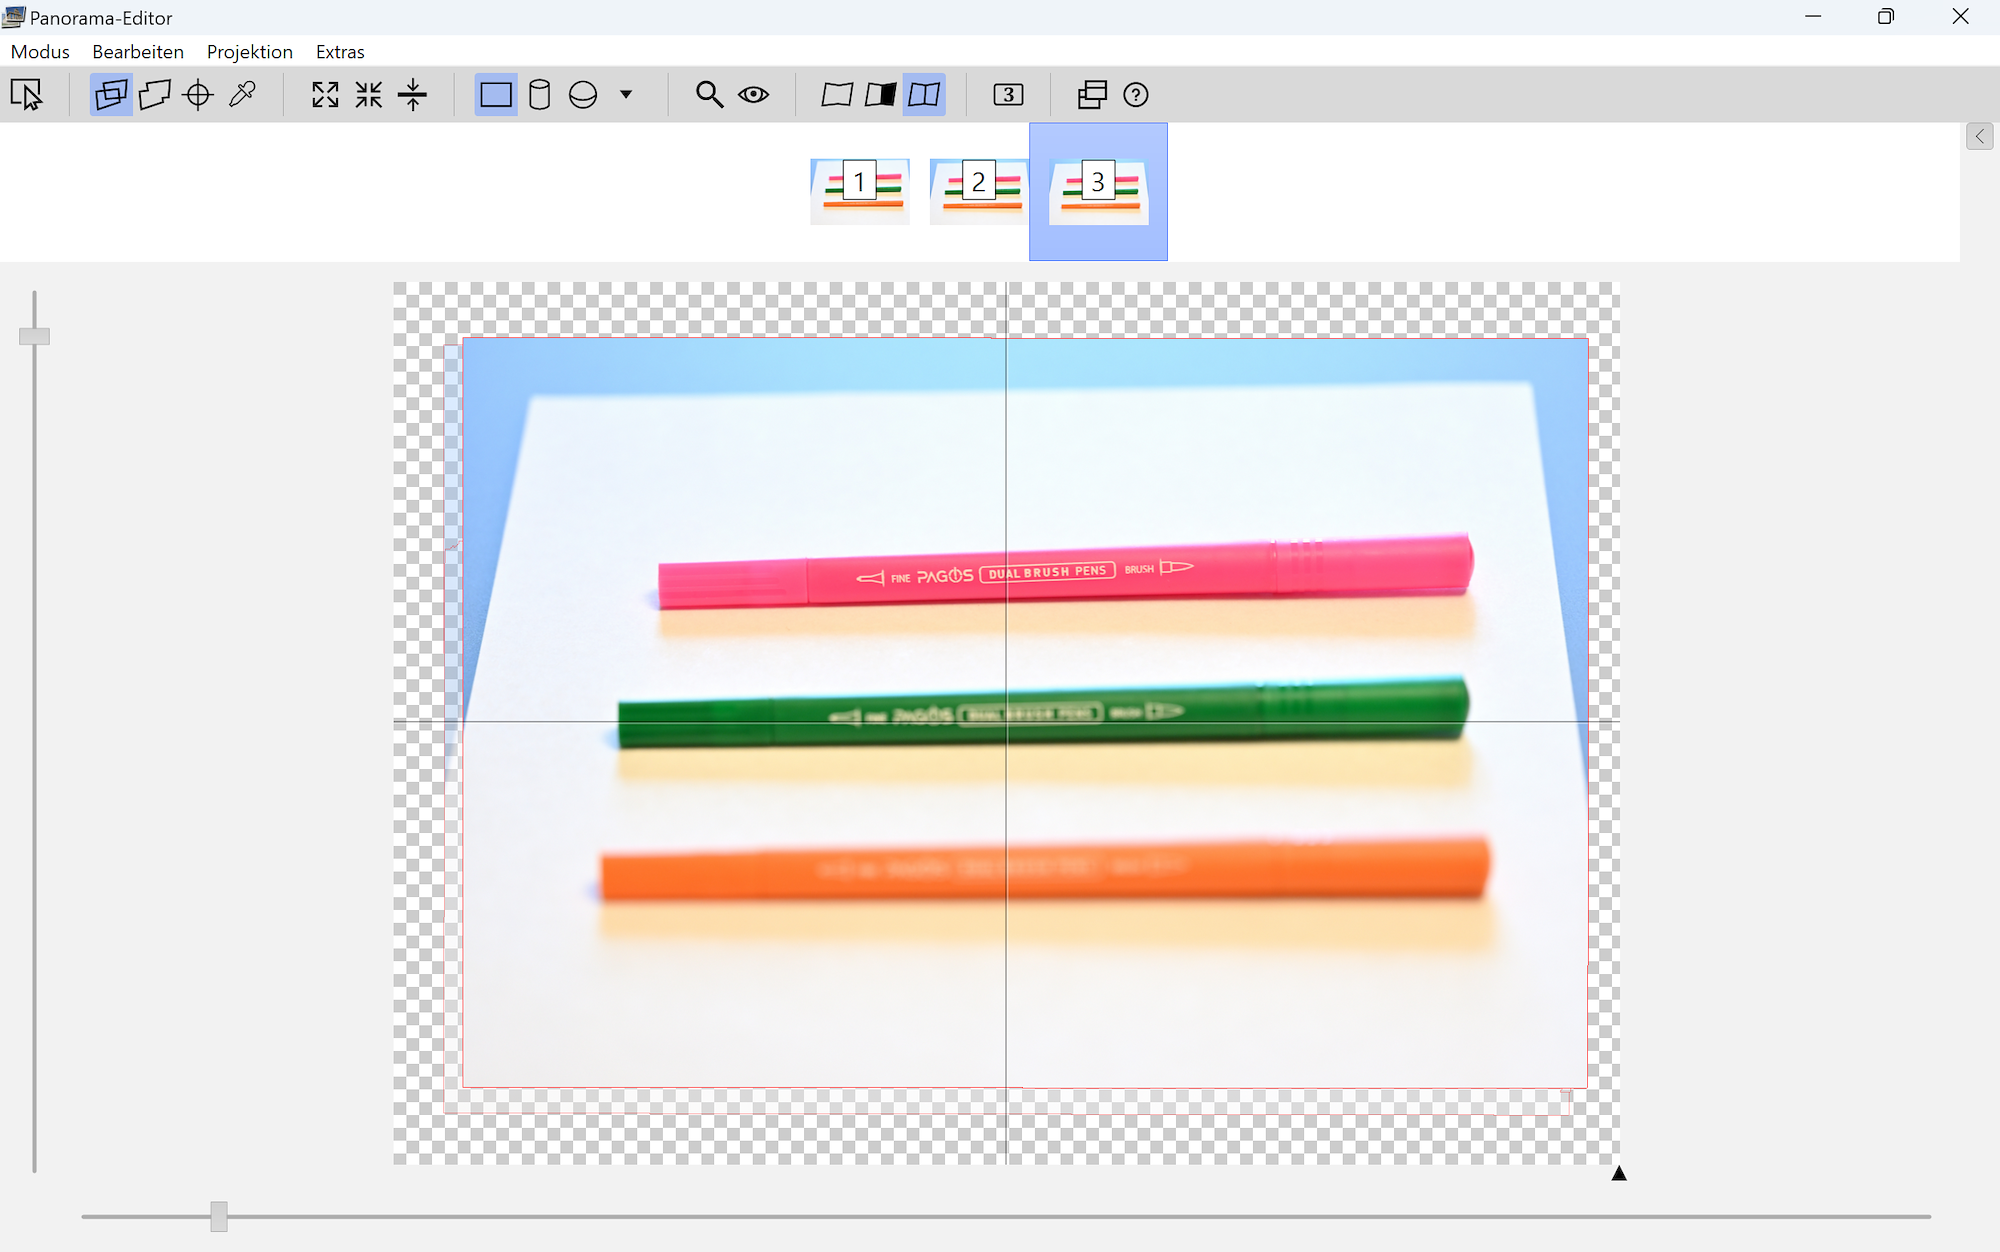
Green in focus:
Pink in focus:
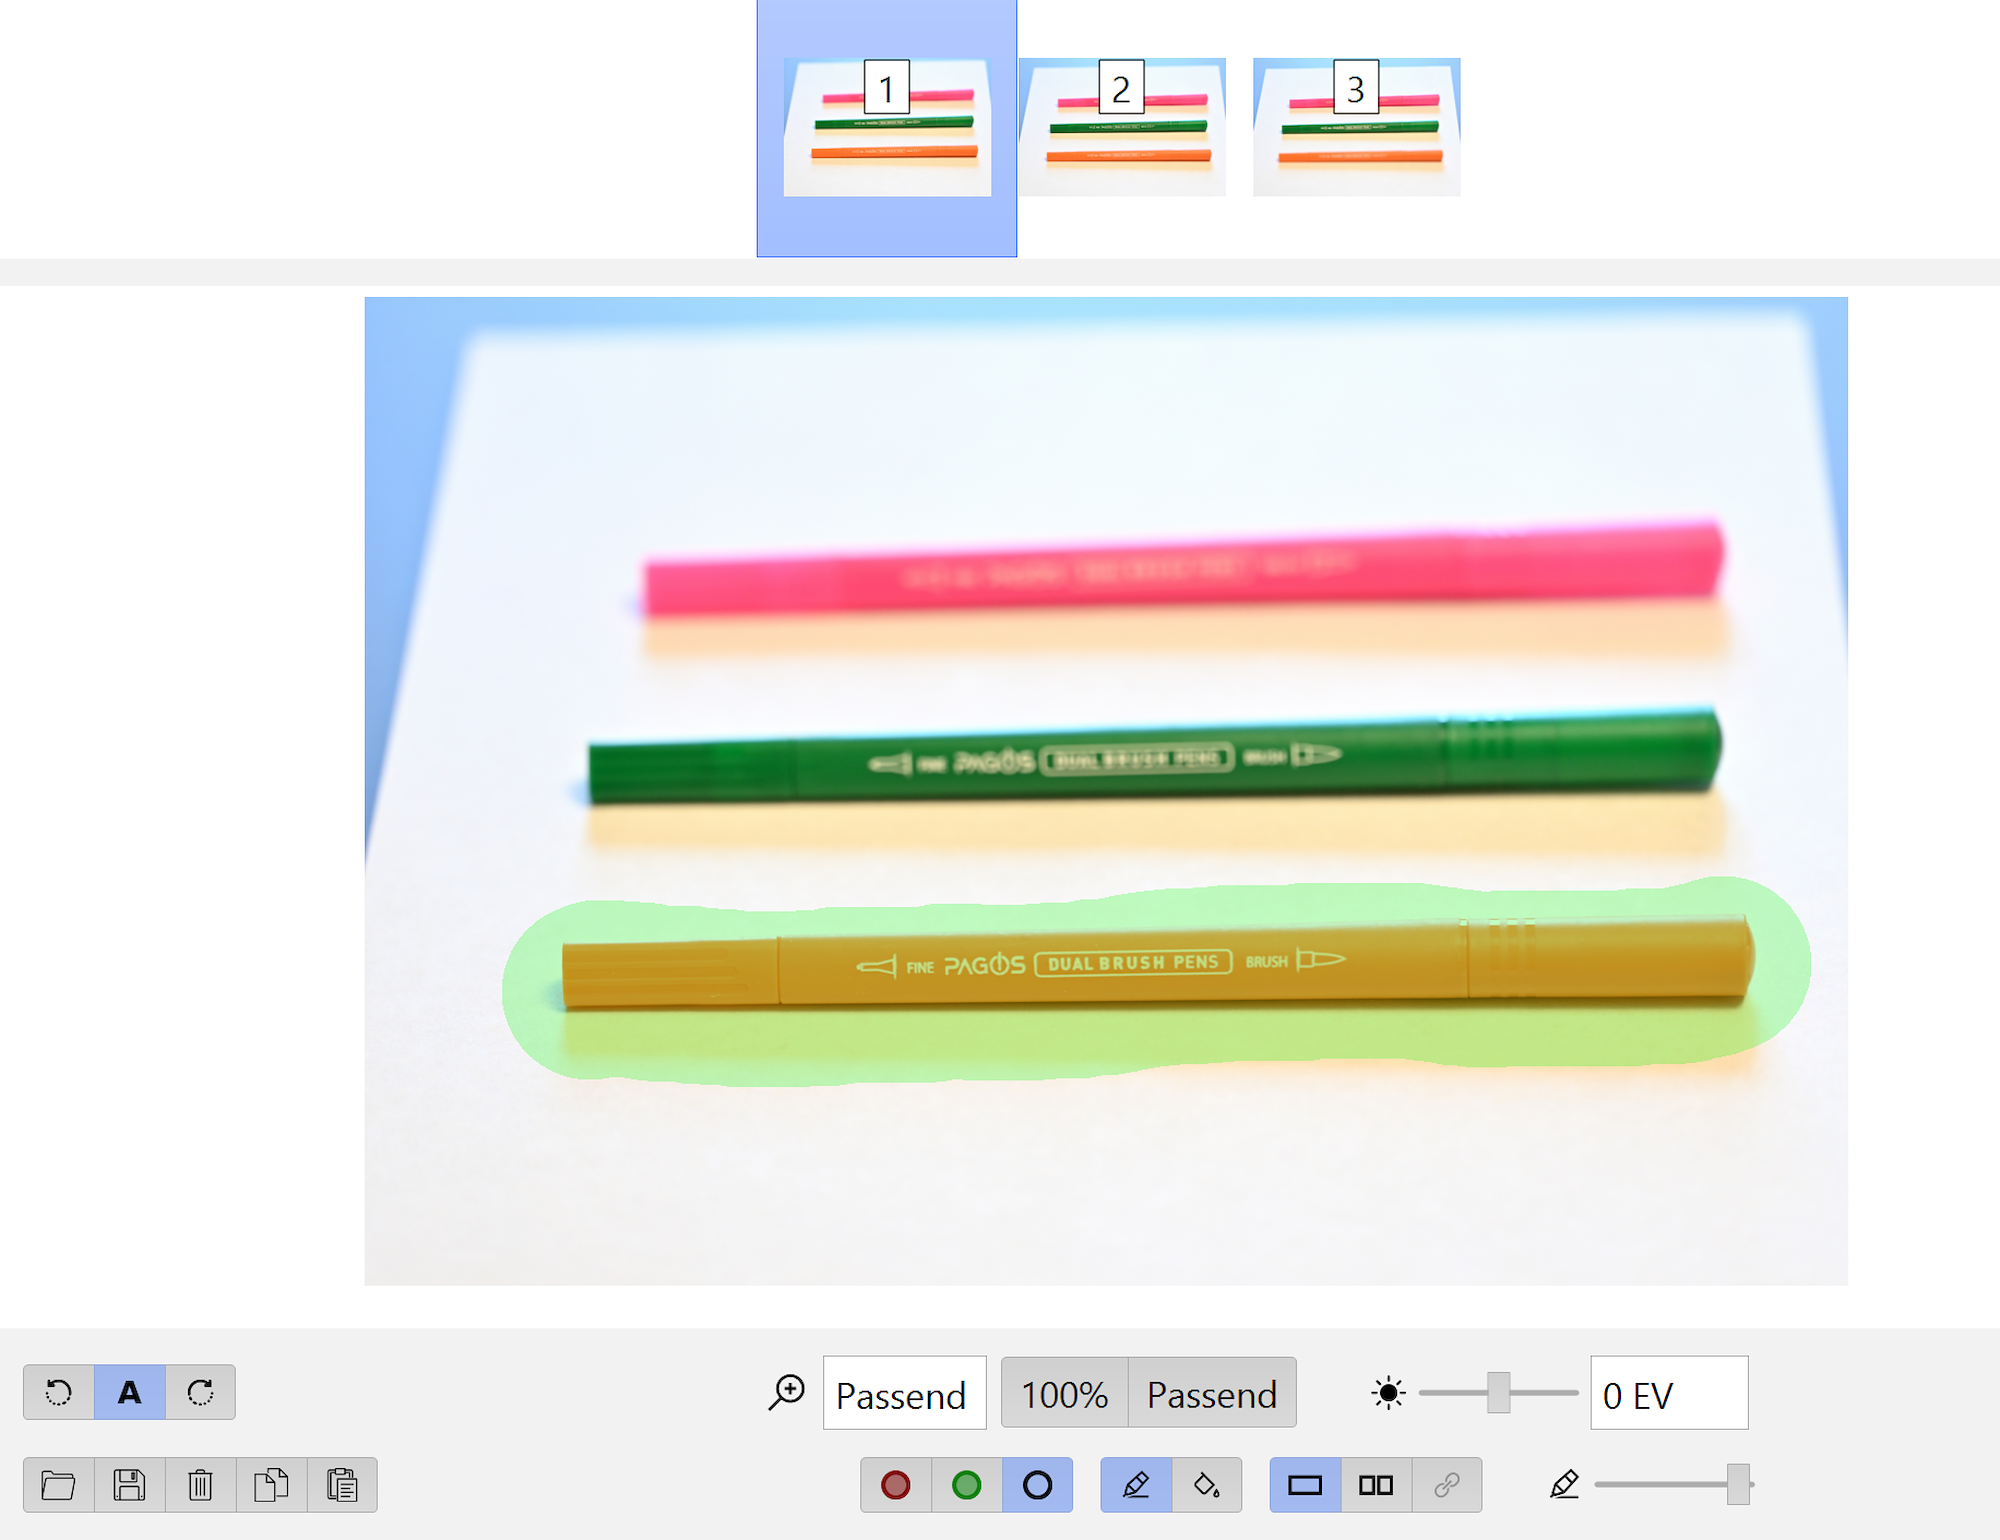
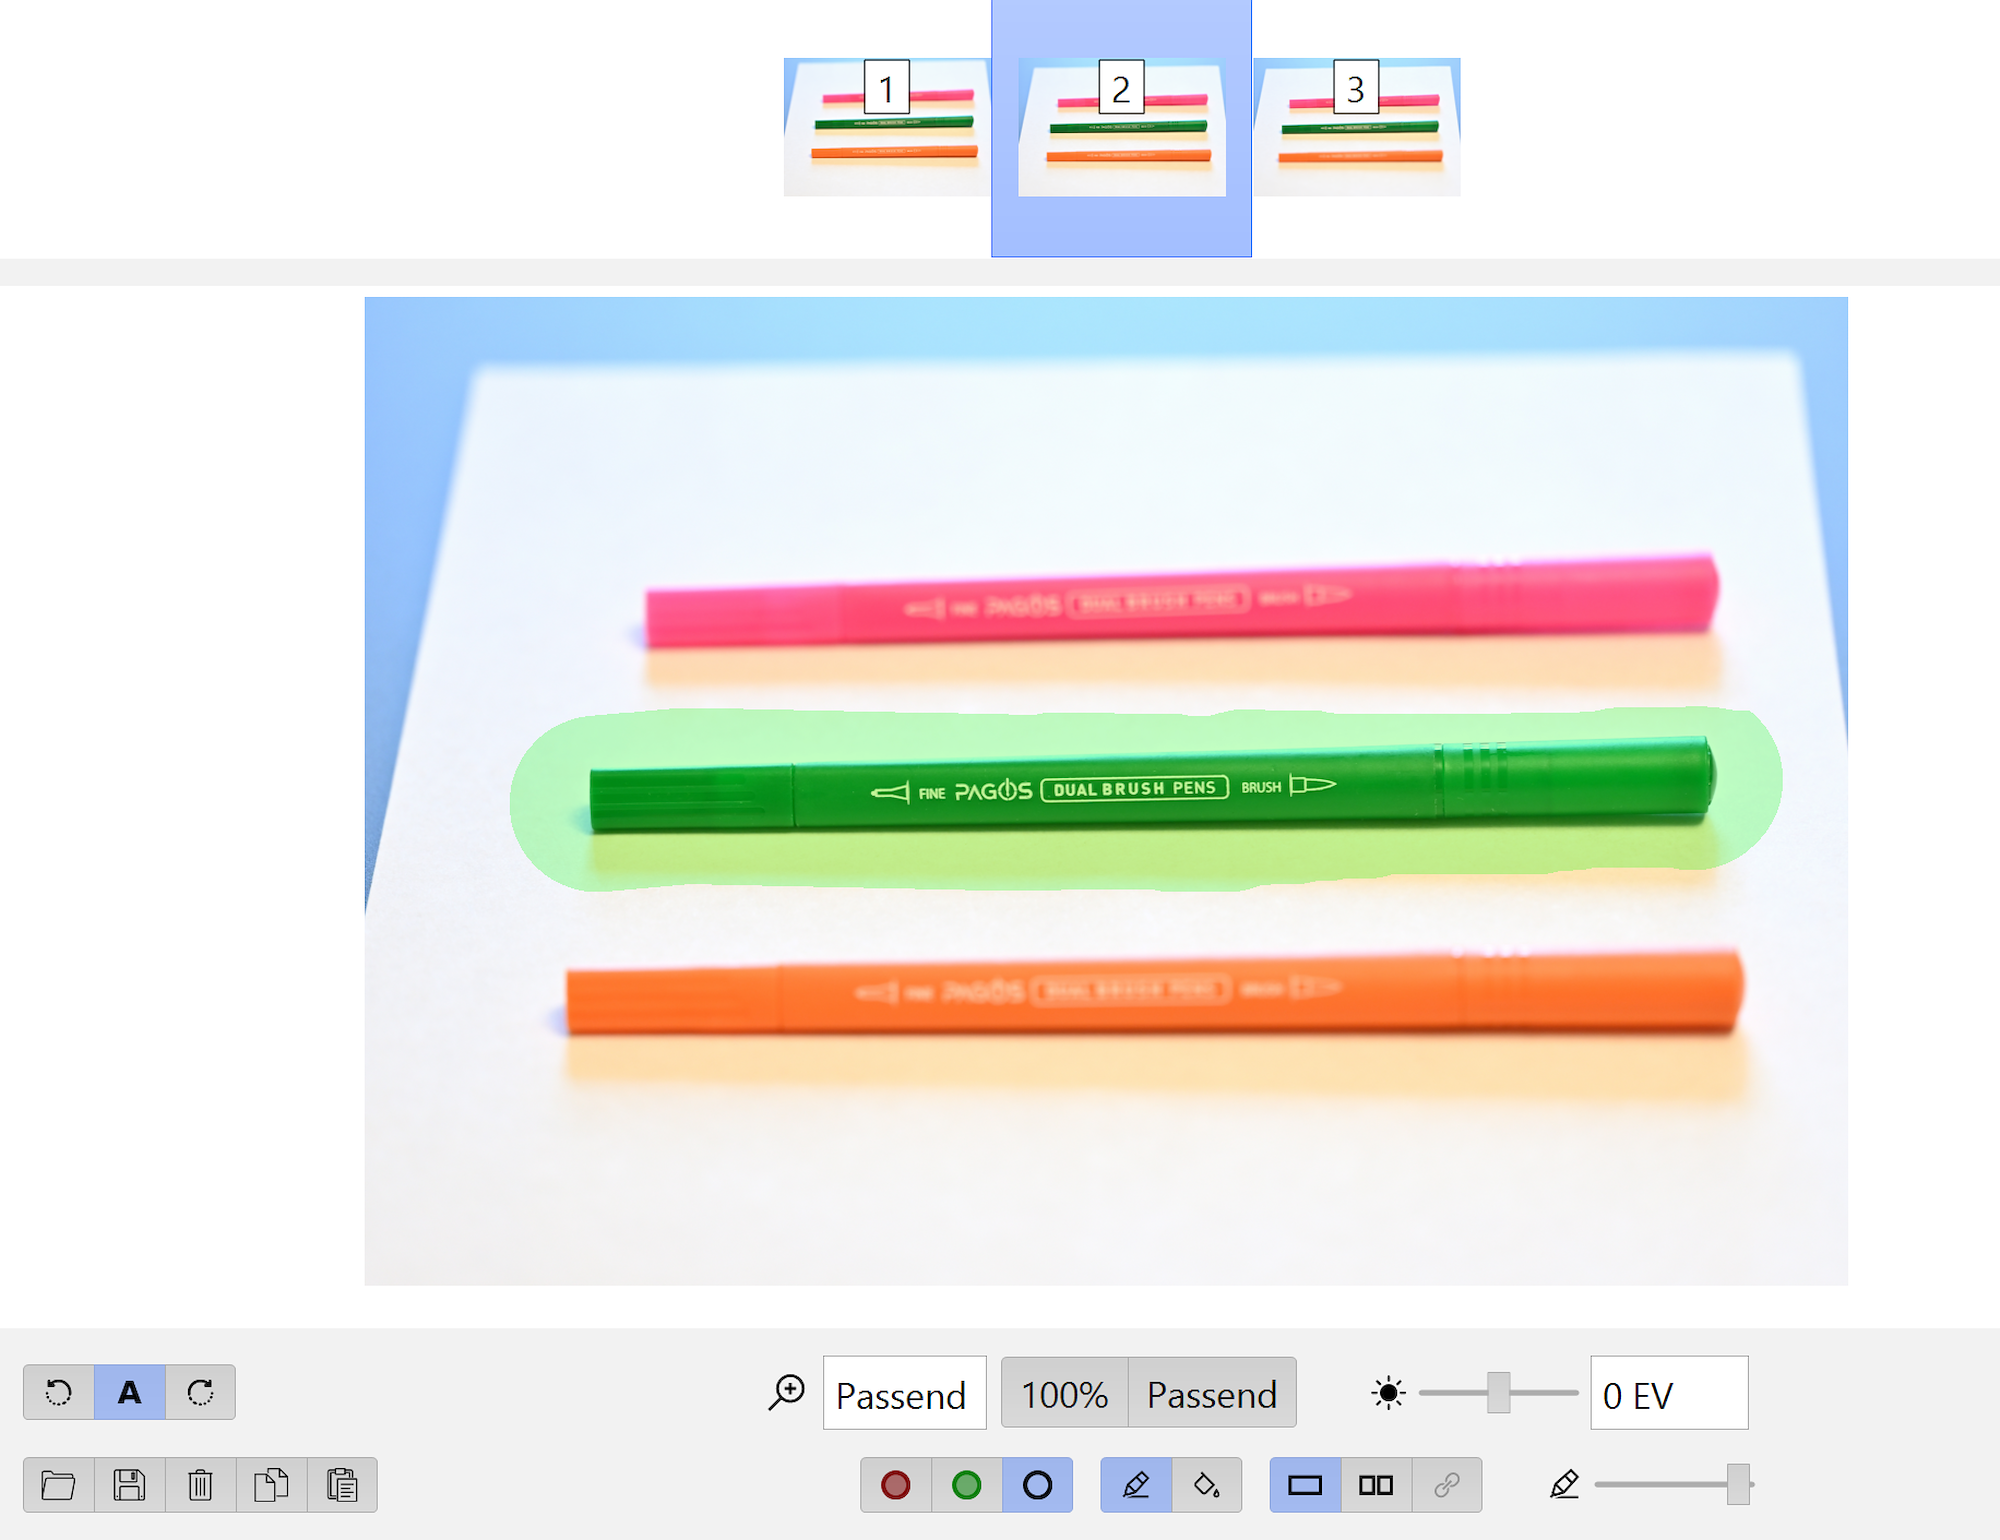
For each image, apply a mask to the object that is in focus:
Run optimize with only the basic optimization for roll, pitch and yaw, but not for the parameters a, b or c.
The seam line will be perfectly set: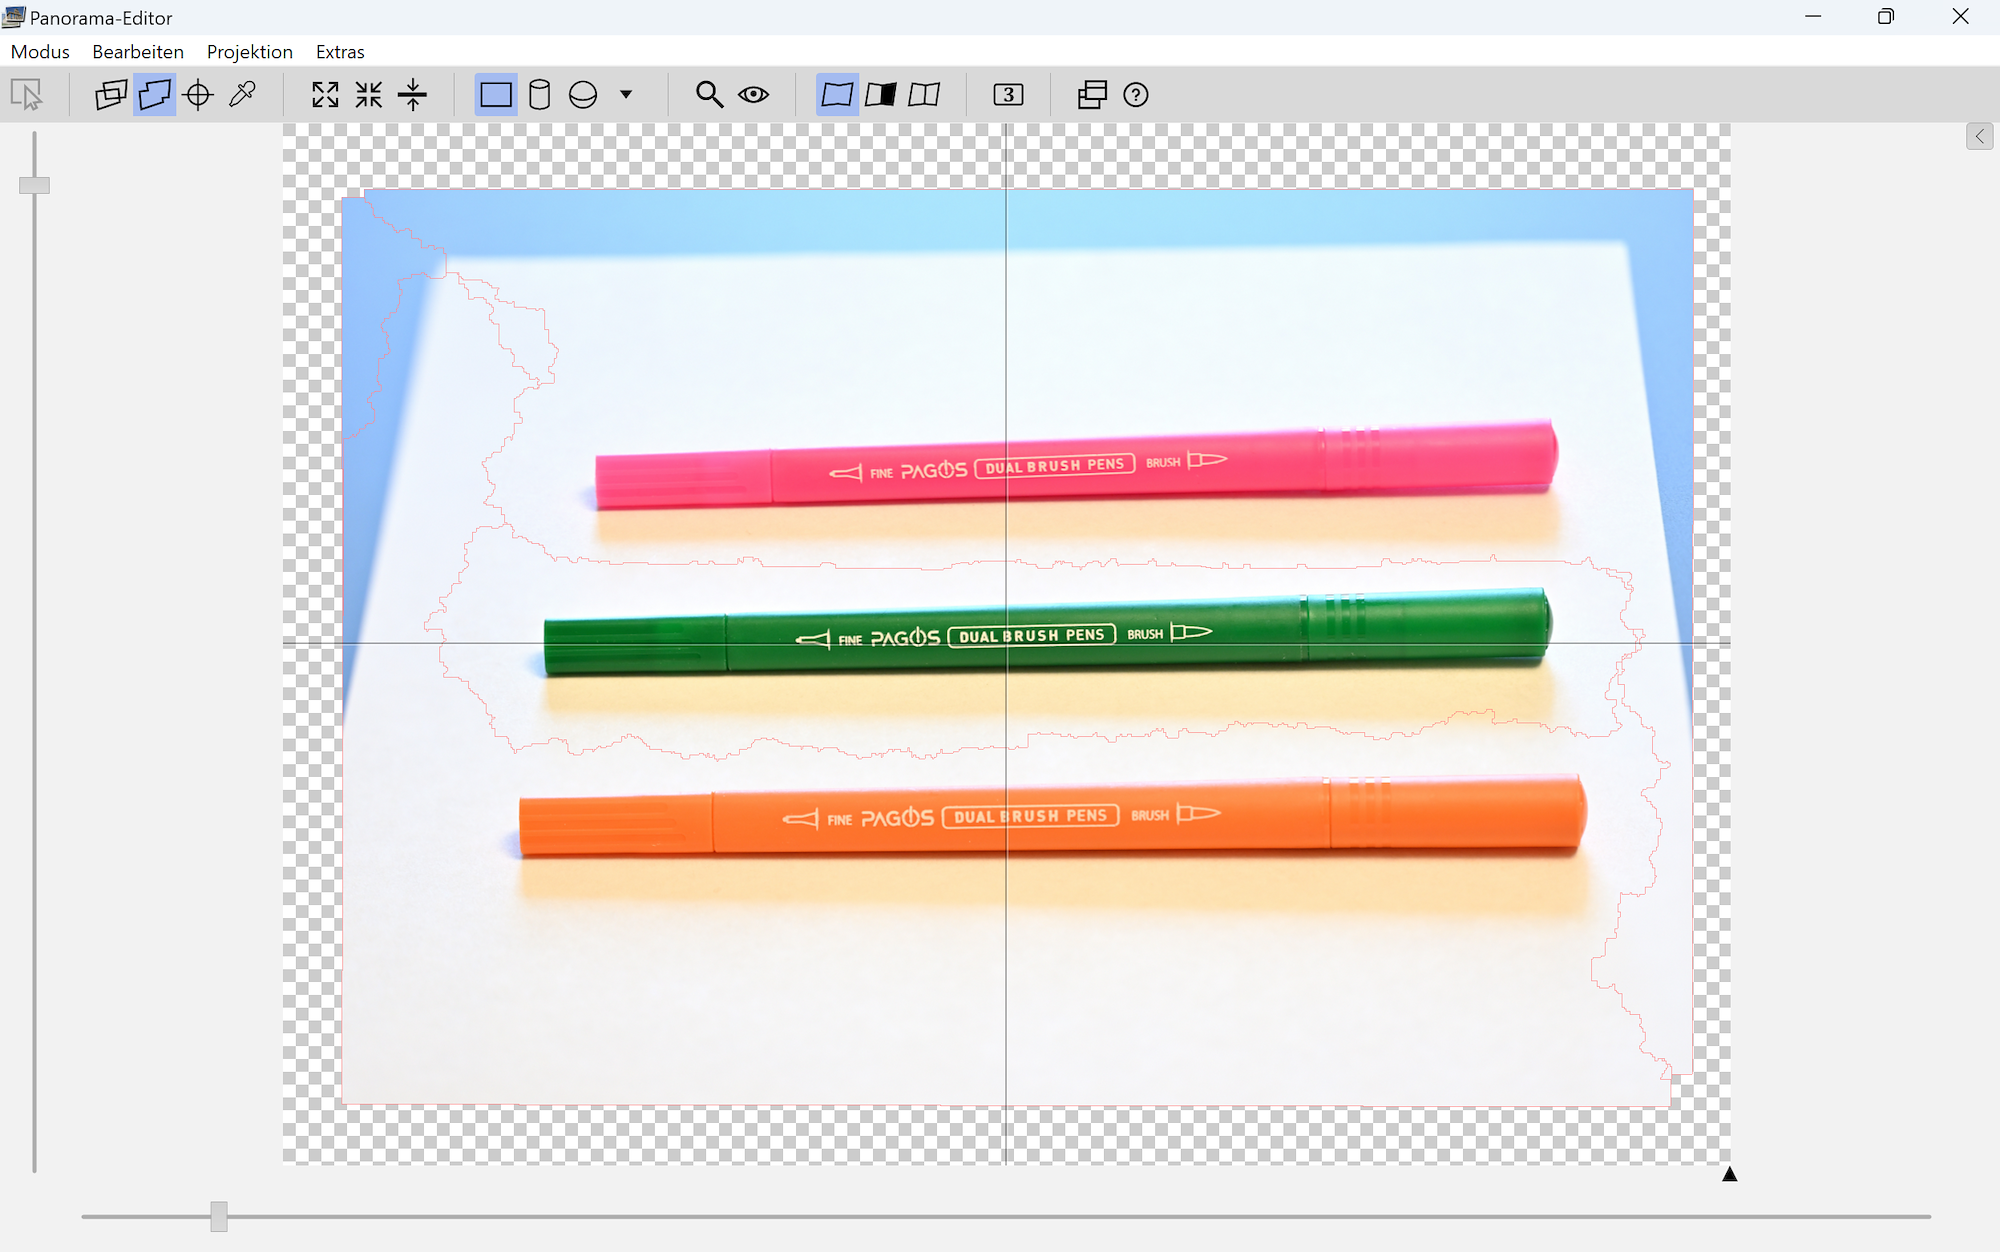
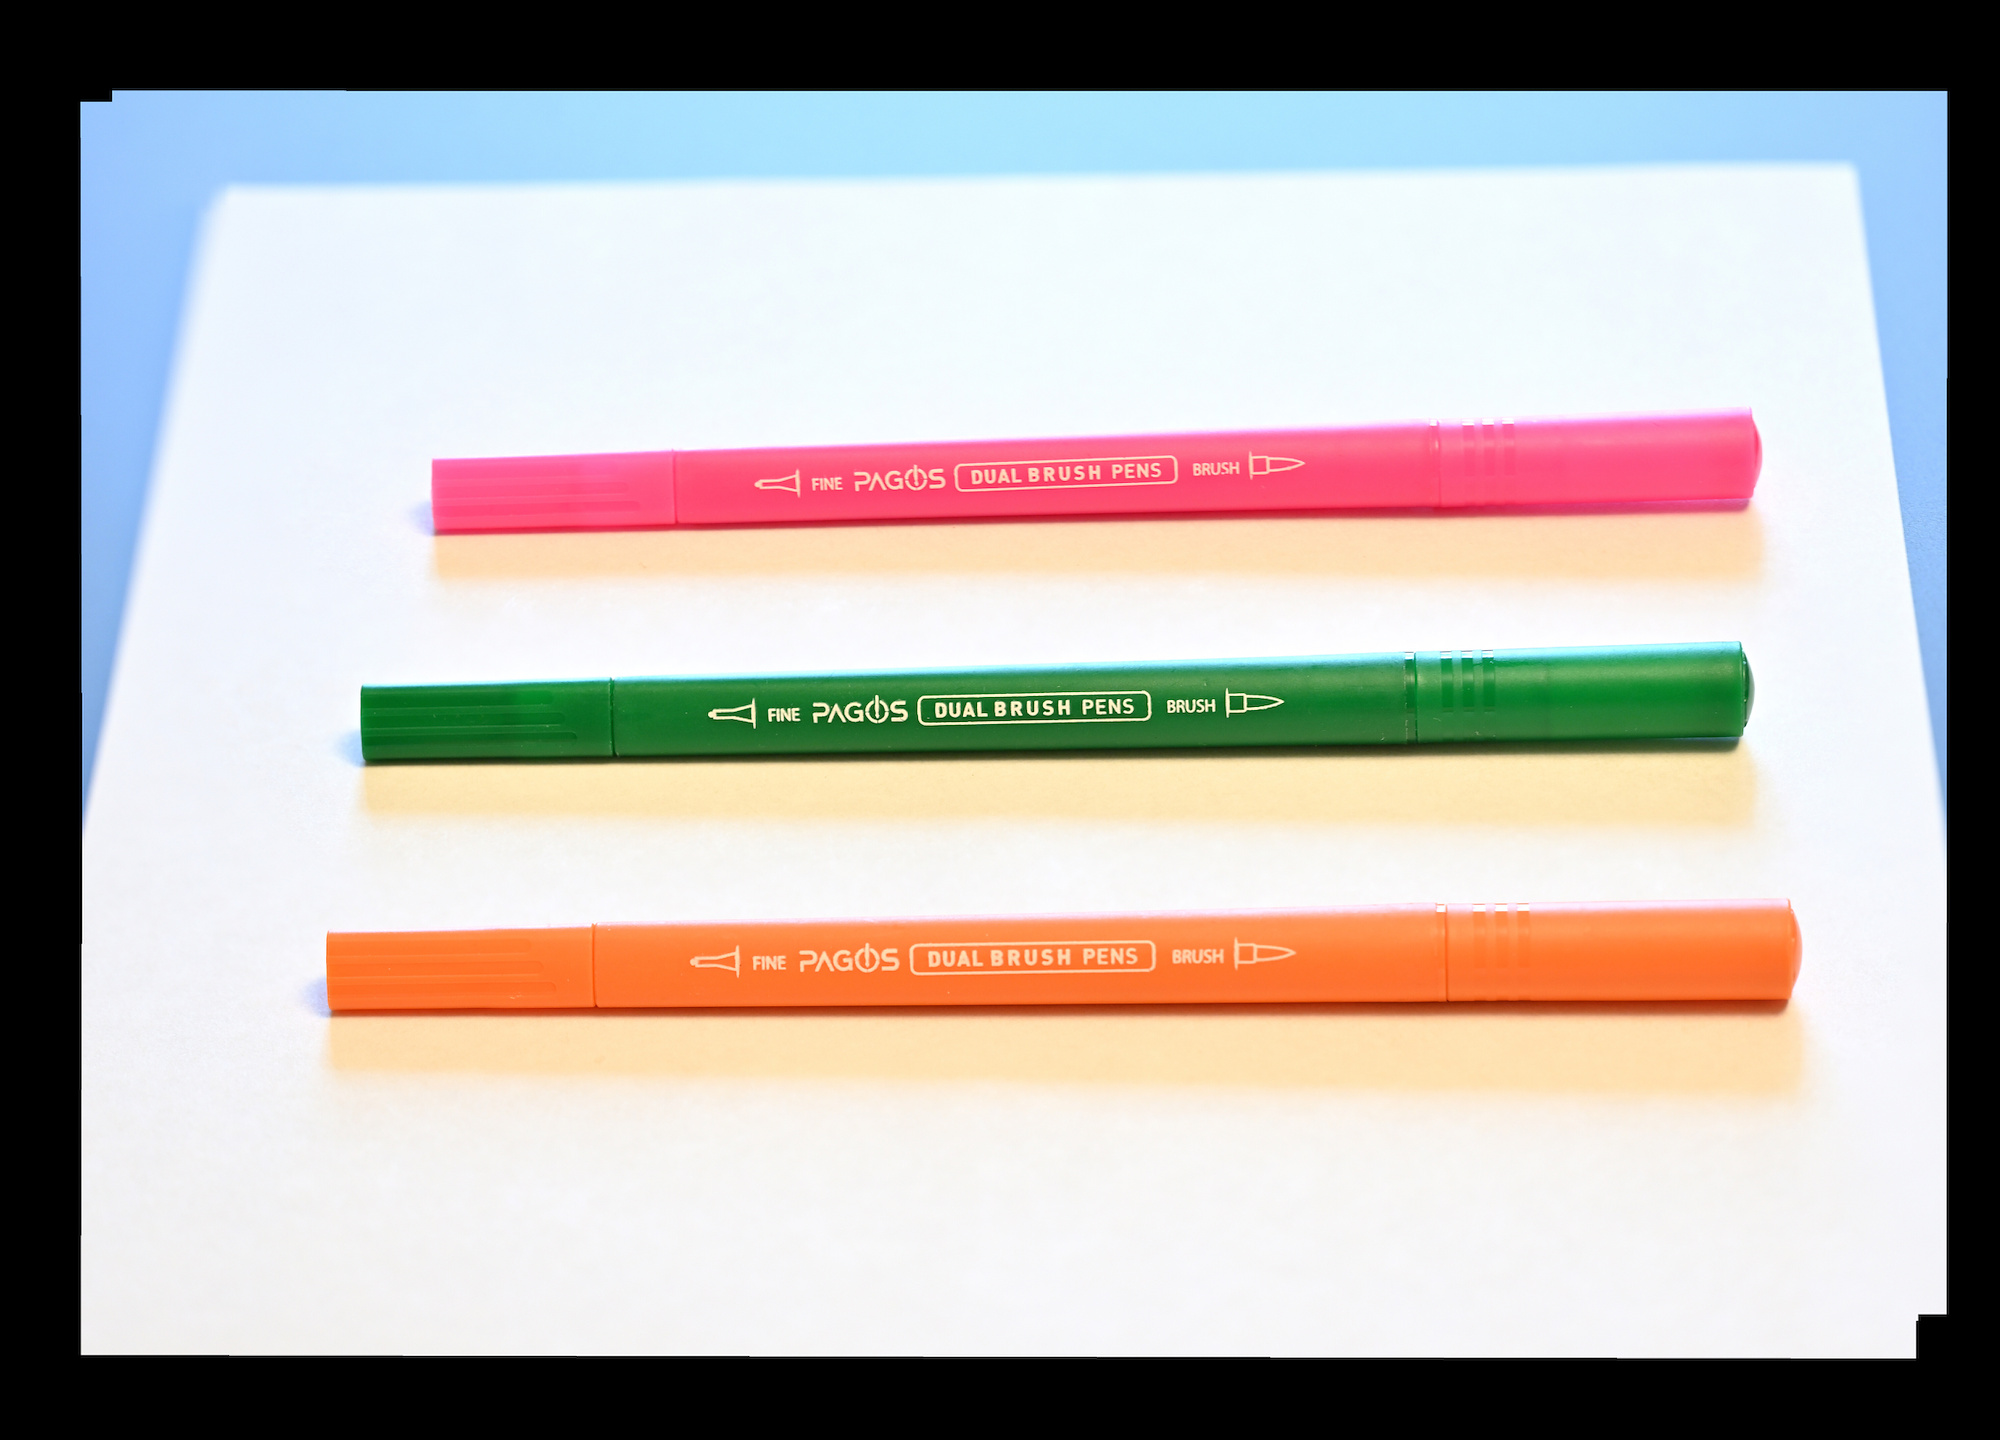
The focus stacked picture:
Another example:
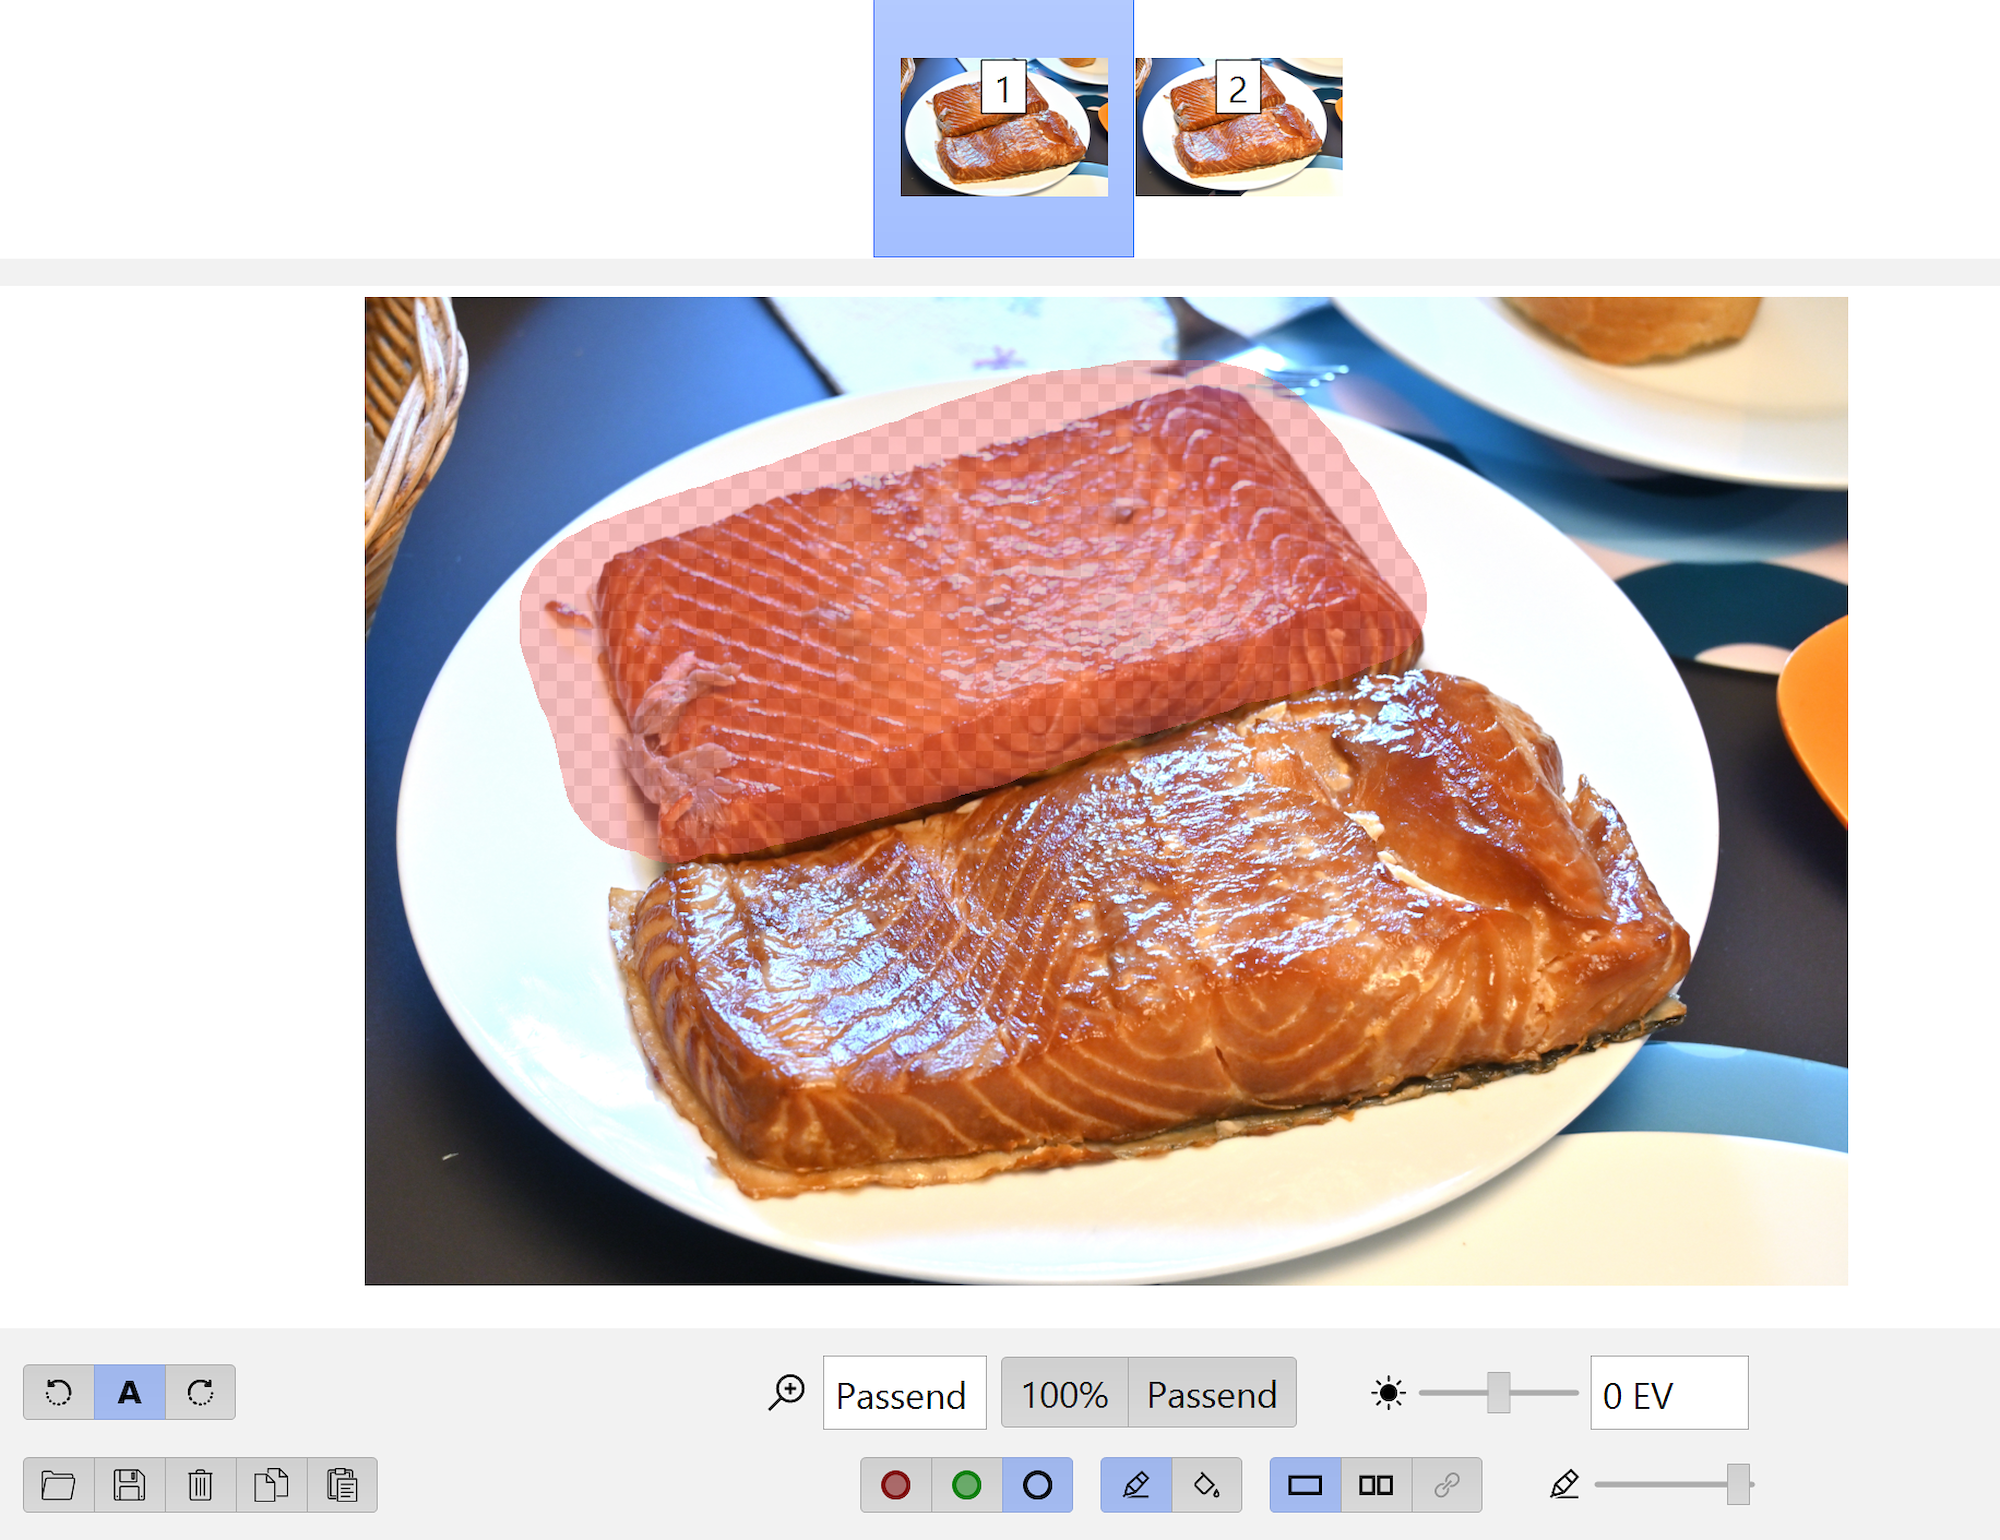
Even a small aperture was not enough to bring everything into focus.Only the lower part is in focus:

Only the upper part is in focus:

Rather than selecting the object in focus as in the previous example (using the green mask), you can deselect the object that is not in focus (using the red mask):
The seam line runs directly between the objects:
The final focus stacked result:
The source of the focus stacked result:
Interactive Panorama Pike Place Market Fischladen

See also:
Torte - 2x24 🥳🎉🎂
Ein Blumenstrauß zum Muttertag 💐🌹
Minestrone 🍲
Birnen-Tart 🥧
PTGui vs HeliconFocus
00011001 << 1 🎂
Obstkuchen zum Sonntagskaffee 🫐🍓 -
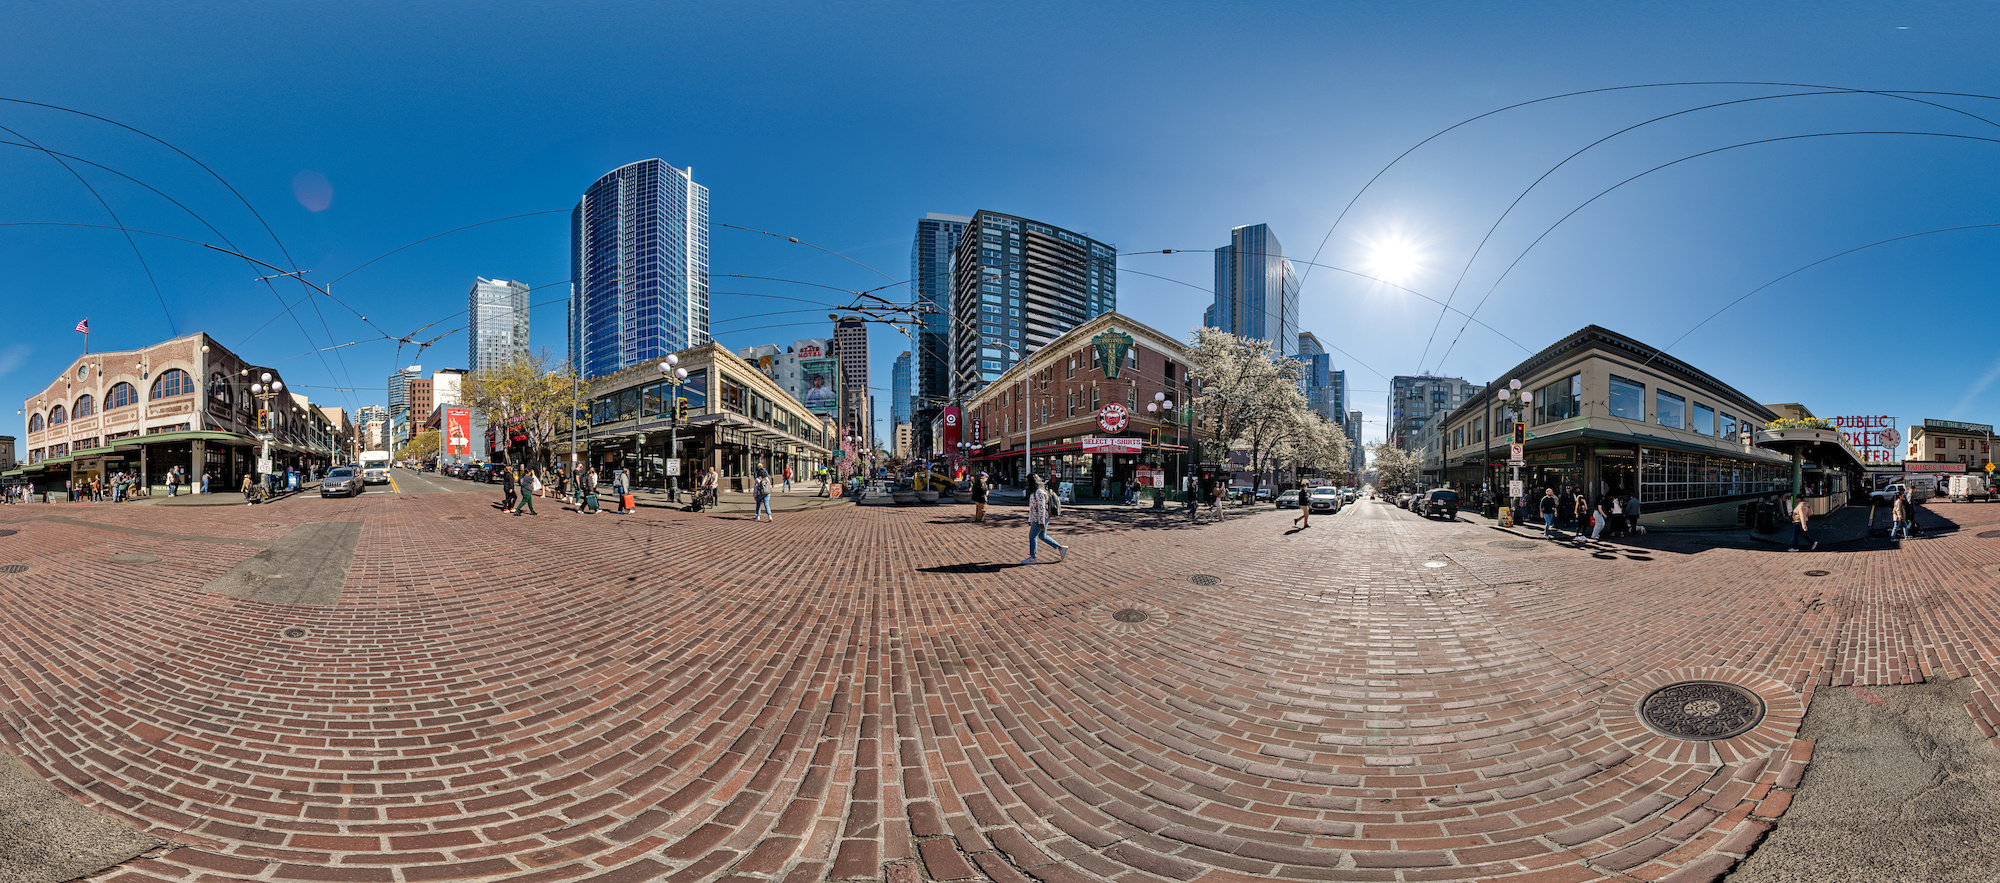
Pike Place Market, Seattle
2024 Equinox, the first spring sun appeared over the large intersection of 1st Avenue and Pike Street in the otherwise cloudy and rainy Pacific Northwest.
This panorama is the March 2024 equinox contribution for the 'Wrinkle March' event of WorldWidePanorama.Interactive Panorama Pike Place Market

This panorama is a contribution for the '20 Years' event of WorldWidePanorama and taken at the same place as the original panorama from 2009.
Interactive Panorama Starbucks at Pike Place Market
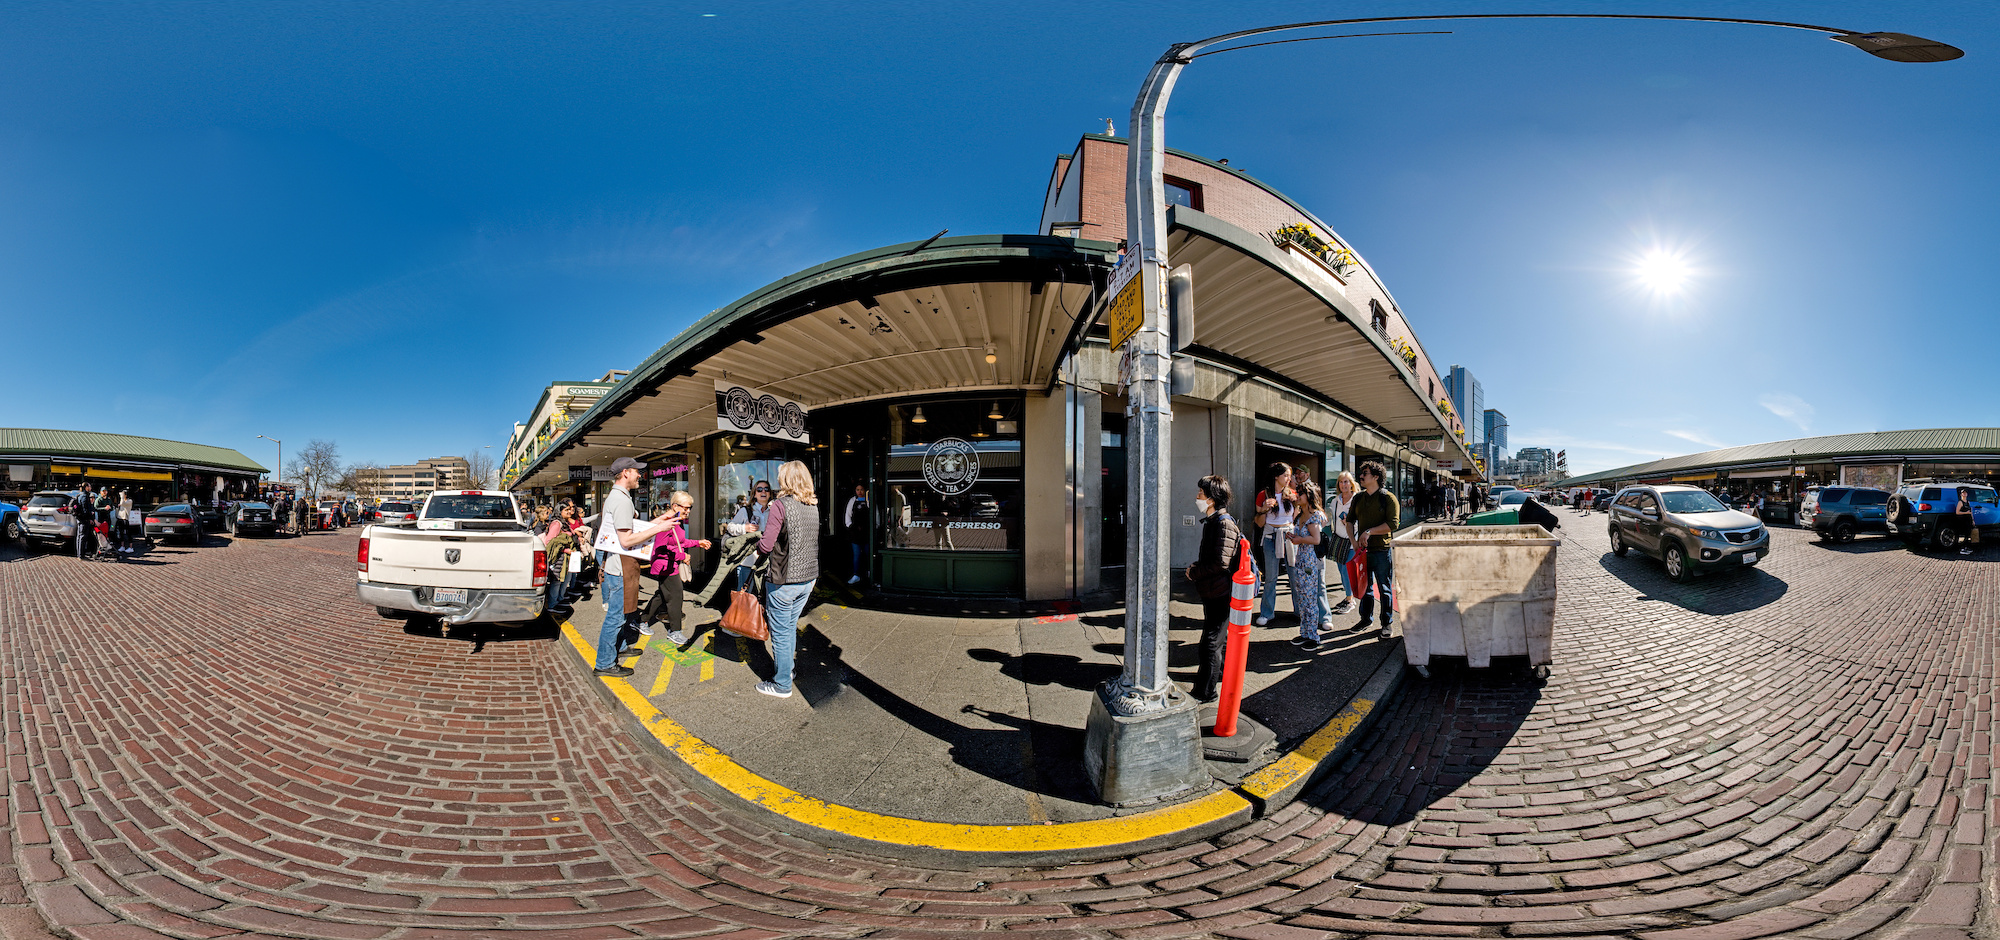
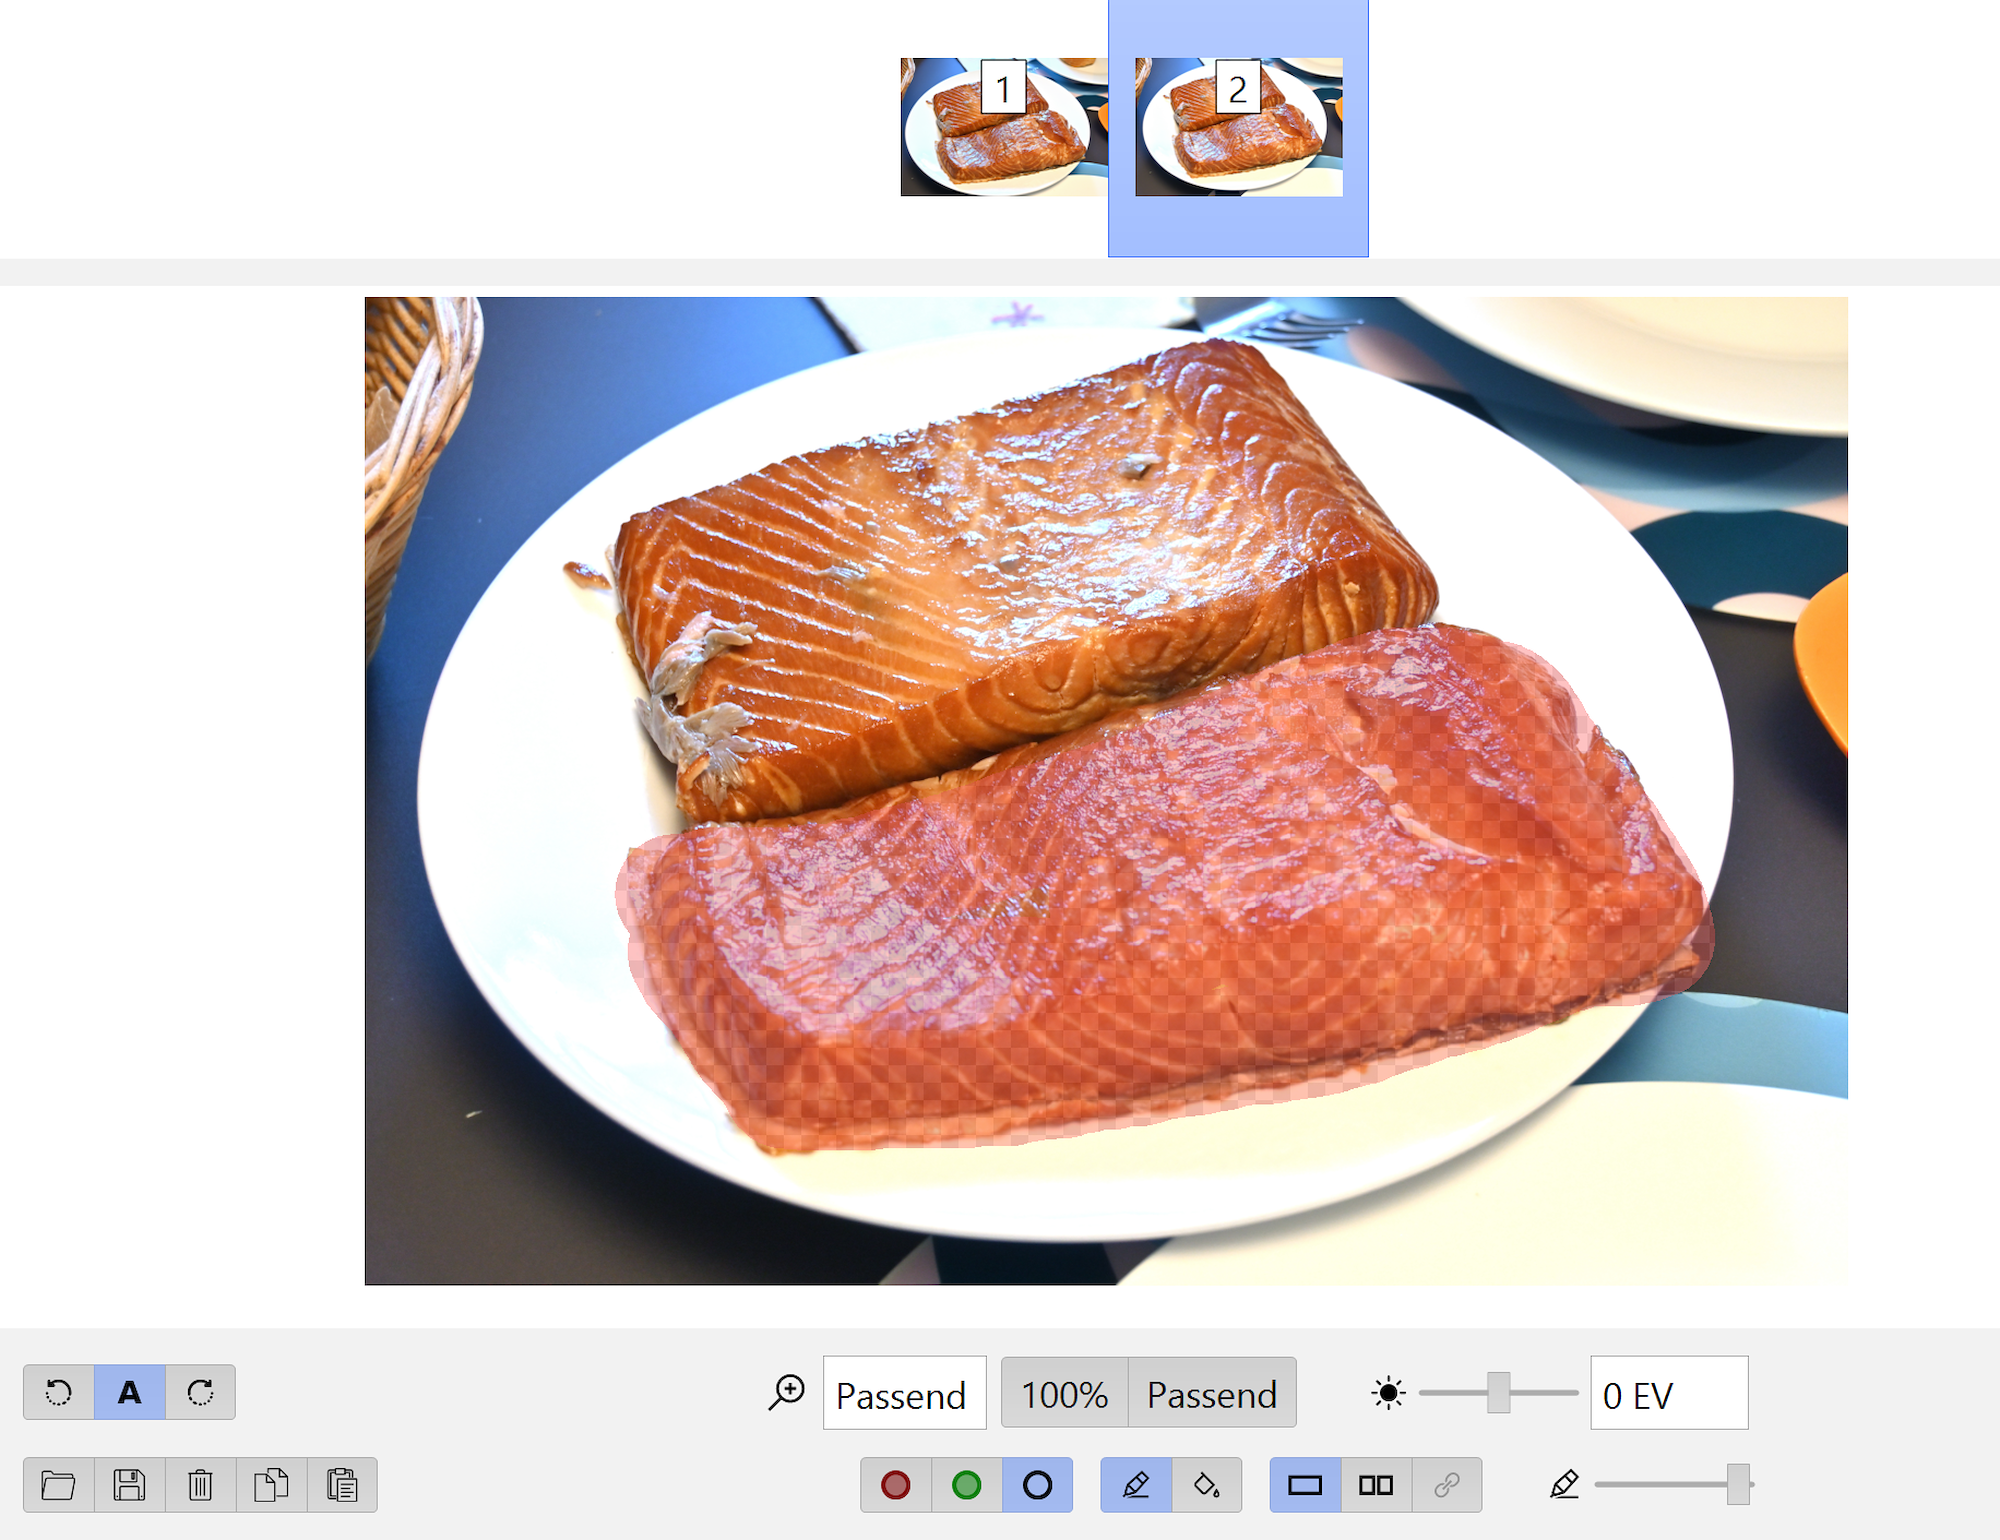
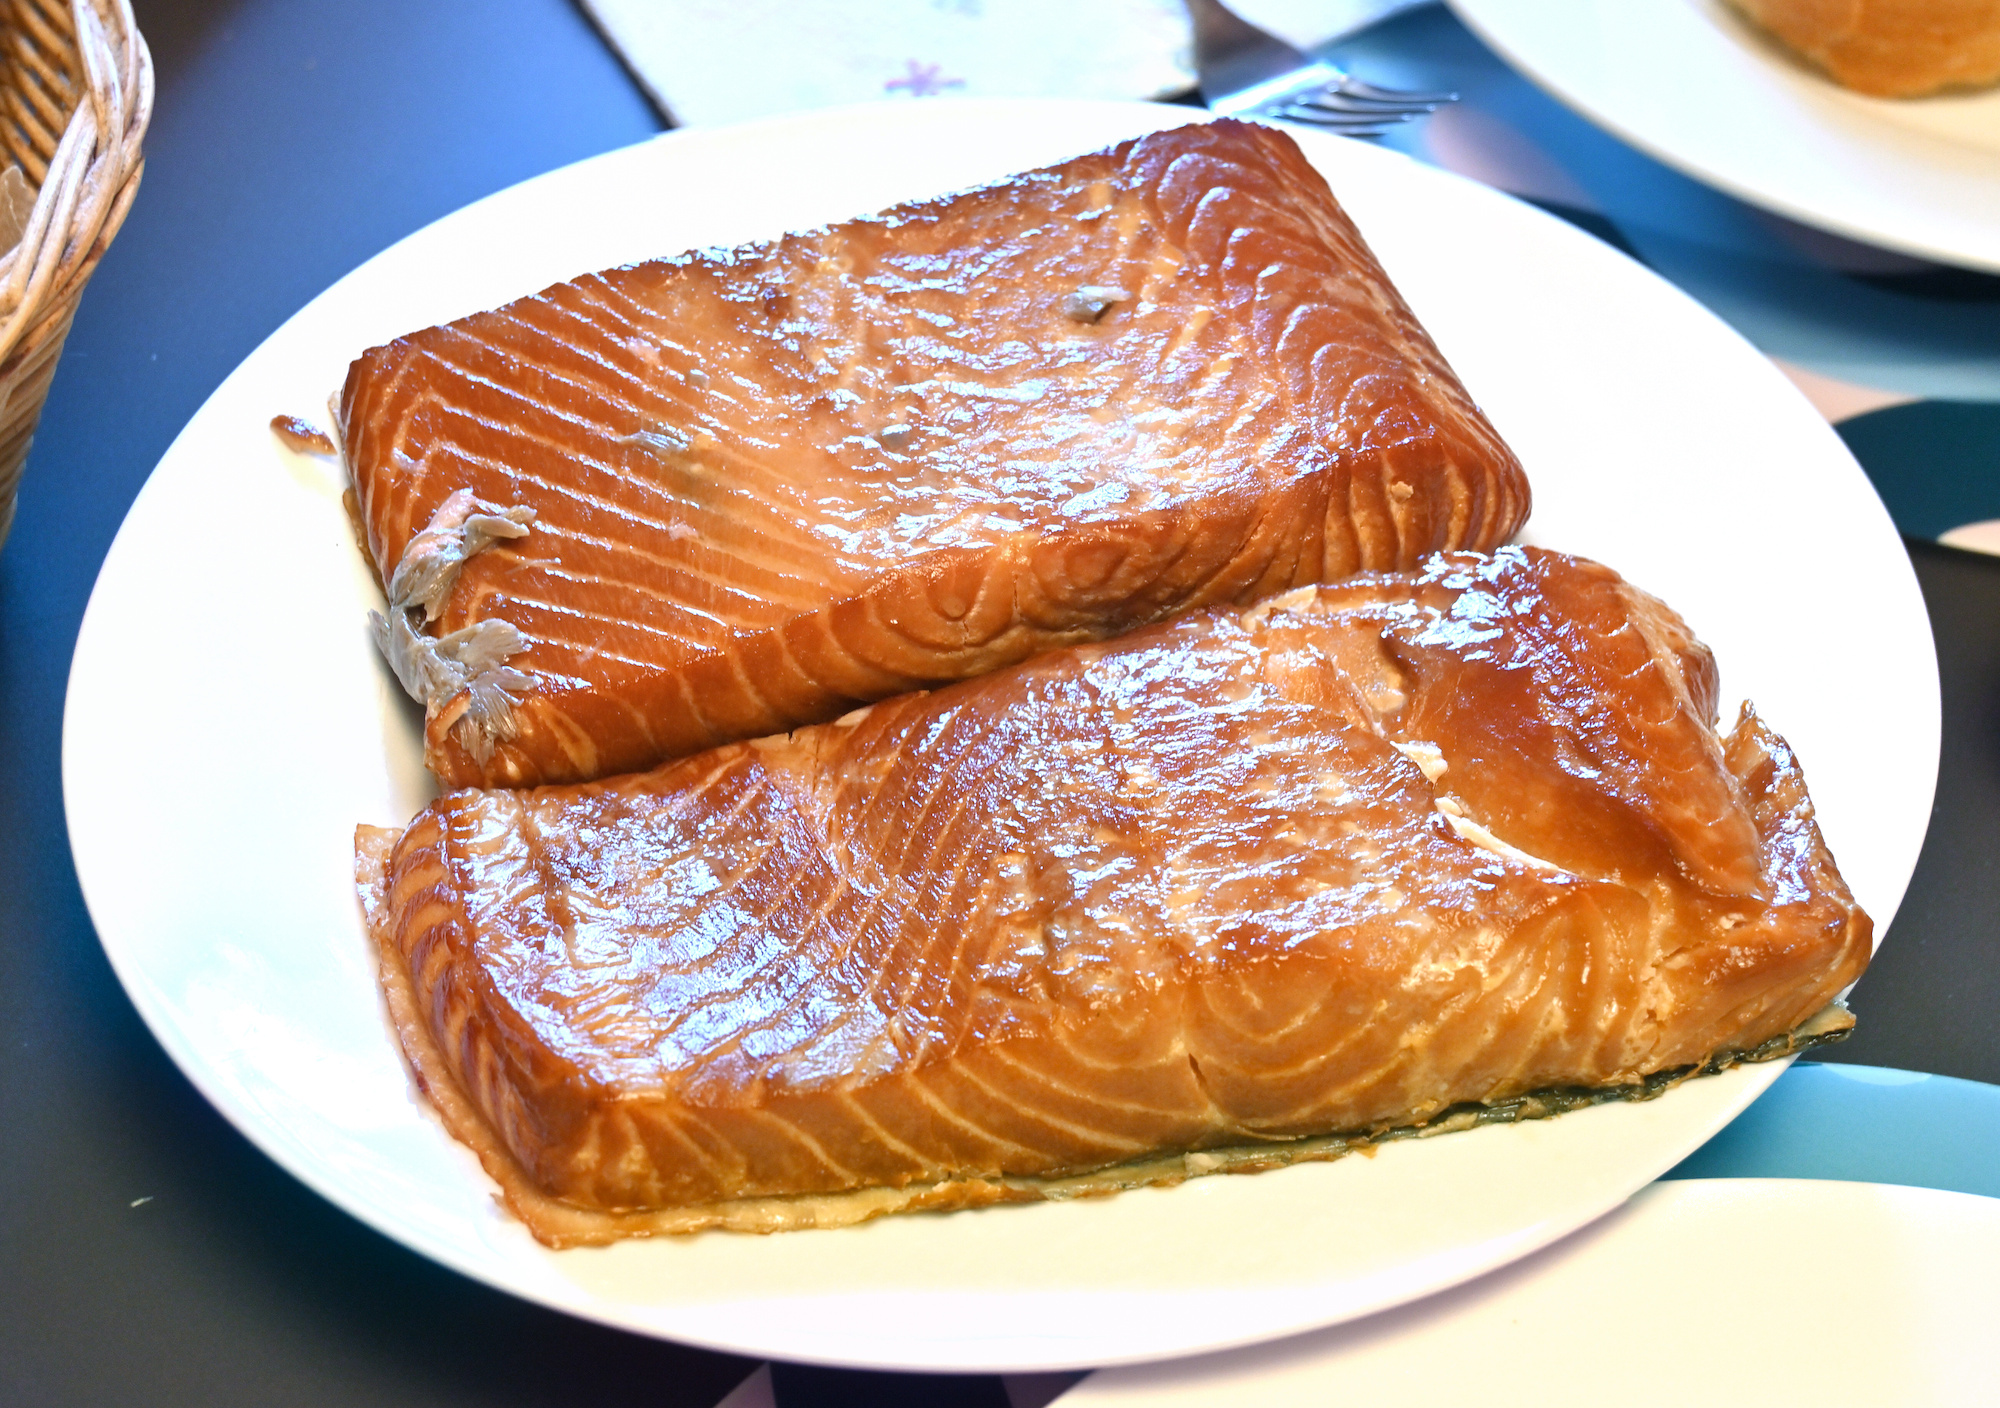
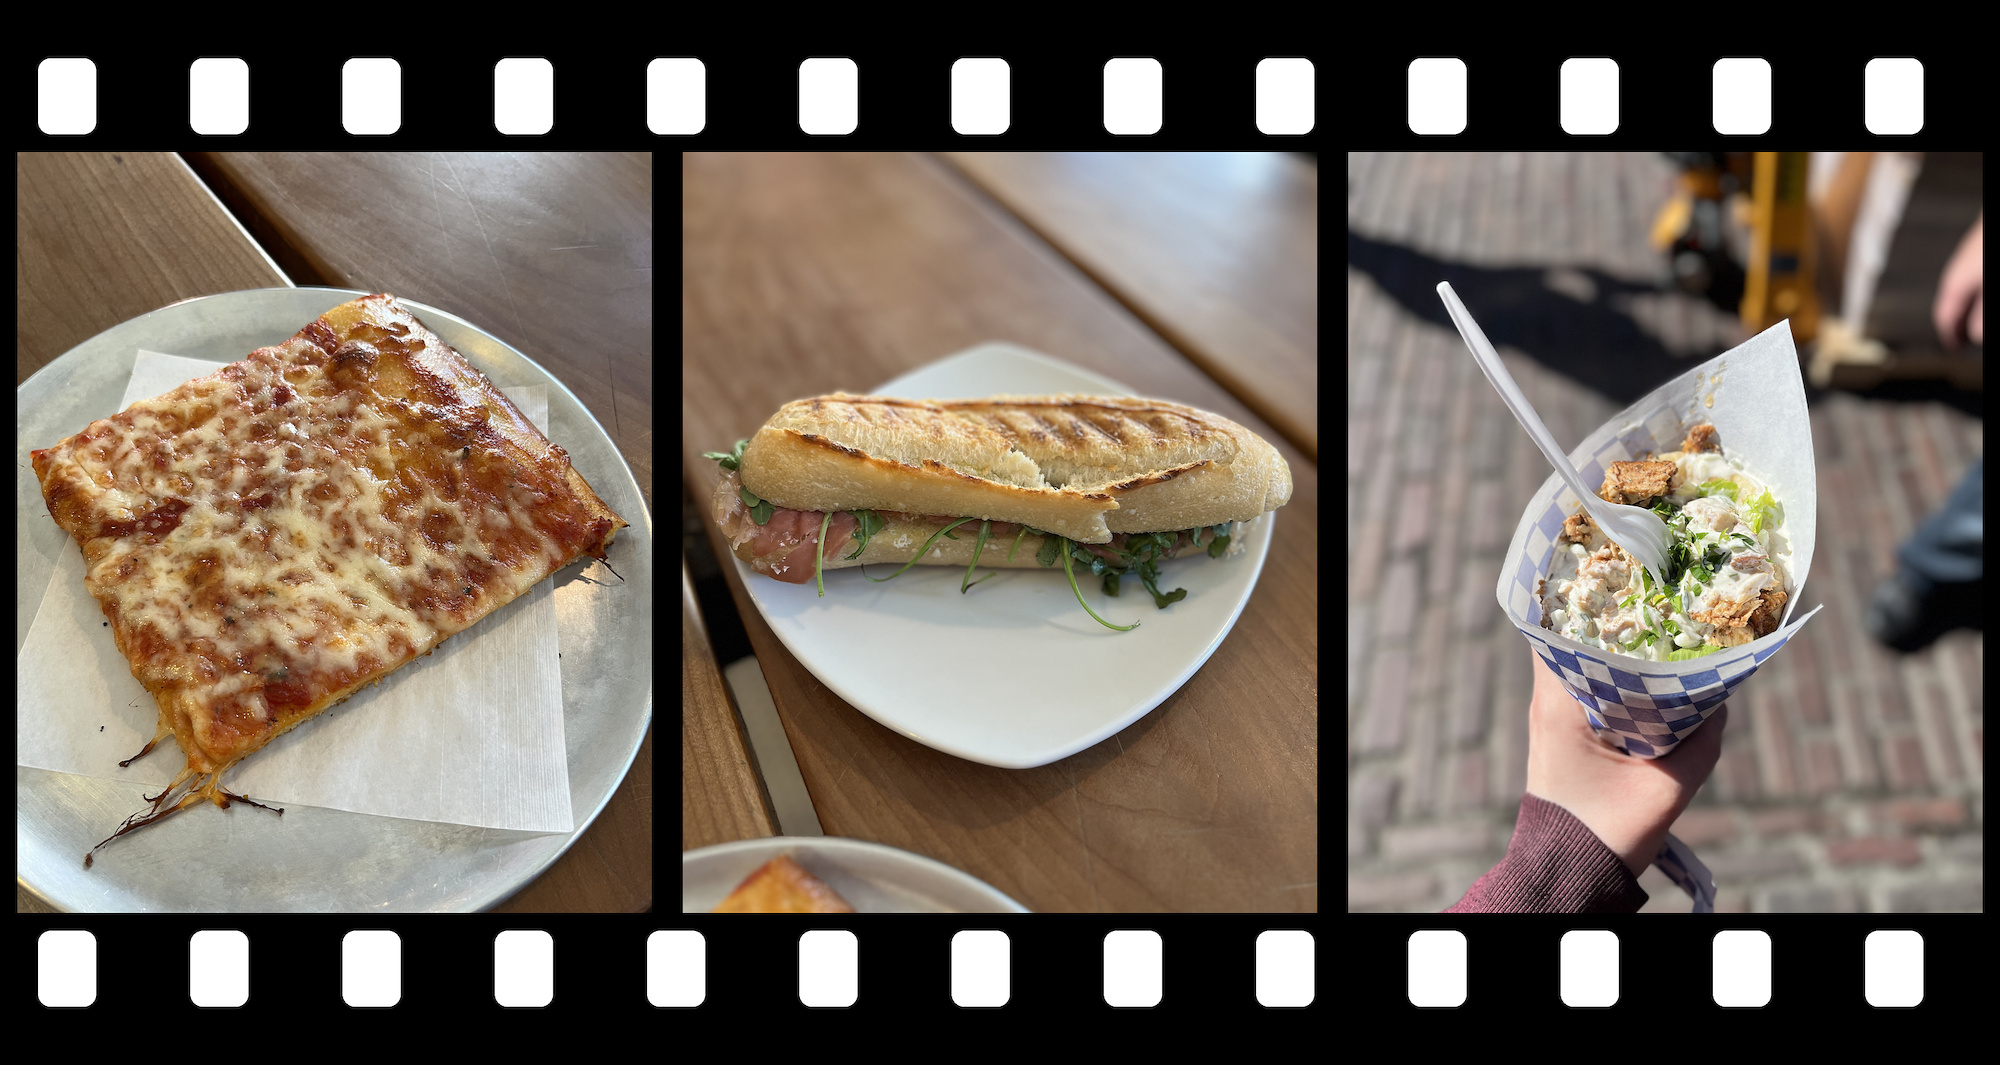
And the Market Food, one of the best of its class.
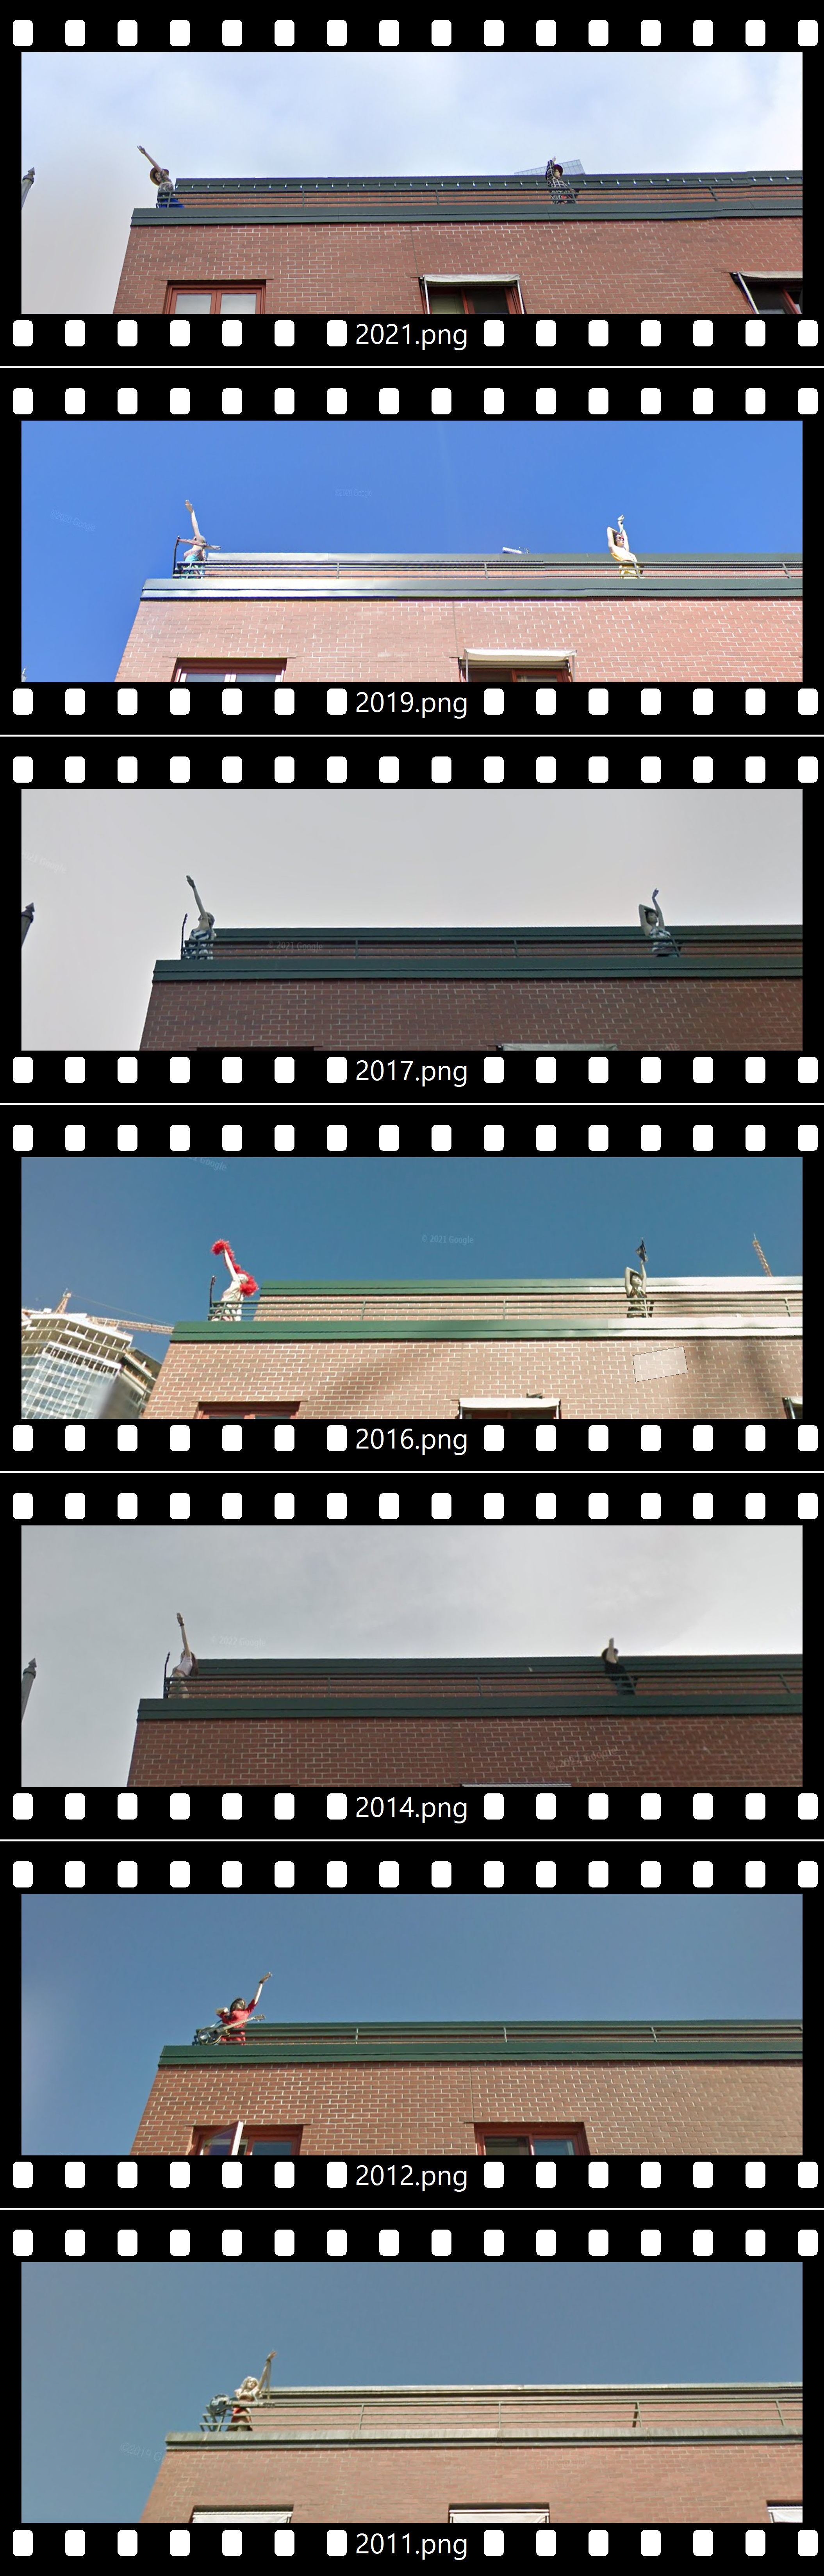
Notice the observers on the roof balcony:
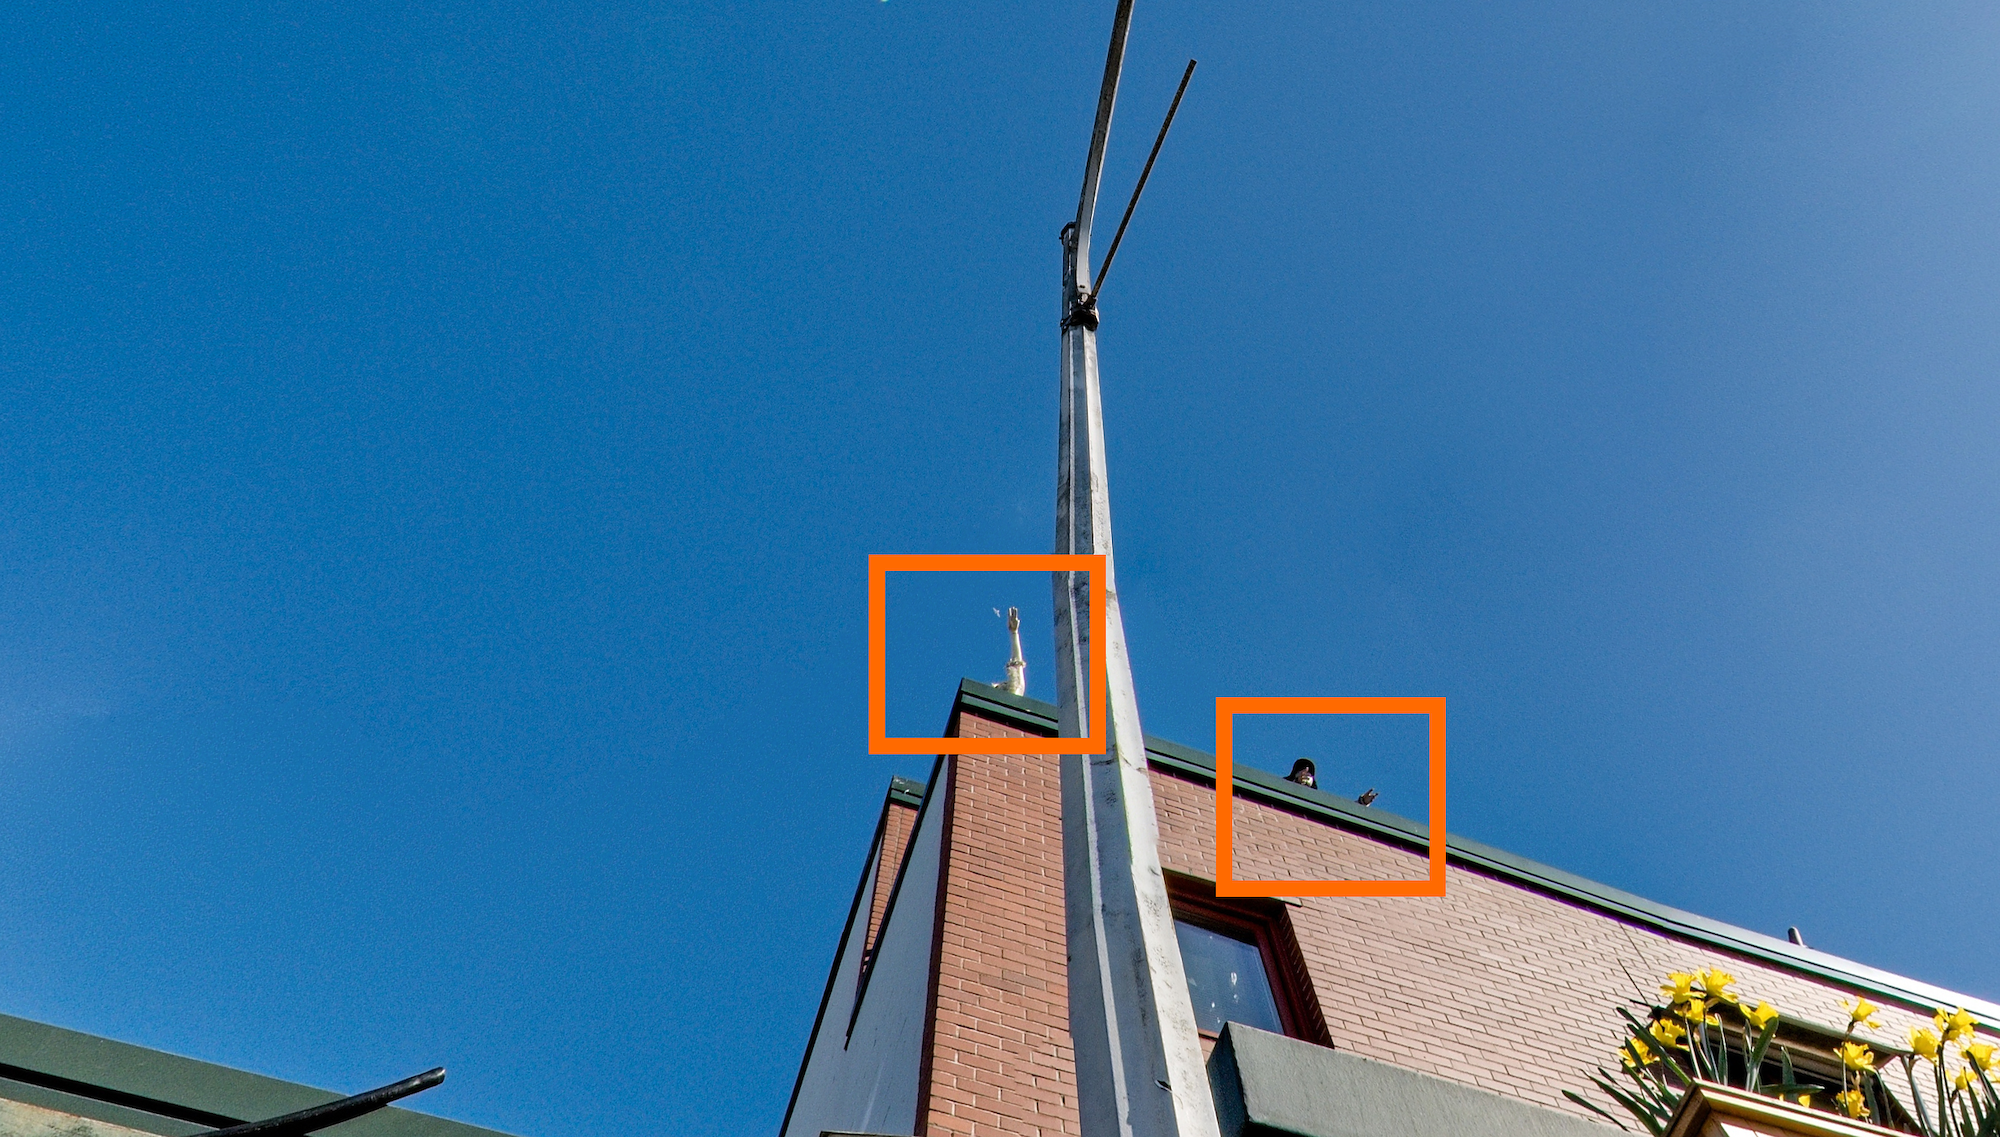
They have been watching the scene for quite some time, from the street view:
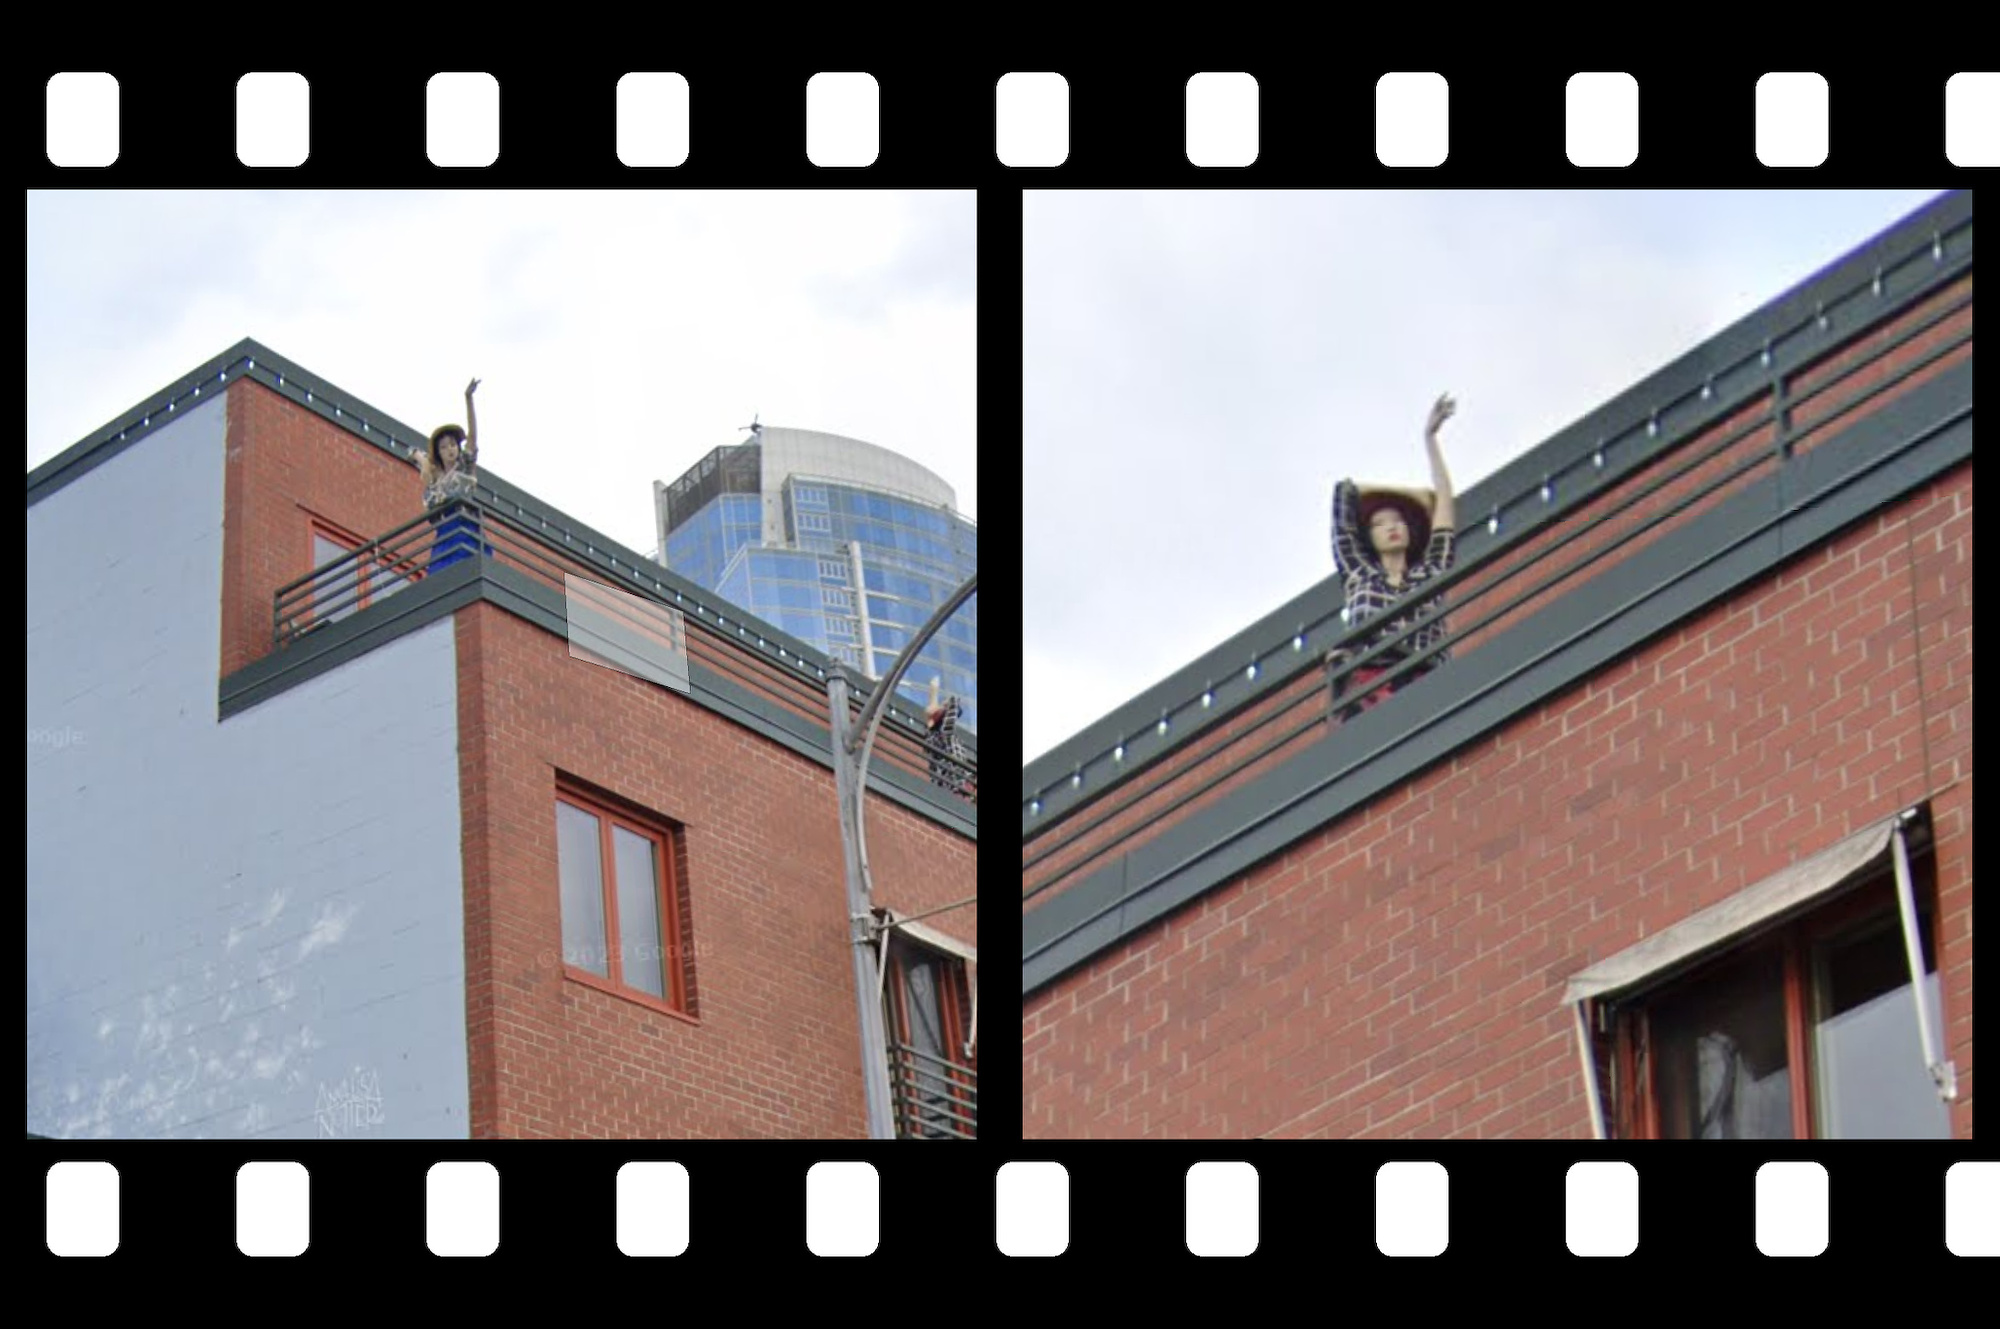
The girls go with the fashion: